
4: Halogens
- Page ID
- 316199
\( \newcommand{\vecs}[1]{\overset { \scriptstyle \rightharpoonup} {\mathbf{#1}} } \)
\( \newcommand{\vecd}[1]{\overset{-\!-\!\rightharpoonup}{\vphantom{a}\smash {#1}}} \)
\( \newcommand{\dsum}{\displaystyle\sum\limits} \)
\( \newcommand{\dint}{\displaystyle\int\limits} \)
\( \newcommand{\dlim}{\displaystyle\lim\limits} \)
\( \newcommand{\id}{\mathrm{id}}\) \( \newcommand{\Span}{\mathrm{span}}\)
( \newcommand{\kernel}{\mathrm{null}\,}\) \( \newcommand{\range}{\mathrm{range}\,}\)
\( \newcommand{\RealPart}{\mathrm{Re}}\) \( \newcommand{\ImaginaryPart}{\mathrm{Im}}\)
\( \newcommand{\Argument}{\mathrm{Arg}}\) \( \newcommand{\norm}[1]{\| #1 \|}\)
\( \newcommand{\inner}[2]{\langle #1, #2 \rangle}\)
\( \newcommand{\Span}{\mathrm{span}}\)
\( \newcommand{\id}{\mathrm{id}}\)
\( \newcommand{\Span}{\mathrm{span}}\)
\( \newcommand{\kernel}{\mathrm{null}\,}\)
\( \newcommand{\range}{\mathrm{range}\,}\)
\( \newcommand{\RealPart}{\mathrm{Re}}\)
\( \newcommand{\ImaginaryPart}{\mathrm{Im}}\)
\( \newcommand{\Argument}{\mathrm{Arg}}\)
\( \newcommand{\norm}[1]{\| #1 \|}\)
\( \newcommand{\inner}[2]{\langle #1, #2 \rangle}\)
\( \newcommand{\Span}{\mathrm{span}}\) \( \newcommand{\AA}{\unicode[.8,0]{x212B}}\)
\( \newcommand{\vectorA}[1]{\vec{#1}} % arrow\)
\( \newcommand{\vectorAt}[1]{\vec{\text{#1}}} % arrow\)
\( \newcommand{\vectorB}[1]{\overset { \scriptstyle \rightharpoonup} {\mathbf{#1}} } \)
\( \newcommand{\vectorC}[1]{\textbf{#1}} \)
\( \newcommand{\vectorD}[1]{\overrightarrow{#1}} \)
\( \newcommand{\vectorDt}[1]{\overrightarrow{\text{#1}}} \)
\( \newcommand{\vectE}[1]{\overset{-\!-\!\rightharpoonup}{\vphantom{a}\smash{\mathbf {#1}}}} \)
\( \newcommand{\vecs}[1]{\overset { \scriptstyle \rightharpoonup} {\mathbf{#1}} } \)
\(\newcommand{\longvect}{\overrightarrow}\)
\( \newcommand{\vecd}[1]{\overset{-\!-\!\rightharpoonup}{\vphantom{a}\smash {#1}}} \)
\(\newcommand{\avec}{\mathbf a}\) \(\newcommand{\bvec}{\mathbf b}\) \(\newcommand{\cvec}{\mathbf c}\) \(\newcommand{\dvec}{\mathbf d}\) \(\newcommand{\dtil}{\widetilde{\mathbf d}}\) \(\newcommand{\evec}{\mathbf e}\) \(\newcommand{\fvec}{\mathbf f}\) \(\newcommand{\nvec}{\mathbf n}\) \(\newcommand{\pvec}{\mathbf p}\) \(\newcommand{\qvec}{\mathbf q}\) \(\newcommand{\svec}{\mathbf s}\) \(\newcommand{\tvec}{\mathbf t}\) \(\newcommand{\uvec}{\mathbf u}\) \(\newcommand{\vvec}{\mathbf v}\) \(\newcommand{\wvec}{\mathbf w}\) \(\newcommand{\xvec}{\mathbf x}\) \(\newcommand{\yvec}{\mathbf y}\) \(\newcommand{\zvec}{\mathbf z}\) \(\newcommand{\rvec}{\mathbf r}\) \(\newcommand{\mvec}{\mathbf m}\) \(\newcommand{\zerovec}{\mathbf 0}\) \(\newcommand{\onevec}{\mathbf 1}\) \(\newcommand{\real}{\mathbb R}\) \(\newcommand{\twovec}[2]{\left[\begin{array}{r}#1 \\ #2 \end{array}\right]}\) \(\newcommand{\ctwovec}[2]{\left[\begin{array}{c}#1 \\ #2 \end{array}\right]}\) \(\newcommand{\threevec}[3]{\left[\begin{array}{r}#1 \\ #2 \\ #3 \end{array}\right]}\) \(\newcommand{\cthreevec}[3]{\left[\begin{array}{c}#1 \\ #2 \\ #3 \end{array}\right]}\) \(\newcommand{\fourvec}[4]{\left[\begin{array}{r}#1 \\ #2 \\ #3 \\ #4 \end{array}\right]}\) \(\newcommand{\cfourvec}[4]{\left[\begin{array}{c}#1 \\ #2 \\ #3 \\ #4 \end{array}\right]}\) \(\newcommand{\fivevec}[5]{\left[\begin{array}{r}#1 \\ #2 \\ #3 \\ #4 \\ #5 \\ \end{array}\right]}\) \(\newcommand{\cfivevec}[5]{\left[\begin{array}{c}#1 \\ #2 \\ #3 \\ #4 \\ #5 \\ \end{array}\right]}\) \(\newcommand{\mattwo}[4]{\left[\begin{array}{rr}#1 \amp #2 \\ #3 \amp #4 \\ \end{array}\right]}\) \(\newcommand{\laspan}[1]{\text{Span}\{#1\}}\) \(\newcommand{\bcal}{\cal B}\) \(\newcommand{\ccal}{\cal C}\) \(\newcommand{\scal}{\cal S}\) \(\newcommand{\wcal}{\cal W}\) \(\newcommand{\ecal}{\cal E}\) \(\newcommand{\coords}[2]{\left\{#1\right\}_{#2}}\) \(\newcommand{\gray}[1]{\color{gray}{#1}}\) \(\newcommand{\lgray}[1]{\color{lightgray}{#1}}\) \(\newcommand{\rank}{\operatorname{rank}}\) \(\newcommand{\row}{\text{Row}}\) \(\newcommand{\col}{\text{Col}}\) \(\renewcommand{\row}{\text{Row}}\) \(\newcommand{\nul}{\text{Nul}}\) \(\newcommand{\var}{\text{Var}}\) \(\newcommand{\corr}{\text{corr}}\) \(\newcommand{\len}[1]{\left|#1\right|}\) \(\newcommand{\bbar}{\overline{\bvec}}\) \(\newcommand{\bhat}{\widehat{\bvec}}\) \(\newcommand{\bperp}{\bvec^\perp}\) \(\newcommand{\xhat}{\widehat{\xvec}}\) \(\newcommand{\vhat}{\widehat{\vvec}}\) \(\newcommand{\uhat}{\widehat{\uvec}}\) \(\newcommand{\what}{\widehat{\wvec}}\) \(\newcommand{\Sighat}{\widehat{\Sigma}}\) \(\newcommand{\lt}{<}\) \(\newcommand{\gt}{>}\) \(\newcommand{\amp}{&}\) \(\definecolor{fillinmathshade}{gray}{0.9}\)Learning Objectives
- Determine how halogens (\(\ce{Cl_{2}}\), \(\ce{Br_{2}}\), \(\ce{I_{2}}\)) react with halides (\(\ce{Cl^{-}}\), \(\ce{Br^{-}}\), \(\ce{I^{-}}\))?
- Explain the reactivity taking place.
Introduction:
Before you start the experiment, there are a couple of terms you should understand.
Halogen – The elements in Group 17 (or VIIA or 7A) of the periodic table are called the halogens. These elements are naturally found as diatomic species. In this experiment, they are (\(\ce{Cl_{2}}\), \(\ce{Br_{2}}\), and \(\ce{I_{2}}\)). \(\ce{Cl_{2}}\) is a gas, \(\ce{Br_{2}}\) is a liquid and \(\ce{I_{2}}\) is a solid at room temperature. We have made solutions of all of these in water.
Halide ion– Halides are any of the negatively charged ions of the halogens. In this experiment, we are using the sodium salts \(\ce{NaCl}\), \(\ce{NaBr}\) and \(\ce{NaI}\) to provide the halide ions. When dissolved in water, these salts dissociate into the sodium ion and the halide ion. For example:
\[\ce{NaCl (s)} \rightarrow \ce{Na^{+} (aq)} + \ce{Cl^{-} (aq)} \label{1}\]
For this experiment, the sodium ion (\(\ce{Na ^{+}}\)) does not participate in the chemical reactions.
The chemical reactions of interest are symbolized by the equation
\[\ce{X_{2} (aq)} + 2\ce{Y^{-} (aq)} \rightarrow 2 \ce{X^{-} (aq)} + \ce{Y_{2} (aq)} \label{2}\]
Pre Lab Video:
Safety and Waste Disposal
- The solutions must be disposed of in the hazardous waste container.
Experiment:
Warning: Make sure that you are using the correct solutions as you conduct this experiment. Keep your test tubes labeled throughout the experiment.
Part I: Solubility of the halogens and halides
In this part of the experiment we will be testing the solubility of the halides and halogens in both water and cyclohexane. This information will be used to draw conclusions about the results in part II.
Step 1
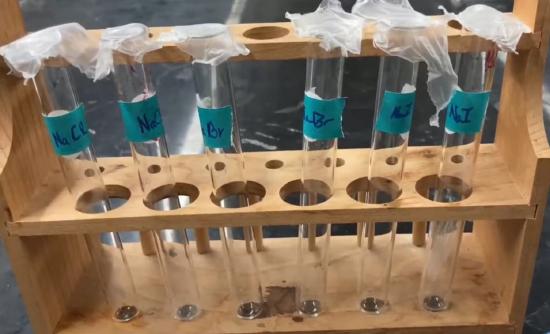 Label six small test tubes; two \(\ce{NaCl}\), two \(\ce{NaBr}\), and two \(\ce{NaI}\).
Step 2
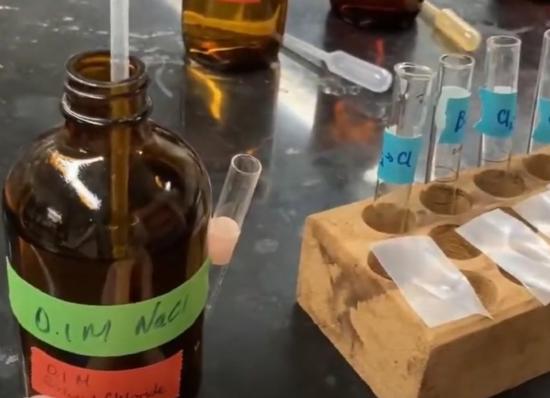
 Test the solubility of the halides in water and cyclohexane. Add a small amount (spatula tip) of solid \(\ce{NaCl}\), solid \(\ce{NaBr}\) and solid \(\ce{NaI}\) to the separate test tubes and then add ~1.0 mL of water. Mix thoroughly. Record your observations including color and clarity of the solutions including any solids present. Keep these solutions.
Step 3
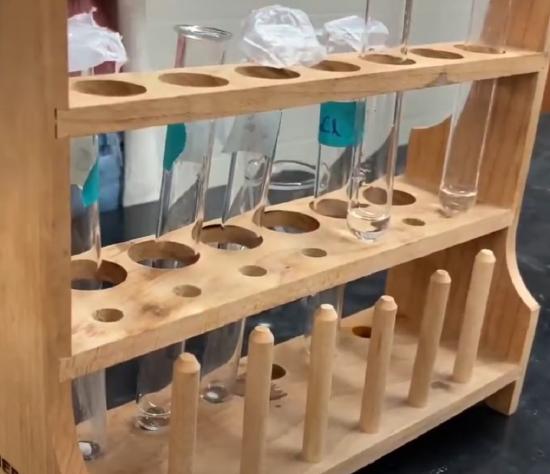
 Test the solubility of the halides in water in cyclohexane. Repeat step B in the other test tubes with ~1.0 mL of cyclohexane rather than water. Record your observations including color and clarity of the solutions and the presence of any solids. Keep these solutions.
Step 4
 Combine the \(\ce{NaCl}\) aqueous solution prepared in step B with the tube containing \(\ce{NaCl}\) and cyclohexane prepared in C. Mix vigorously for 15 seconds. Record your observations. Repeat for the bromide and iodide solutions. Describe what happens to the solid and the solutions.
Step 5
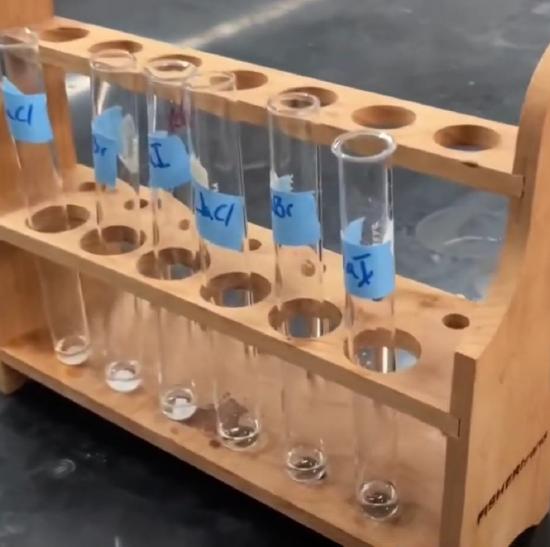
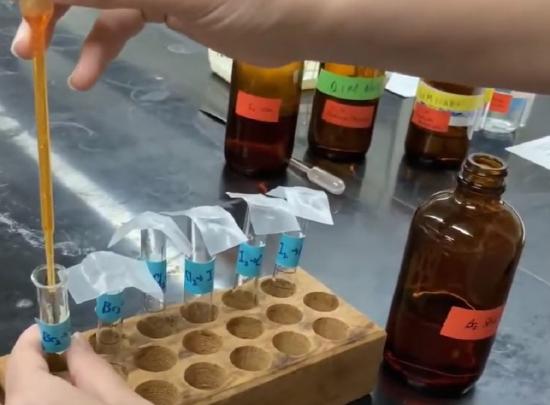
 Obtain about 4 mL each of the pre-made aqueous halogen solutions of \(\ce{Cl_{2}}\), \(\ce{Br_{2}}\), and \(\ce{I_{2}}\), and place in three labeled test tubes. CAP UP with parafilm. Keep the parafilm on when not using the solutions.
Step 6
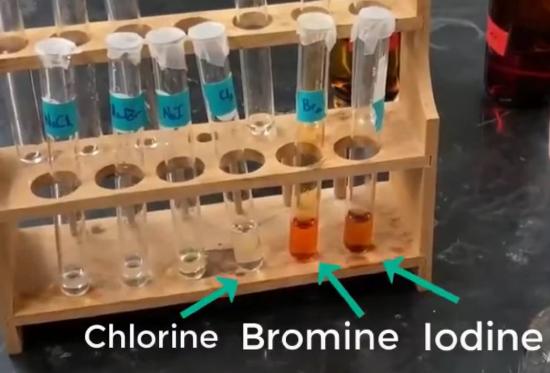
Add 12-15 drops of each aqueous solution to separate labeled test tubes containing 1.0 mL of cyclohexane. Mix vigorously. Record your observations of both, the aqueous halides solutions (before adding the cyclohexane) and after mixing with cyclohexane. Save the excess of all the solutions for Part II.
Step 7
Summarize your results in a table.
Step 8
Before continuing describe briefly in your notebook how you will use the color of the cyclohexane layer to determine what halogen is present. Confer with your lab instructor or TA and have them initial your notebook.
Part II: Reactions between the halogens and halides
In this section we will be examining the reactions of each halogen with each different halide. That is, you should have a reaction of bromine with chloride and iodide, a reaction of chlorine with bromide and iodide, and a reaction of iodine with chloride and bromide.
Note
Be sure you are using the correct solutions and label every test tube. In this part, use the pre-made sodium halide solutions available.
Step 1

Add ~8 drops of aqueous \(\ce{Br_{2}}\), solution to 1 mL of aqueous chloride (\(\ce{Cl^{-}}\)) solution. Mix thoroughly. Add 0.5 mL of cyclohexane and mix vigorously. Record your observations.
Does the cyclohexane indicate that a reaction between \(\ce{Cl^{-}}\) and \(\ce{Br_{2}}\) occurred? Defend your conclusion based on the experimental data you obtained and the data from Part I.
Step 2
Add 8 drops of aqueous \(\ce{Br_{2}}\) solution to 1 mL of aqueous iodide (\(\ce{I^{-}}\)) solution. Mix thoroughly. Add 0.5 mL of cyclohexane and mix vigorously. Record your observations.
Step 3
Add 8 drops of aqueous \(\ce{Cl_{2}}\) solution to 1 mL of aqueous bromide (\(\ce{Br^{-}}\)) solution. Mix thoroughly. Add 0.5 mL of cyclohexane and mix vigorously. Record your observations.
Step 4
Add 8 drops of aqueous \(\ce{Cl_{2}}\) solution to 1 mL of aqueous iodide (\(\ce{I^{-}}\)) solution. Mix thoroughly. Add 0.5 mL of cyclohexane and mix vigorously. Record your observations.
Step 5
Add 8 drops of aqueous \(\ce{I_{2}}\) solution to 1 mL of aqueous chloride (\(\ce{Cl^{-}}\)) solution. Mix thoroughly. Add 0.5 mL of cyclohexane and mix vigorously. Record your observations.
Step 6
Add 8 drops of aqueous \(\ce{I_{2}}\) solution to 1 mL of aqueous bromide (\(\ce{Br^{-}}\)) solution. Mix thoroughly. Add 0.5 mL of cyclohexane and mix vigorously. Record your observations.
Step 7
Discard all wastes in waste containers.