
A1.1: Preparing your Computer for Class
- Page ID
- 358430
\( \newcommand{\vecs}[1]{\overset { \scriptstyle \rightharpoonup} {\mathbf{#1}} } \)
\( \newcommand{\vecd}[1]{\overset{-\!-\!\rightharpoonup}{\vphantom{a}\smash {#1}}} \)
\( \newcommand{\id}{\mathrm{id}}\) \( \newcommand{\Span}{\mathrm{span}}\)
( \newcommand{\kernel}{\mathrm{null}\,}\) \( \newcommand{\range}{\mathrm{range}\,}\)
\( \newcommand{\RealPart}{\mathrm{Re}}\) \( \newcommand{\ImaginaryPart}{\mathrm{Im}}\)
\( \newcommand{\Argument}{\mathrm{Arg}}\) \( \newcommand{\norm}[1]{\| #1 \|}\)
\( \newcommand{\inner}[2]{\langle #1, #2 \rangle}\)
\( \newcommand{\Span}{\mathrm{span}}\)
\( \newcommand{\id}{\mathrm{id}}\)
\( \newcommand{\Span}{\mathrm{span}}\)
\( \newcommand{\kernel}{\mathrm{null}\,}\)
\( \newcommand{\range}{\mathrm{range}\,}\)
\( \newcommand{\RealPart}{\mathrm{Re}}\)
\( \newcommand{\ImaginaryPart}{\mathrm{Im}}\)
\( \newcommand{\Argument}{\mathrm{Arg}}\)
\( \newcommand{\norm}[1]{\| #1 \|}\)
\( \newcommand{\inner}[2]{\langle #1, #2 \rangle}\)
\( \newcommand{\Span}{\mathrm{span}}\) \( \newcommand{\AA}{\unicode[.8,0]{x212B}}\)
\( \newcommand{\vectorA}[1]{\vec{#1}} % arrow\)
\( \newcommand{\vectorAt}[1]{\vec{\text{#1}}} % arrow\)
\( \newcommand{\vectorB}[1]{\overset { \scriptstyle \rightharpoonup} {\mathbf{#1}} } \)
\( \newcommand{\vectorC}[1]{\textbf{#1}} \)
\( \newcommand{\vectorD}[1]{\overrightarrow{#1}} \)
\( \newcommand{\vectorDt}[1]{\overrightarrow{\text{#1}}} \)
\( \newcommand{\vectE}[1]{\overset{-\!-\!\rightharpoonup}{\vphantom{a}\smash{\mathbf {#1}}}} \)
\( \newcommand{\vecs}[1]{\overset { \scriptstyle \rightharpoonup} {\mathbf{#1}} } \)
\( \newcommand{\vecd}[1]{\overset{-\!-\!\rightharpoonup}{\vphantom{a}\smash {#1}}} \)
\(\newcommand{\avec}{\mathbf a}\) \(\newcommand{\bvec}{\mathbf b}\) \(\newcommand{\cvec}{\mathbf c}\) \(\newcommand{\dvec}{\mathbf d}\) \(\newcommand{\dtil}{\widetilde{\mathbf d}}\) \(\newcommand{\evec}{\mathbf e}\) \(\newcommand{\fvec}{\mathbf f}\) \(\newcommand{\nvec}{\mathbf n}\) \(\newcommand{\pvec}{\mathbf p}\) \(\newcommand{\qvec}{\mathbf q}\) \(\newcommand{\svec}{\mathbf s}\) \(\newcommand{\tvec}{\mathbf t}\) \(\newcommand{\uvec}{\mathbf u}\) \(\newcommand{\vvec}{\mathbf v}\) \(\newcommand{\wvec}{\mathbf w}\) \(\newcommand{\xvec}{\mathbf x}\) \(\newcommand{\yvec}{\mathbf y}\) \(\newcommand{\zvec}{\mathbf z}\) \(\newcommand{\rvec}{\mathbf r}\) \(\newcommand{\mvec}{\mathbf m}\) \(\newcommand{\zerovec}{\mathbf 0}\) \(\newcommand{\onevec}{\mathbf 1}\) \(\newcommand{\real}{\mathbb R}\) \(\newcommand{\twovec}[2]{\left[\begin{array}{r}#1 \\ #2 \end{array}\right]}\) \(\newcommand{\ctwovec}[2]{\left[\begin{array}{c}#1 \\ #2 \end{array}\right]}\) \(\newcommand{\threevec}[3]{\left[\begin{array}{r}#1 \\ #2 \\ #3 \end{array}\right]}\) \(\newcommand{\cthreevec}[3]{\left[\begin{array}{c}#1 \\ #2 \\ #3 \end{array}\right]}\) \(\newcommand{\fourvec}[4]{\left[\begin{array}{r}#1 \\ #2 \\ #3 \\ #4 \end{array}\right]}\) \(\newcommand{\cfourvec}[4]{\left[\begin{array}{c}#1 \\ #2 \\ #3 \\ #4 \end{array}\right]}\) \(\newcommand{\fivevec}[5]{\left[\begin{array}{r}#1 \\ #2 \\ #3 \\ #4 \\ #5 \\ \end{array}\right]}\) \(\newcommand{\cfivevec}[5]{\left[\begin{array}{c}#1 \\ #2 \\ #3 \\ #4 \\ #5 \\ \end{array}\right]}\) \(\newcommand{\mattwo}[4]{\left[\begin{array}{rr}#1 \amp #2 \\ #3 \amp #4 \\ \end{array}\right]}\) \(\newcommand{\laspan}[1]{\text{Span}\{#1\}}\) \(\newcommand{\bcal}{\cal B}\) \(\newcommand{\ccal}{\cal C}\) \(\newcommand{\scal}{\cal S}\) \(\newcommand{\wcal}{\cal W}\) \(\newcommand{\ecal}{\cal E}\) \(\newcommand{\coords}[2]{\left\{#1\right\}_{#2}}\) \(\newcommand{\gray}[1]{\color{gray}{#1}}\) \(\newcommand{\lgray}[1]{\color{lightgray}{#1}}\) \(\newcommand{\rank}{\operatorname{rank}}\) \(\newcommand{\row}{\text{Row}}\) \(\newcommand{\col}{\text{Col}}\) \(\renewcommand{\row}{\text{Row}}\) \(\newcommand{\nul}{\text{Nul}}\) \(\newcommand{\var}{\text{Var}}\) \(\newcommand{\corr}{\text{corr}}\) \(\newcommand{\len}[1]{\left|#1\right|}\) \(\newcommand{\bbar}{\overline{\bvec}}\) \(\newcommand{\bhat}{\widehat{\bvec}}\) \(\newcommand{\bperp}{\bvec^\perp}\) \(\newcommand{\xhat}{\widehat{\xvec}}\) \(\newcommand{\vhat}{\widehat{\vvec}}\) \(\newcommand{\uhat}{\widehat{\uvec}}\) \(\newcommand{\what}{\widehat{\wvec}}\) \(\newcommand{\Sighat}{\widehat{\Sigma}}\) \(\newcommand{\lt}{<}\) \(\newcommand{\gt}{>}\) \(\newcommand{\amp}{&}\) \(\definecolor{fillinmathshade}{gray}{0.9}\)The following software will be used throughout the course and should be installed on your personal computer before proceeding to the next chapter.
Required Software
Thonny IDE
Thonny is an Interactive Development Environment (IDE) for python that comes preinstalled with the Raspberry Pi. Although Anaconda has the Spyder IDE, we will use Thonny on the laptop because it is what we will use on the Pi. An IDE is a software package that makes it easy to write and test software. An IDE contains a code editor, an interpreter, and a debugger. What makes the IDE so useful is that the editor, intrepreter and debugger are all in the same GUI (Graphical User Interface), and so you can use it to write, test and debug python code.
Download Thonny at https://thonny.org/
Section 2.1 of the Introduction to Python goes over the Thonny IDE and if you are unfamiliar with Thonny you should proceed to that material.
SD Card Formatter
This is required because you need to format a micro SD card and install an image of the Raspberry Pi Operating System (RPi OS) on it. Disk formatting is the process of preparing a data storage device such as a hard disk drive, solid-state drive, floppy disk or USB flash drive for initial use. In some cases, the formatting operation may also create one or more new file systems. It also erases any previous data on the drive.
An SD Card Formatter is not included in the Windows operating system, so we need to install it. To do so, go to:
https://www.sdcard.org/downloads/formatter_4/eula_windows/index.html
Scroll to the bottom of the page and click the Blue Accept button. When you do so, it will automatically start to download the installer software as a Zip file. Right click on the file and extract. Double click on the Setup file go thorough the installation wizard and install the software. When you have done so, the SD Card Formatter App will show in your start menu (you can type it into the search box of the start menu).
 Figure \(\PageIndex{1}\):SD card formatter appears in start menu. You can also type SD Card... in the search option of the start menu and it will show up (CC0.0; Bob Belford)
You will need to use this software in section 1.1 when you install your Raspberry Pi's operating System.
Raspberry Pi Imager
The Raspberry Pi Imager is the easiest way to install the operating system on a micro SD card, and you can download the program from the pi.com software page https://www.raspberrypi.com/software/. Before installing the image you should format your SD card.
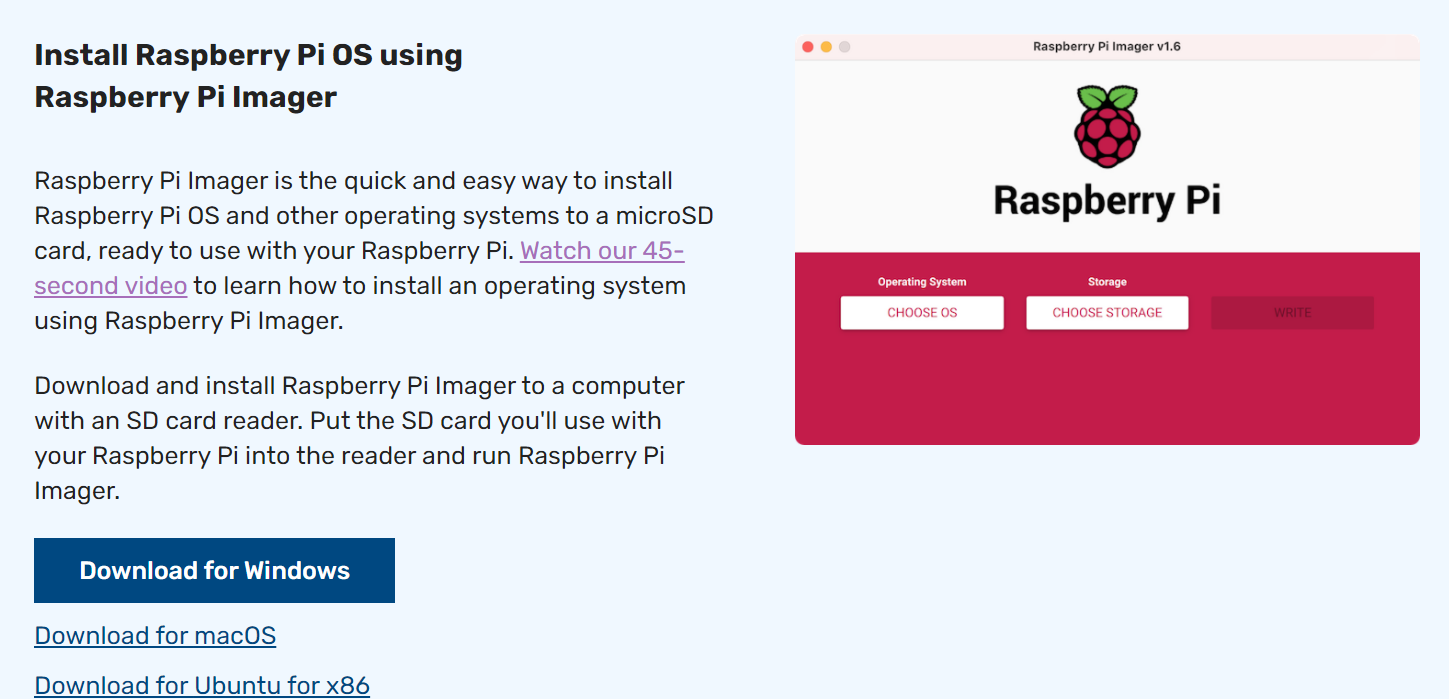 Figure \(\PageIndex{1}\): Copy and Paste Caption here. (Copyright; author via source)
Install VNC
The Raspberry Pi comes with VNC (Virtual Network Computing) and we will install it on our desktop/laptop so that we can connect to the Pi in "headless mode", effectively using our desktop/laptop as the mouse, keyboard and monitor for controlling the Pi. Go to https://www.realvnc.com/en/connect/download/viewer/ and download the viewer (Figure \(\PageIndex{16}\)).

In the next section we will use the VNC viewer to connect to the Raspberry Pi over the internet.
Optional Software
Installing Win32DiskImager
In this part of the lab, you will prepare your computer to be able to create disk images on microSD cards that you are going to be using with your Raspberry Pi computers. A disk image is a copy of the entire contents of a storage device, such as a hard drive, DVD, or CD. The disk image represents the content exactly as it is on the original storage device, including both data and structure information.
Win32DiskImager is not included in the Windows operating system, so we need to install it. To do so, go to:
https://sourceforge.net/projects/win32diskimager/files/latest/download
This website will automatically start to download the file to your downloads directory. Once you download you need to install it:
- Run the executable file win32diskimager-1.0.0-install in your download directory
- Accept agreement and click next
- Install in default folder (press next twice)
- Create a shortcut desktop icon if you want (I do not) and click next
- Click Install and Finish
Install 7-Zip
In this part of the lab, you will prepare your computer to be able to extract zipped files that are larger than 4 gigabytes. We need this software because you will be installing the Raspbian operating system on your Raspberry Pi using a microSD card that you prepare with your Windows PC. To get 7-ZIP go to this URL:
The first thing you will do is download the install file and then install it.
- Run the executable file
- Click Install
- Click Close
7-Zip should now be in your start menu