
6.4: Linux Commands
- Page ID
- 469685
\( \newcommand{\vecs}[1]{\overset { \scriptstyle \rightharpoonup} {\mathbf{#1}} } \)
\( \newcommand{\vecd}[1]{\overset{-\!-\!\rightharpoonup}{\vphantom{a}\smash {#1}}} \)
\( \newcommand{\dsum}{\displaystyle\sum\limits} \)
\( \newcommand{\dint}{\displaystyle\int\limits} \)
\( \newcommand{\dlim}{\displaystyle\lim\limits} \)
\( \newcommand{\id}{\mathrm{id}}\) \( \newcommand{\Span}{\mathrm{span}}\)
( \newcommand{\kernel}{\mathrm{null}\,}\) \( \newcommand{\range}{\mathrm{range}\,}\)
\( \newcommand{\RealPart}{\mathrm{Re}}\) \( \newcommand{\ImaginaryPart}{\mathrm{Im}}\)
\( \newcommand{\Argument}{\mathrm{Arg}}\) \( \newcommand{\norm}[1]{\| #1 \|}\)
\( \newcommand{\inner}[2]{\langle #1, #2 \rangle}\)
\( \newcommand{\Span}{\mathrm{span}}\)
\( \newcommand{\id}{\mathrm{id}}\)
\( \newcommand{\Span}{\mathrm{span}}\)
\( \newcommand{\kernel}{\mathrm{null}\,}\)
\( \newcommand{\range}{\mathrm{range}\,}\)
\( \newcommand{\RealPart}{\mathrm{Re}}\)
\( \newcommand{\ImaginaryPart}{\mathrm{Im}}\)
\( \newcommand{\Argument}{\mathrm{Arg}}\)
\( \newcommand{\norm}[1]{\| #1 \|}\)
\( \newcommand{\inner}[2]{\langle #1, #2 \rangle}\)
\( \newcommand{\Span}{\mathrm{span}}\) \( \newcommand{\AA}{\unicode[.8,0]{x212B}}\)
\( \newcommand{\vectorA}[1]{\vec{#1}} % arrow\)
\( \newcommand{\vectorAt}[1]{\vec{\text{#1}}} % arrow\)
\( \newcommand{\vectorB}[1]{\overset { \scriptstyle \rightharpoonup} {\mathbf{#1}} } \)
\( \newcommand{\vectorC}[1]{\textbf{#1}} \)
\( \newcommand{\vectorD}[1]{\overrightarrow{#1}} \)
\( \newcommand{\vectorDt}[1]{\overrightarrow{\text{#1}}} \)
\( \newcommand{\vectE}[1]{\overset{-\!-\!\rightharpoonup}{\vphantom{a}\smash{\mathbf {#1}}}} \)
\( \newcommand{\vecs}[1]{\overset { \scriptstyle \rightharpoonup} {\mathbf{#1}} } \)
\(\newcommand{\longvect}{\overrightarrow}\)
\( \newcommand{\vecd}[1]{\overset{-\!-\!\rightharpoonup}{\vphantom{a}\smash {#1}}} \)
\(\newcommand{\avec}{\mathbf a}\) \(\newcommand{\bvec}{\mathbf b}\) \(\newcommand{\cvec}{\mathbf c}\) \(\newcommand{\dvec}{\mathbf d}\) \(\newcommand{\dtil}{\widetilde{\mathbf d}}\) \(\newcommand{\evec}{\mathbf e}\) \(\newcommand{\fvec}{\mathbf f}\) \(\newcommand{\nvec}{\mathbf n}\) \(\newcommand{\pvec}{\mathbf p}\) \(\newcommand{\qvec}{\mathbf q}\) \(\newcommand{\svec}{\mathbf s}\) \(\newcommand{\tvec}{\mathbf t}\) \(\newcommand{\uvec}{\mathbf u}\) \(\newcommand{\vvec}{\mathbf v}\) \(\newcommand{\wvec}{\mathbf w}\) \(\newcommand{\xvec}{\mathbf x}\) \(\newcommand{\yvec}{\mathbf y}\) \(\newcommand{\zvec}{\mathbf z}\) \(\newcommand{\rvec}{\mathbf r}\) \(\newcommand{\mvec}{\mathbf m}\) \(\newcommand{\zerovec}{\mathbf 0}\) \(\newcommand{\onevec}{\mathbf 1}\) \(\newcommand{\real}{\mathbb R}\) \(\newcommand{\twovec}[2]{\left[\begin{array}{r}#1 \\ #2 \end{array}\right]}\) \(\newcommand{\ctwovec}[2]{\left[\begin{array}{c}#1 \\ #2 \end{array}\right]}\) \(\newcommand{\threevec}[3]{\left[\begin{array}{r}#1 \\ #2 \\ #3 \end{array}\right]}\) \(\newcommand{\cthreevec}[3]{\left[\begin{array}{c}#1 \\ #2 \\ #3 \end{array}\right]}\) \(\newcommand{\fourvec}[4]{\left[\begin{array}{r}#1 \\ #2 \\ #3 \\ #4 \end{array}\right]}\) \(\newcommand{\cfourvec}[4]{\left[\begin{array}{c}#1 \\ #2 \\ #3 \\ #4 \end{array}\right]}\) \(\newcommand{\fivevec}[5]{\left[\begin{array}{r}#1 \\ #2 \\ #3 \\ #4 \\ #5 \\ \end{array}\right]}\) \(\newcommand{\cfivevec}[5]{\left[\begin{array}{c}#1 \\ #2 \\ #3 \\ #4 \\ #5 \\ \end{array}\right]}\) \(\newcommand{\mattwo}[4]{\left[\begin{array}{rr}#1 \amp #2 \\ #3 \amp #4 \\ \end{array}\right]}\) \(\newcommand{\laspan}[1]{\text{Span}\{#1\}}\) \(\newcommand{\bcal}{\cal B}\) \(\newcommand{\ccal}{\cal C}\) \(\newcommand{\scal}{\cal S}\) \(\newcommand{\wcal}{\cal W}\) \(\newcommand{\ecal}{\cal E}\) \(\newcommand{\coords}[2]{\left\{#1\right\}_{#2}}\) \(\newcommand{\gray}[1]{\color{gray}{#1}}\) \(\newcommand{\lgray}[1]{\color{lightgray}{#1}}\) \(\newcommand{\rank}{\operatorname{rank}}\) \(\newcommand{\row}{\text{Row}}\) \(\newcommand{\col}{\text{Col}}\) \(\renewcommand{\row}{\text{Row}}\) \(\newcommand{\nul}{\text{Nul}}\) \(\newcommand{\var}{\text{Var}}\) \(\newcommand{\corr}{\text{corr}}\) \(\newcommand{\len}[1]{\left|#1\right|}\) \(\newcommand{\bbar}{\overline{\bvec}}\) \(\newcommand{\bhat}{\widehat{\bvec}}\) \(\newcommand{\bperp}{\bvec^\perp}\) \(\newcommand{\xhat}{\widehat{\xvec}}\) \(\newcommand{\vhat}{\widehat{\vvec}}\) \(\newcommand{\uhat}{\widehat{\uvec}}\) \(\newcommand{\what}{\widehat{\wvec}}\) \(\newcommand{\Sighat}{\widehat{\Sigma}}\) \(\newcommand{\lt}{<}\) \(\newcommand{\gt}{>}\) \(\newcommand{\amp}{&}\) \(\definecolor{fillinmathshade}{gray}{0.9}\)
Directory (Folder) Commands
cd
cd <path> directs to a specific directory in the tree
note, there must be a space after the cd
cd switches
the following switches work on cd
cd /home/pi
cd   #by itself takes you home
cd ~  navigate to home directory
cd /  navigate to root directory
cd .. go up one level
cd - go back one level
cp
cp - copy directory
We can copy a directory to a new location by using the command:
- cp directory_name destination : Copies directory (or file) to a new location
To include the subfolders of a directory, we need to add -r (recursive)
cp /tmp/test/subdir2 /tmp/test/subdir1 -r
cd subdir1
ls
- Output:
-

Relative path
The previous examples that we worked on used some relative paths. Working with a relative path means that the place where you go depends on your current working directory.
The "etc" directory is a file that is located directly inside the root of the file system. If you were to try and cd to the "etc" folder while you are in the root directory, it will work.
cd /
pwd
cd etc
pwd
However, if you are not in your root directory, that won't work.
cd
pwd
cd etc
pwd
You will get an error saying "No such file or directory".
Changing the working directory will affect where you start. The path of the directory you want to access only makes sense while it is relative to your working directory.
Absolute path
Absolute commands have the same effect no matter what your current working directory is. From our previous examples, the cd command is an absolute one. When you run it on its own, you go straight to your home directory. Another previous example is the cd / command. It directly switches you to the root directory when you run it on its own.
Note: Any path starting with / is an absolute path. When you want to switch to a directory and start your path with the /, it is the equivalent of "going to the root directory and then to the folder that comes after the slash".
cd
pwd
cd /etc
pwd
find
find works on both directories and files.
ls
With the last command, we created two new subdirectories. We can look at the list with the command:
- ls : list
ls
- Output:
-

ls switches
ls
ls /home/pi
ls -1     (one, to make a single column)
ls -l      (long, to list info)
ls -l -a   (long and all, to include hidden files
ls ../   (reaches up one level)
mkdir
the following commands show you where you are, make a new directory, show you the new directory and move you to the new directory
pwd
mkdir new_directory
ls
cd new_directory
ls
rm - Remove Directory
for empty directories
rm switches
rm -d directory_name
rm -r recursive and removes subfolders
rm -rf recursive and forced
for directories with files in them (-r is recursive, and removes contents of directory)
rm -r directory-name
The -r is a switch making the command recursive
to do it without asking for confirmation
rm -rf directory_name
The -f switch "forces" the action
BE VERY CAREFUL WHEN USING rm -r or rm -rf as you delete everything, including subfolders.
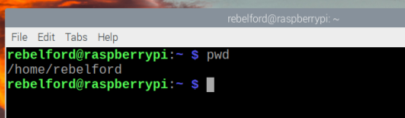
pwd
Identifies Current Directory
rebelford@raspberrypi:~ $ pwd
pwd
- Output:
-
tree
tree
This shows the file structure from where you are
Operating System Commands
date
date
date +%m-%d-%y
df - free space
Display Partitions (free space)
To make the output easier to understand (in Kilobytes, Megabytes and Gigabytes), use the option -h (human-readable) with the df command
To know the storage usage of each folder, use the command:
df
df -h
- Output:
-

du - disk usage
To know how much storage has been used from the disk, use the command:
- du : disk usage
-
du
du/home/pi
for a specific directory (home/pi)
By using the du command by itself, be ready to get a big number of logs with all the files that exist on your disk!
We will be discussing the options to get precise outputs using the du command in the following part.
To know the storage usage of each folder, use the command:
du -h --max-depth=1 ./
- Output:
-

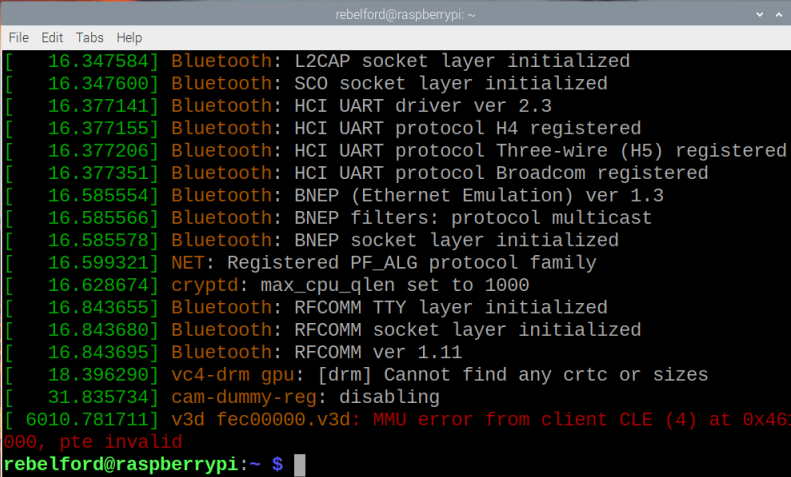
dmesg
displays kernel related messages about hardware, device drivers, initialization and bootup issues
In this activity we will check bootup processes and errors
dmesg
- Output:
-
free
To know how much RAM the server has, use the command:
- free
- free -b : b is for bytes
- free -k : k is for kilo-bytes
- free -m : m is for mega-bytes
- free -g : g is for giga_bytes
free
free -b
- Output:
-

htop
Monitor running processes
In this activity we will check bootup processes and errors (you need to use ctrl c to terminate
htop
- Output:
-

kill/killall
kills a specific process by its process id, which you get with the ps command
ps
kill ###(the process ID of the process you want to kill)
lscpu
list number of cpus
lscpu
- Output:
-

ps
To display the currently running processes, use the command:
- ps : process status: produces a snapshot of the running processes.
ps
- Output:
-

The output contains a list of the running processes under 4 columns:
- PID: the process identification number
- TTY: the terminal name
- TIME: the running time
- CMD: the name of the command that launches the process
Options that can be used with the ps command:
- ps -a : lists all the running processes of all the users
- ps -u : lists additional information (memory usage, CPU usage percentage, process state code, and process owner)
reboot
sudo reboot
shutdown
sudo shutdown -h now
sudo shutdown -h 20:00
-h switch halts processes, and the 20:00 specifies the time for shutdown
top
resource-usage of processes
top
- Output:
-

Note
Unlike the ps command, the top command output updates periodically; You will see real-time updates for running times and CPU usage.
The output of the top command is a shell that allows the user to move through processes and interact with them.
Interacting with a process is done by the keys:
- k : kills the process
- M : sorts the list by memory usage
- N : sorts the list by the process identification numbers
- r : changes the priority of the process
- d : changes the refresh time interval
- c : displays the path of the process