
1.6: Quick Start
- Page ID
- 206514

\( \newcommand{\vecs}[1]{\overset { \scriptstyle \rightharpoonup} {\mathbf{#1}} } \)
\( \newcommand{\vecd}[1]{\overset{-\!-\!\rightharpoonup}{\vphantom{a}\smash {#1}}} \)
\( \newcommand{\dsum}{\displaystyle\sum\limits} \)
\( \newcommand{\dint}{\displaystyle\int\limits} \)
\( \newcommand{\dlim}{\displaystyle\lim\limits} \)
\( \newcommand{\id}{\mathrm{id}}\) \( \newcommand{\Span}{\mathrm{span}}\)
( \newcommand{\kernel}{\mathrm{null}\,}\) \( \newcommand{\range}{\mathrm{range}\,}\)
\( \newcommand{\RealPart}{\mathrm{Re}}\) \( \newcommand{\ImaginaryPart}{\mathrm{Im}}\)
\( \newcommand{\Argument}{\mathrm{Arg}}\) \( \newcommand{\norm}[1]{\| #1 \|}\)
\( \newcommand{\inner}[2]{\langle #1, #2 \rangle}\)
\( \newcommand{\Span}{\mathrm{span}}\)
\( \newcommand{\id}{\mathrm{id}}\)
\( \newcommand{\Span}{\mathrm{span}}\)
\( \newcommand{\kernel}{\mathrm{null}\,}\)
\( \newcommand{\range}{\mathrm{range}\,}\)
\( \newcommand{\RealPart}{\mathrm{Re}}\)
\( \newcommand{\ImaginaryPart}{\mathrm{Im}}\)
\( \newcommand{\Argument}{\mathrm{Arg}}\)
\( \newcommand{\norm}[1]{\| #1 \|}\)
\( \newcommand{\inner}[2]{\langle #1, #2 \rangle}\)
\( \newcommand{\Span}{\mathrm{span}}\) \( \newcommand{\AA}{\unicode[.8,0]{x212B}}\)
\( \newcommand{\vectorA}[1]{\vec{#1}} % arrow\)
\( \newcommand{\vectorAt}[1]{\vec{\text{#1}}} % arrow\)
\( \newcommand{\vectorB}[1]{\overset { \scriptstyle \rightharpoonup} {\mathbf{#1}} } \)
\( \newcommand{\vectorC}[1]{\textbf{#1}} \)
\( \newcommand{\vectorD}[1]{\overrightarrow{#1}} \)
\( \newcommand{\vectorDt}[1]{\overrightarrow{\text{#1}}} \)
\( \newcommand{\vectE}[1]{\overset{-\!-\!\rightharpoonup}{\vphantom{a}\smash{\mathbf {#1}}}} \)
\( \newcommand{\vecs}[1]{\overset { \scriptstyle \rightharpoonup} {\mathbf{#1}} } \)
\(\newcommand{\longvect}{\overrightarrow}\)
\( \newcommand{\vecd}[1]{\overset{-\!-\!\rightharpoonup}{\vphantom{a}\smash {#1}}} \)
\(\newcommand{\avec}{\mathbf a}\) \(\newcommand{\bvec}{\mathbf b}\) \(\newcommand{\cvec}{\mathbf c}\) \(\newcommand{\dvec}{\mathbf d}\) \(\newcommand{\dtil}{\widetilde{\mathbf d}}\) \(\newcommand{\evec}{\mathbf e}\) \(\newcommand{\fvec}{\mathbf f}\) \(\newcommand{\nvec}{\mathbf n}\) \(\newcommand{\pvec}{\mathbf p}\) \(\newcommand{\qvec}{\mathbf q}\) \(\newcommand{\svec}{\mathbf s}\) \(\newcommand{\tvec}{\mathbf t}\) \(\newcommand{\uvec}{\mathbf u}\) \(\newcommand{\vvec}{\mathbf v}\) \(\newcommand{\wvec}{\mathbf w}\) \(\newcommand{\xvec}{\mathbf x}\) \(\newcommand{\yvec}{\mathbf y}\) \(\newcommand{\zvec}{\mathbf z}\) \(\newcommand{\rvec}{\mathbf r}\) \(\newcommand{\mvec}{\mathbf m}\) \(\newcommand{\zerovec}{\mathbf 0}\) \(\newcommand{\onevec}{\mathbf 1}\) \(\newcommand{\real}{\mathbb R}\) \(\newcommand{\twovec}[2]{\left[\begin{array}{r}#1 \\ #2 \end{array}\right]}\) \(\newcommand{\ctwovec}[2]{\left[\begin{array}{c}#1 \\ #2 \end{array}\right]}\) \(\newcommand{\threevec}[3]{\left[\begin{array}{r}#1 \\ #2 \\ #3 \end{array}\right]}\) \(\newcommand{\cthreevec}[3]{\left[\begin{array}{c}#1 \\ #2 \\ #3 \end{array}\right]}\) \(\newcommand{\fourvec}[4]{\left[\begin{array}{r}#1 \\ #2 \\ #3 \\ #4 \end{array}\right]}\) \(\newcommand{\cfourvec}[4]{\left[\begin{array}{c}#1 \\ #2 \\ #3 \\ #4 \end{array}\right]}\) \(\newcommand{\fivevec}[5]{\left[\begin{array}{r}#1 \\ #2 \\ #3 \\ #4 \\ #5 \\ \end{array}\right]}\) \(\newcommand{\cfivevec}[5]{\left[\begin{array}{c}#1 \\ #2 \\ #3 \\ #4 \\ #5 \\ \end{array}\right]}\) \(\newcommand{\mattwo}[4]{\left[\begin{array}{rr}#1 \amp #2 \\ #3 \amp #4 \\ \end{array}\right]}\) \(\newcommand{\laspan}[1]{\text{Span}\{#1\}}\) \(\newcommand{\bcal}{\cal B}\) \(\newcommand{\ccal}{\cal C}\) \(\newcommand{\scal}{\cal S}\) \(\newcommand{\wcal}{\cal W}\) \(\newcommand{\ecal}{\cal E}\) \(\newcommand{\coords}[2]{\left\{#1\right\}_{#2}}\) \(\newcommand{\gray}[1]{\color{gray}{#1}}\) \(\newcommand{\lgray}[1]{\color{lightgray}{#1}}\) \(\newcommand{\rank}{\operatorname{rank}}\) \(\newcommand{\row}{\text{Row}}\) \(\newcommand{\col}{\text{Col}}\) \(\renewcommand{\row}{\text{Row}}\) \(\newcommand{\nul}{\text{Nul}}\) \(\newcommand{\var}{\text{Var}}\) \(\newcommand{\corr}{\text{corr}}\) \(\newcommand{\len}[1]{\left|#1\right|}\) \(\newcommand{\bbar}{\overline{\bvec}}\) \(\newcommand{\bhat}{\widehat{\bvec}}\) \(\newcommand{\bperp}{\bvec^\perp}\) \(\newcommand{\xhat}{\widehat{\xvec}}\) \(\newcommand{\vhat}{\widehat{\vvec}}\) \(\newcommand{\uhat}{\widehat{\uvec}}\) \(\newcommand{\what}{\widehat{\wvec}}\) \(\newcommand{\Sighat}{\widehat{\Sigma}}\) \(\newcommand{\lt}{<}\) \(\newcommand{\gt}{>}\) \(\newcommand{\amp}{&}\) \(\definecolor{fillinmathshade}{gray}{0.9}\)The goal of the LibreTexts project is to establish a vetted, comprehensive, and widely used platform for the dissemination and implementation of customized materials for post-secondary courses, while significantly reducing textbook costs for students. The LibreTexts project consists of 13 independently operating and interconnected “libraries” that focus on augmenting education in separate fields via a series of open-access online textbook environments that includes complementary ancillaries that advance diverse pedagogical methods and support multiple student learning styles.
Campus BookshelvesThe Course area holds campus- and faculty-specific courses. Each course shell is uniquely designed to address the needs of faculty and their students and typically contains text remixes (i.e., texts generated from existing content often with customized editing and/or content interspersed) that students and faculty can directly access for their class activities. |
 |
BookshelvesBookshelves in a LibreTexts Library holds texts that are curated by the LibreTexts Development team and can be used either directly or to create customized remixes (i.e., texts generated from existing content often with editing and/or content interspersed) for use in campus Course Shells. |
editing works best with Google Chrome and Windows 10
LibreTexts can be read on any HTML5 device and any browser
How to Login
Enter the username and password you have been provided to log in. Credentials are specific to each library.
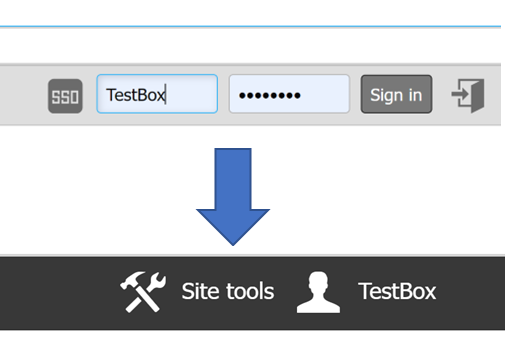
When you login the gray bar will turn black. Move the cursor to your userID on the far right hand side of the black bar and click on Sandbox to go to your Sandbox(es) (some people have more than one!)

Once you go to your Sandbox the black bar will have Edit, New and Options buttons. Two additional boxes, Training Tutorials and References and LibreFest have appeared. The LibreFest box is for a recent workshop. For now click on your Sandbox
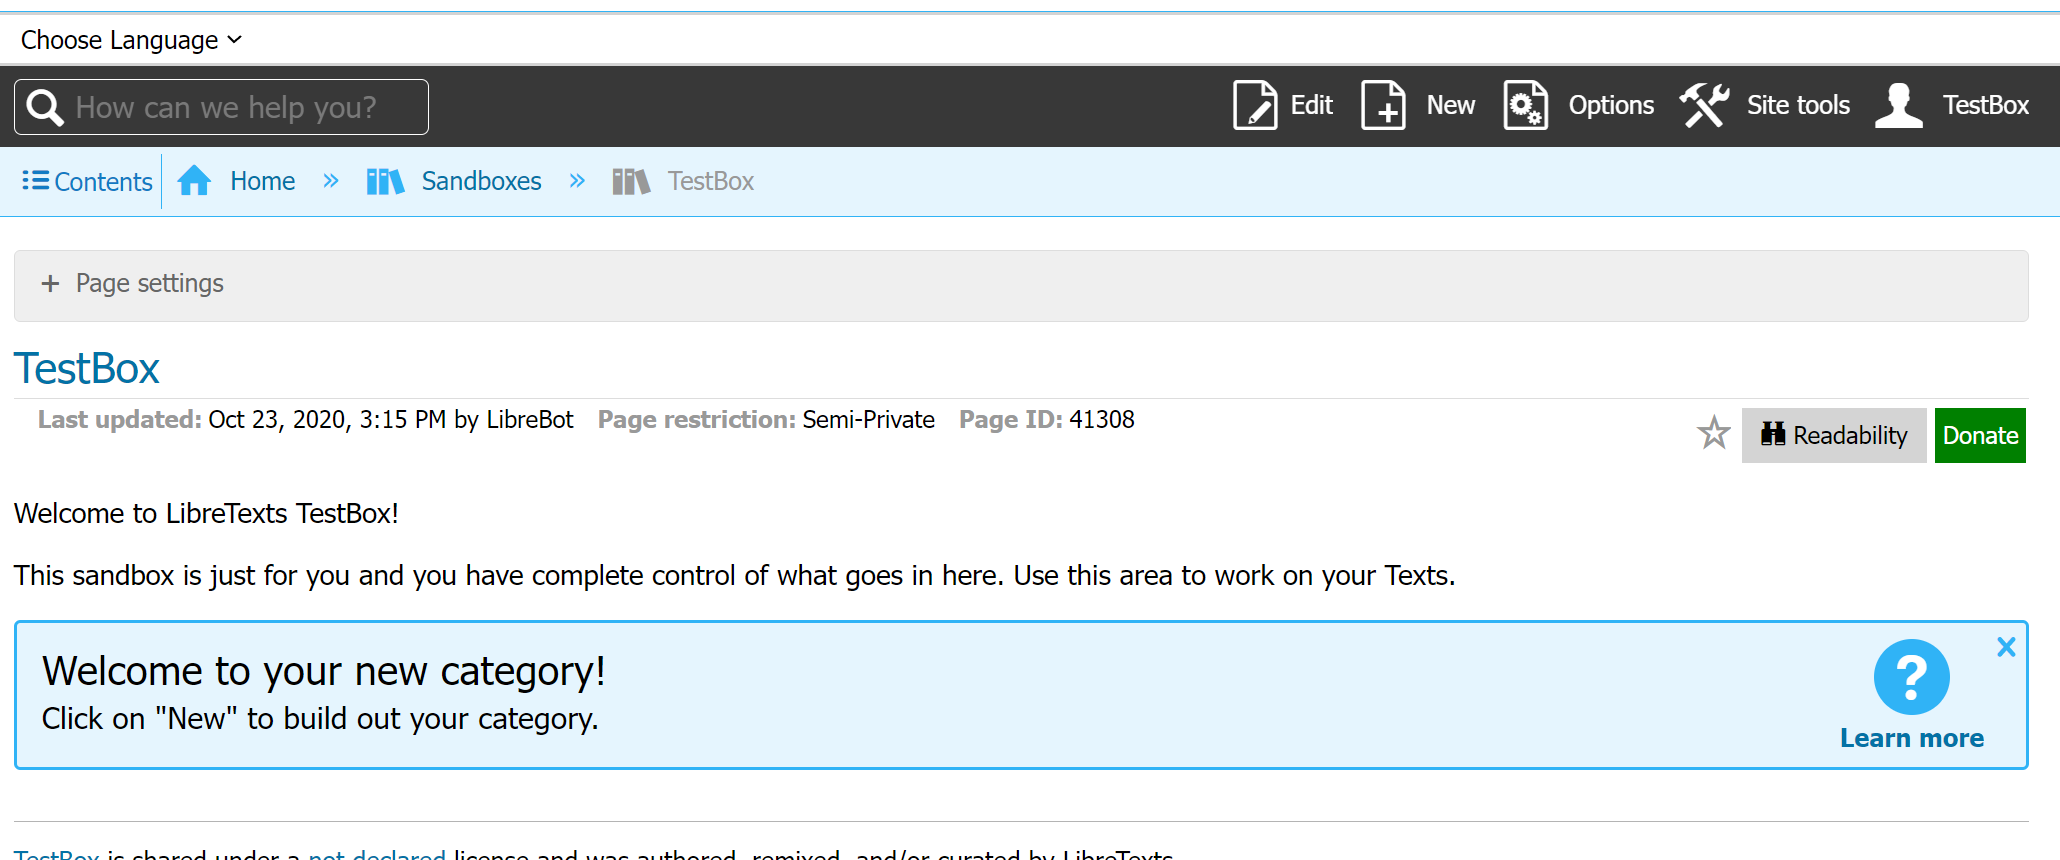 |
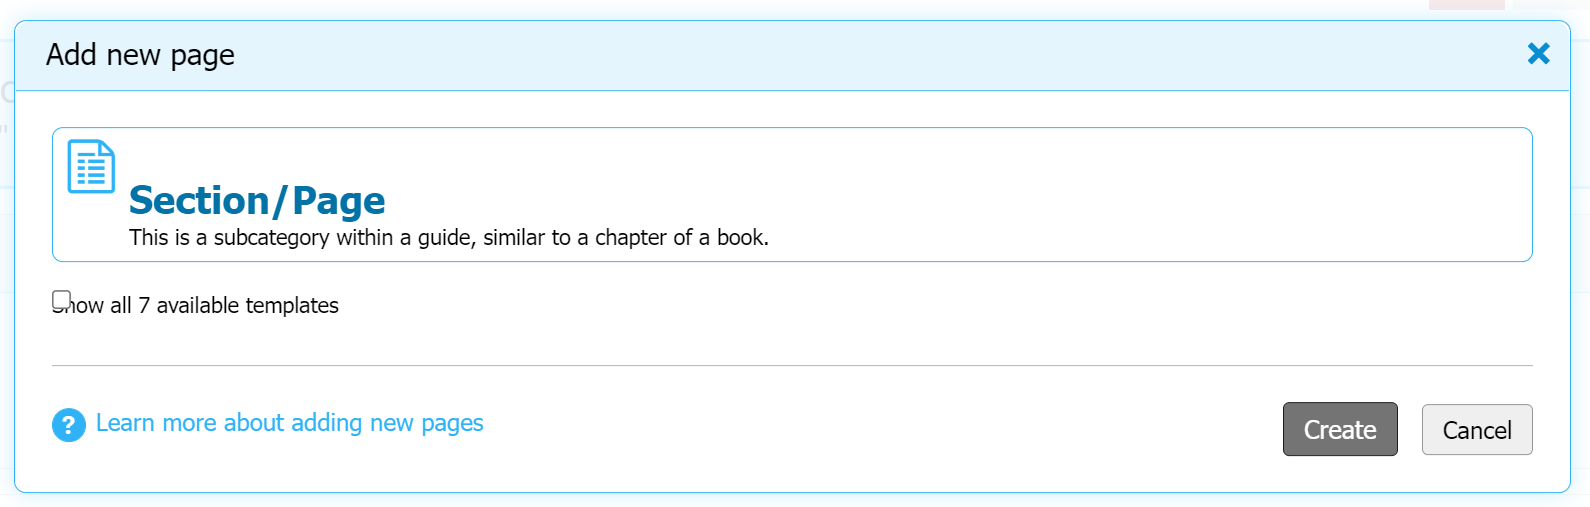
LibreTexts libraries follow a specialized site structure that is optimized for users. Book/Units have Chapters and Chapters have Sections/Pages. For more complex structures see the complete online Construction Guide, but for this workshop we will stick with the simple one where you will create your own book under the guide that has been created for the workshop. Let's get started. Next click on New on the black bar |
| Because you are starting in a Book, only the Book and Chapter options are available. At this time you want to create your own book so select that and click on create or simply double click on the Book option. | 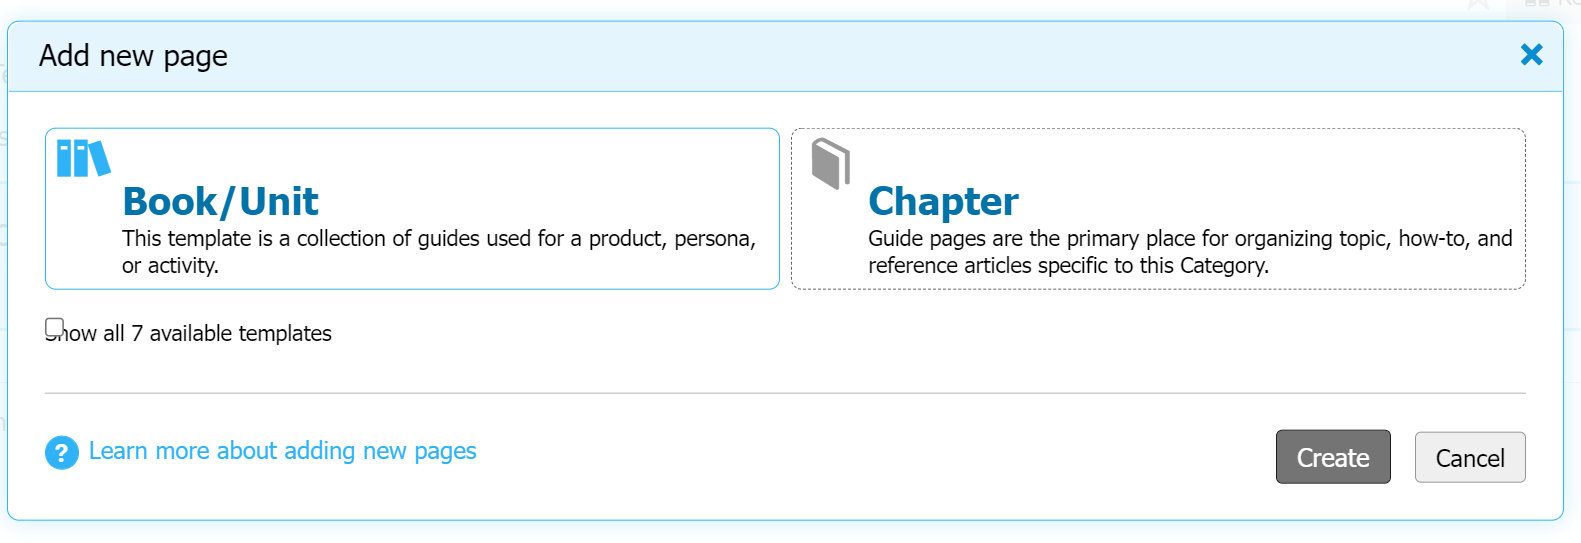 |
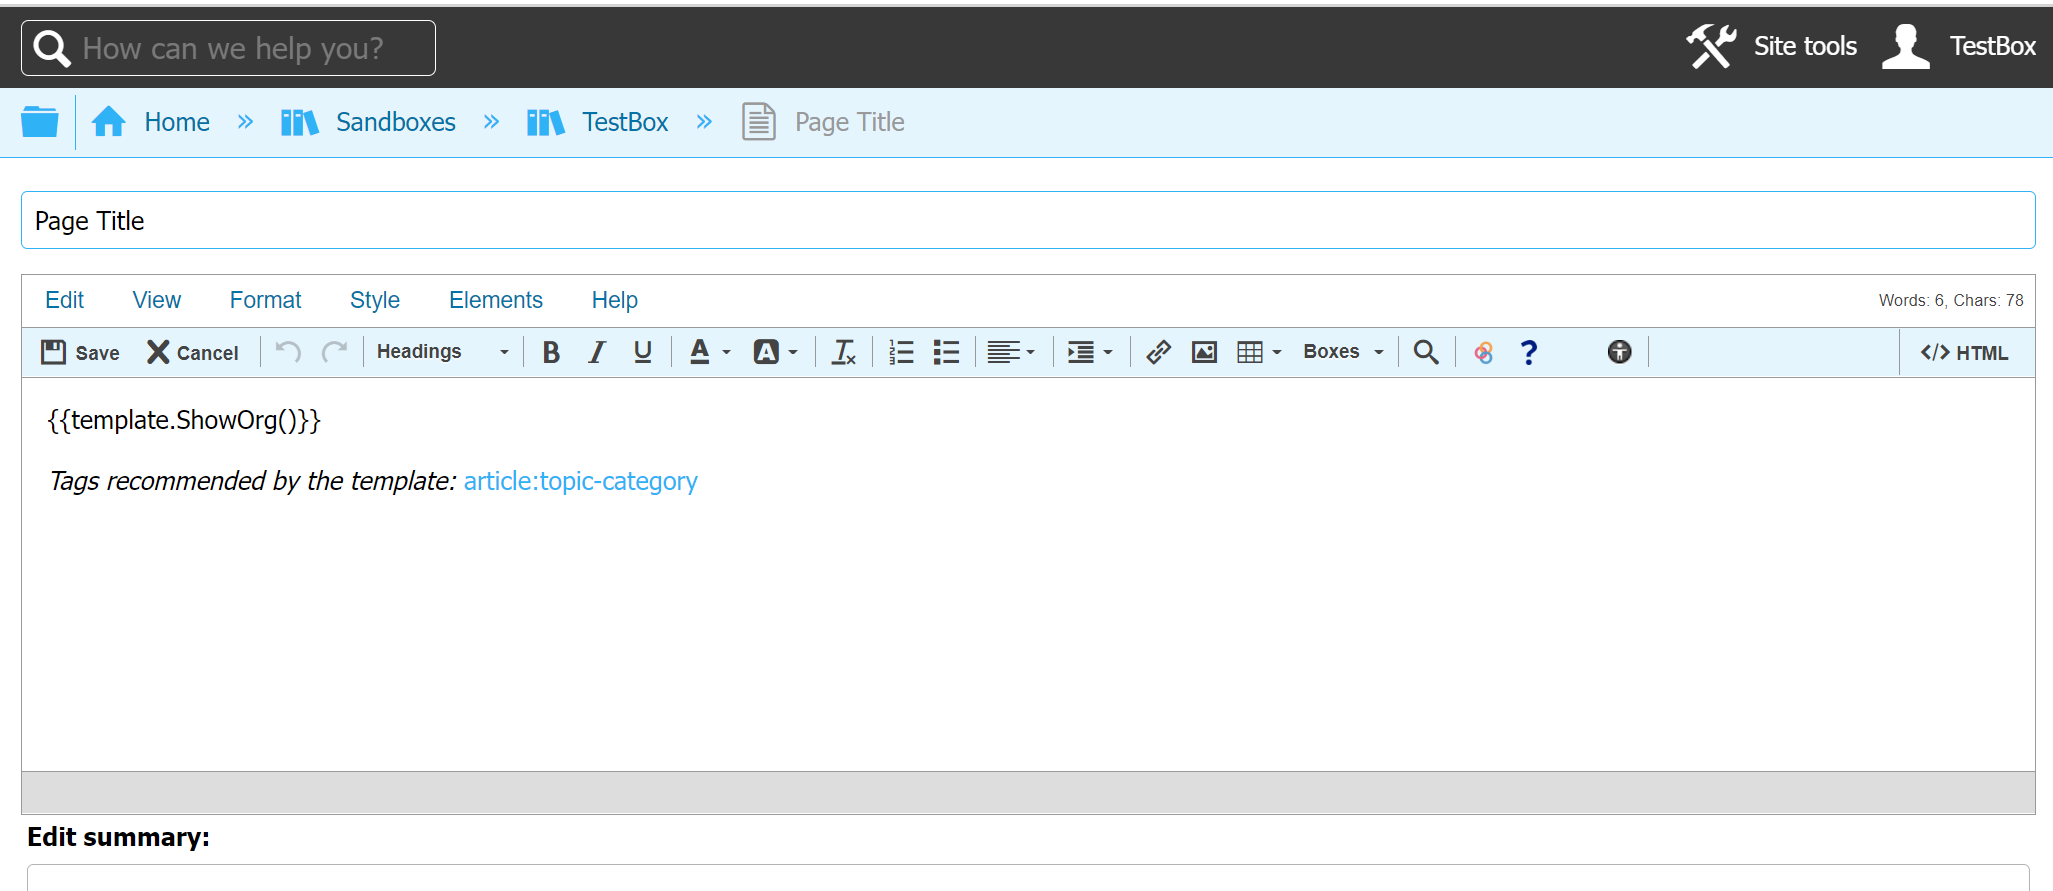 |
BEST JUST SAVE
Any references to templates and article type tags at the top of the page (such as
"Tags recommended by the template") determine how the page is stored on the site. If you see these lines do not remove them.Creating a New Chapter
- On the black toolbar, click New.
- Select the following page default classifications:
- Chapter
- Click the Create button.
The Editor will create a new chapter in your book.
Title Your Chapter
LibreTexts has a uniform title format that that should be used unless it is impossible. Each chapter should be formatted like XX: Title
- XX is the chapter number
- title is the page title
This approach preserves curation and remixing ability of the pages as well as automatic equations/figure/table numbering that work off of the title of the page.
- Title your Chapter as 1: First Chapter for now.
- You can add text in the box explaining the purpose of your book now or later.
- Click Save.
The system will now invite you to build out a guide. Guides are the way that you and other users navigate through the system. Click on the tab at the left hand side with a "+" on it to see the choices for the guides. Select Article Directory and then click on the "add new tab" button. This creates a new guide (with nothing in it).
Creating a New Page
 |
|
You should see your first page of the chapter. You can continue editing by clicking Edit or create the next page.
Editing a Page
The Mindtouch platform LibreTexts uses has a modified CKE editor from CKSource that allows for construction without having to build/edit raw (HTML) code. The editor is WYSIWYG that automatically creates HTML from visual authoring. The editor displays when you create a new page or edit a page. It is designed to bring common word processor features directly to web pages, simplifying content creation.
- After saving the page on the MindTouch toolbar, select Edit.
- Edit the content as necessary. See a complete list of editor tools.
- In the Edit summary field at the bottom of the page, leave change notes for other editors or yourself (optional). Edit summaries can be viewed in the page revision history.
- Click Save to save the changes you made.
AUTOMATIC SAVING & WORD COUNTS
- Automatic saving - By default, the LibreTexts libraries autosave pages every 25 seconds in case your browser crashes or computer restarts so that you can return to the page and pick up where you left off.
- Word count - A word and character count is displayed in the upper right corner of the editor UI.
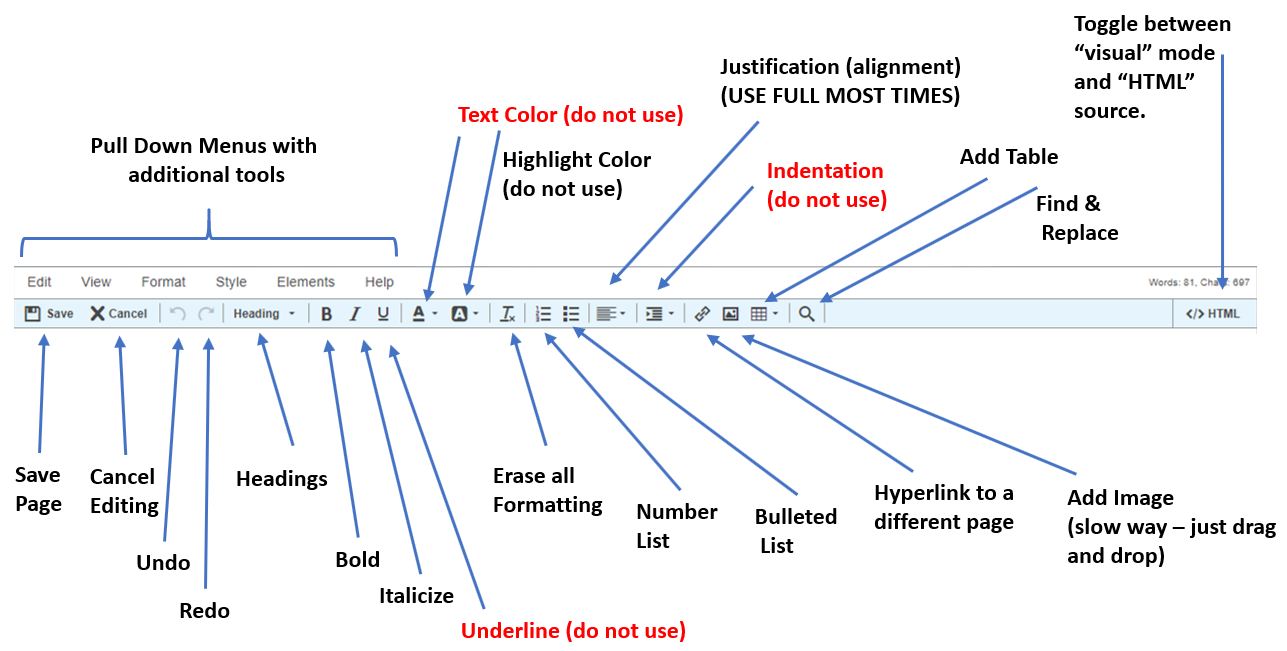
The Editor
The Editor has been configured for most of the needs contributors require. The layout is below; please refrain from using the advanced features in red until you are familiar with the Mindtouch structure. The Toolbar is the section located at the top of the editor window. It contains menu buttons that give you access to various functions of CKEditor. All buttons are grouped according to their function and include both simple operations (like basic text styling or formatting) and more advanced features (like inserting media or forms via a dialog window).
DO NO HARM (OR ILLEGAL Stuff)
You are responsible for content that you provide, including but not limited to photos, profiles information, messages, search results, edits, etc. that you upload, publish or display on or through LibreTexts, or transmit to or share with others. You may not submit content to LibreTexts that you did not create or that you do not have permission to submit. You understand and agree that others may, but are not obligated to, edit, delete or remove (without notice) any content from LibreTexts, for any reason or no reason.
Adding Figures the Easy Way - Drag and Drop
- "Save" or "export" the figures into jpg, png, gif or some other graphics file depending on the program you are using to make the image (JPG and PNG are preferred).
- Drag and drop the image from your desktop to your page (while editing).
Additional factors to pay attention to regarding figures
- NO BMP figures are allowed to be imported. Use PNG, JPG, or GIF figures instead.
- Please CROP your figures to remove superfluous white space that makes reading your module awkward. The Microsoft Office Picture Editor or Paint will crop images and is free on MS operating systems.
- All figures constructed for this project must have the original non-image files used uploaded to the LibreTexts, preferable in the module itself. DO NOT HOTLINK images.
Formatting Figures
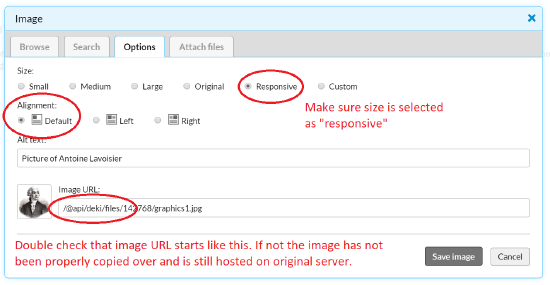 |
Double click on image (in edit mode) to open settings and make sure settings are set right. To center justify figure, click on the right side of the image (not the figure) and you can use the center justification for text off the normal editing toolbar. |
Adding Captions
To add a caption add a line under the figure formatted as
Figure \(\PageIndex{i}\): Captiontext
where \( i \) is the number of the figure on the page. This automatically formats the caption into the caption style you see on the figures on this page. Unfortunately, if you add another figure that requires renumbering the figures after it, this still has to be done manually.
Figure captions Format
The figure label should be formatted as shown for the figure above:
- Center justified
- "Figure" in bold followed by numbering with a page index command and a colon like this: Figure
\(\PageIndex{1}\): - Manually enter the figure number in the \Pageindex command, "1" for the first figure of the page, "2" for the second, etc.
Alt-Text for Accessibility
Each Figure and Table has a simple option to add alt-texts. Just double right click on the image to get the figure setting and select image properties from the menu that appears and you can add alt-test into the entry. See section on Alt-texts for more details.
Hyperlinking
To ensure effective coupling of pages within the LibreTexts, content on pages can be "hyperlinked" to other pages. This is simple:
- Mark the word you want to be the hyperlink, then click the hyperlink button with the "chain link" icon.
- If you want to link to an outside page place the address in the “link to” box and click “update link”.
- If you want to link to an internal LibreTexts module you can use the “browse” option to find the page. You can also use the search function to look for key words (make sure you check that the page is a relevant link though).

Link Farming: DO NOT HYPERLINK OUTSIDE OF THE LIBRARY UNLESS NECESSARY
WHILE CURATING IS KEY TO THE LIBRETEXTS PLATFORM, LINK FARMING (NEEDING TO CURATE DEAD LINKS) IS TO BE AVOIDED.
Adding Templates
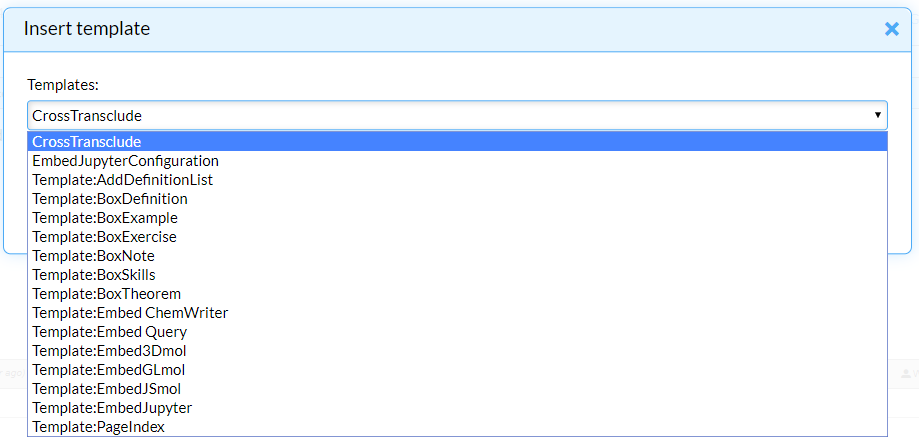 |
Under Elements of the editing toolbar, there is an option for "Templates". These are specialized code snippets that are designed for adding standard code to your page. Some of these templates are for general use and other are more specific. The six BOX templates add the text for a container around special text (see below). The Embed templates are for special HTML5 interactive code like Jupyer executable code or interactive molecules. The other templates will be discussed in a different section. Feel free to add any of them to a test page to see what it does. |
|
Definition A cow is an animal |
Example \(\PageIndex{1}\) Add text here. |
Exercise \(\PageIndex{1}\) Add exercises text here |
|
Note The ideal gas law is easy to remember and apply in solving problems |
Learning Objectives
|
Theorem \(\PageIndex{1}\) Statement. |
Remixing
The OER Remixer allows rapid assembly of customized Remixes from existing sources on our comprehensive and ever-growing libraries. See the Remixer Tutorial in Chapter 7 of the Construction Guide for a more detailed explanation of the Remixer's interface and a walkthrough of how to do basic tasks with the OER Remixer, as well as videos. Your Remixing Map is stored automatically on your computer as you build, so you do not have to complete your Remix in one setting. The Remixer works best on Chrome browsers running on W10.
Before using the OER Remixer, it is important to construct a Remixing Map. Lubbock Christian University created an excellent excel sheet to help out in this procedure. The gist of the map is to identify the content in the libraries (green) that will map into the organization of the new remix (yellow). This requires faculty/instructional designers to peruse the Bookshelves of Source texts and of other Course Remixes to identify desired content. Once remixed, these pages can be then edited at the sub-page level (e.g., sub-sections, paragraph, pages etc). The Remixing Map reflects only the initial organization of a custom remix. Notice the customized organization; there is no limit other than imagination and the size/makeup of the LibreTexts libraries. While the Remixing Map below does not demonstrate it, it is possible to make placeholder pages in the Remixer if a gap exists in the libraries. New custom content can be added to these pages once the text is created.