5.4C: Step-by-Step Procedures for Vacuum Distillation
- Page ID
- 95724
\( \newcommand{\vecs}[1]{\overset { \scriptstyle \rightharpoonup} {\mathbf{#1}} } \)
\( \newcommand{\vecd}[1]{\overset{-\!-\!\rightharpoonup}{\vphantom{a}\smash {#1}}} \)
\( \newcommand{\id}{\mathrm{id}}\) \( \newcommand{\Span}{\mathrm{span}}\)
( \newcommand{\kernel}{\mathrm{null}\,}\) \( \newcommand{\range}{\mathrm{range}\,}\)
\( \newcommand{\RealPart}{\mathrm{Re}}\) \( \newcommand{\ImaginaryPart}{\mathrm{Im}}\)
\( \newcommand{\Argument}{\mathrm{Arg}}\) \( \newcommand{\norm}[1]{\| #1 \|}\)
\( \newcommand{\inner}[2]{\langle #1, #2 \rangle}\)
\( \newcommand{\Span}{\mathrm{span}}\)
\( \newcommand{\id}{\mathrm{id}}\)
\( \newcommand{\Span}{\mathrm{span}}\)
\( \newcommand{\kernel}{\mathrm{null}\,}\)
\( \newcommand{\range}{\mathrm{range}\,}\)
\( \newcommand{\RealPart}{\mathrm{Re}}\)
\( \newcommand{\ImaginaryPart}{\mathrm{Im}}\)
\( \newcommand{\Argument}{\mathrm{Arg}}\)
\( \newcommand{\norm}[1]{\| #1 \|}\)
\( \newcommand{\inner}[2]{\langle #1, #2 \rangle}\)
\( \newcommand{\Span}{\mathrm{span}}\) \( \newcommand{\AA}{\unicode[.8,0]{x212B}}\)
\( \newcommand{\vectorA}[1]{\vec{#1}} % arrow\)
\( \newcommand{\vectorAt}[1]{\vec{\text{#1}}} % arrow\)
\( \newcommand{\vectorB}[1]{\overset { \scriptstyle \rightharpoonup} {\mathbf{#1}} } \)
\( \newcommand{\vectorC}[1]{\textbf{#1}} \)
\( \newcommand{\vectorD}[1]{\overrightarrow{#1}} \)
\( \newcommand{\vectorDt}[1]{\overrightarrow{\text{#1}}} \)
\( \newcommand{\vectE}[1]{\overset{-\!-\!\rightharpoonup}{\vphantom{a}\smash{\mathbf {#1}}}} \)
\( \newcommand{\vecs}[1]{\overset { \scriptstyle \rightharpoonup} {\mathbf{#1}} } \)
\( \newcommand{\vecd}[1]{\overset{-\!-\!\rightharpoonup}{\vphantom{a}\smash {#1}}} \)
Vacuum Distillation Procedure
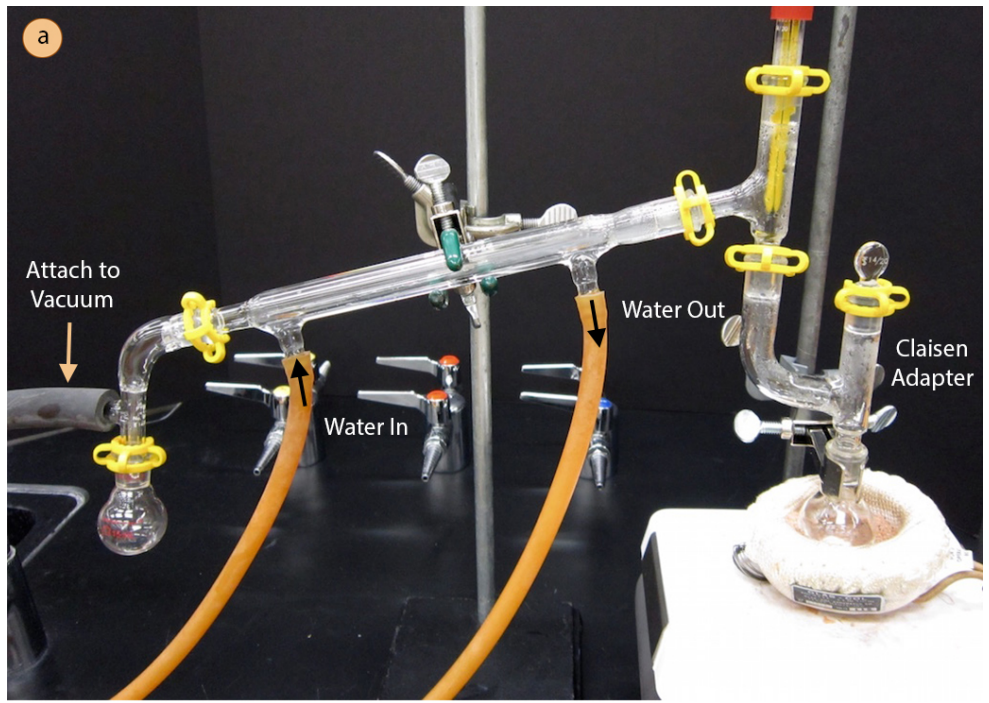
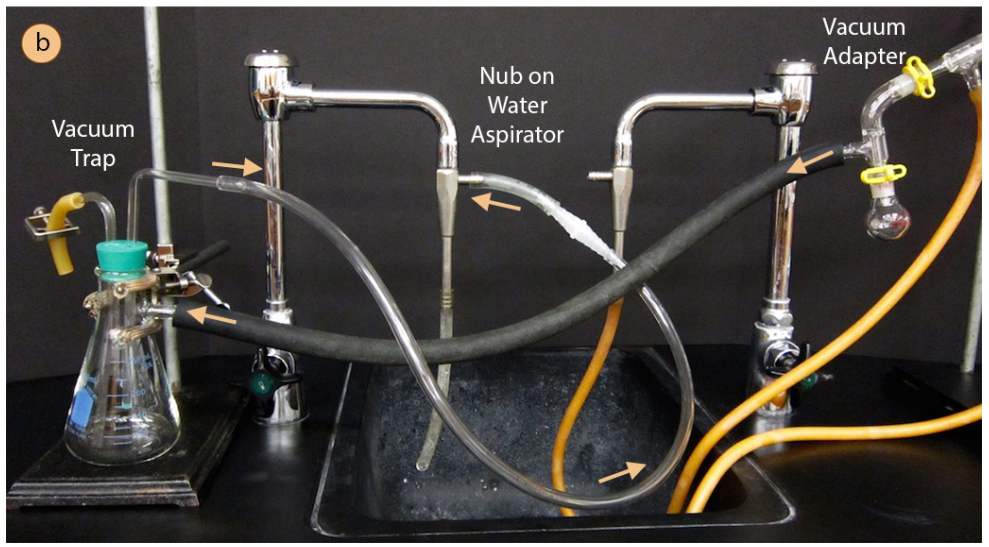
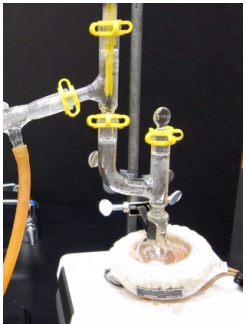
A vacuum distillation apparatus is shown in Figure 5.50, using a simple distillation setup. A fraction distillation can also be used. It is assumed that readers have previously performed a simple distillation under atmospheric pressure, so in this section are described differences between atmospheric and reduced pressure distillations.

Prepare the Apparatus
- Safety note: Inspect every piece of glassware to be used with the vacuum distillation, checking for stars, cracks, or other weaknesses in the glass, as these may allow for implosion when the pressure is reduced.
- A stir bar needs to be used for bump prevention. Boiling stones cannot be used with vacuum distillation as air trapped in the stone's pores is rapidly removed under vacuum, causing the stones to fail to produce bubbles.
- Although greasing is somewhat of a personal choice with simple and fractional distillations, all joints must be greased in vacuum distillations or the system will leak and fail to achieve a low pressure (Figures 5.51a+b).
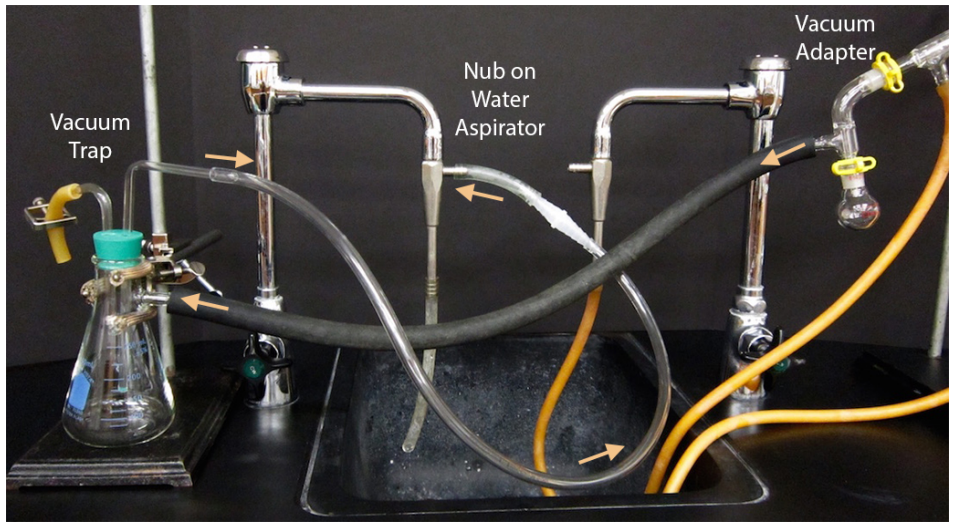
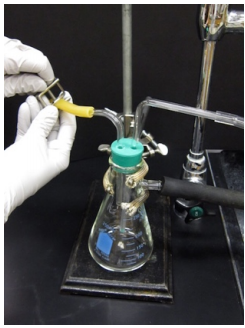
- Begin assembly of the apparatus near the vacuum source. If using a water aspirator, test to be sure that the aspirator works well as some are more functional than others. To test an aspirator, apply thick vacuum hosing to the nub on the aspirator, turn on the water and feel for suction at the end of the hose with your finger (Figure 5.51c).
- A Claisen adapter should be included in the apparatus as solutions under vacuum tend to bump violently (a Claisen adapter is labeled in Figure 5.50a).
- Attach thick-walled tubing to the vacuum adapter on the distillation apparatus (Figure 5.51d) and connect to a vacuum trap. A trap suitable for a water aspirator is shown in Figure 5.50b, but a more substantial trap cooled with dry ice and acetone should be used with a portable vacuum to prevent solvent vapors from degrading the oil pump.
Connect the trap to the vacuum source (aspirator or vacuum pump). It is best to not bend or strain the tubing as much as is practical, as this may create a leak in the system.
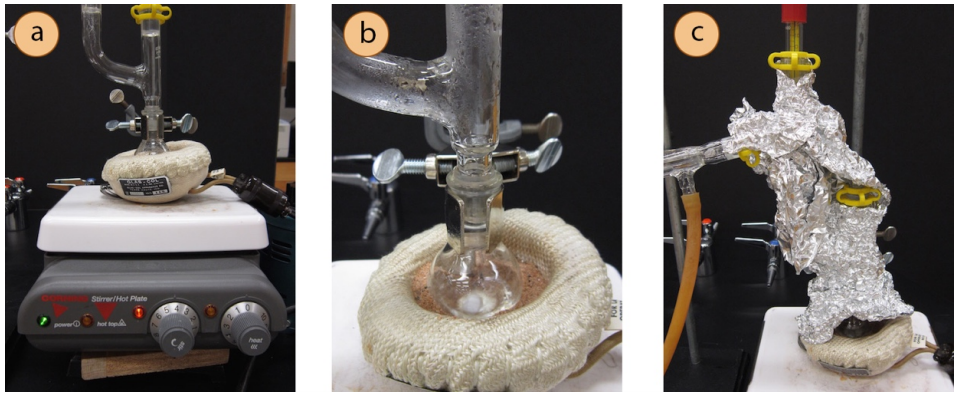
- Insert a wood block (Figure 5.52a) or lab jack beneath the stirring plate to allow for lowering of the heat source when the distillation is complete.
Begin the Distillation
- Before heating, turn on the vacuum source to begin reducing pressure inside the apparatus. There should not be a hissing sound or else there is a leak in the system.
The purpose of reducing the pressure before heating is for removal of very low-boiling liquids (e.g. residual solvent). If the system were heated at the same time, the low-boiling liquids might boil violently in the flask.
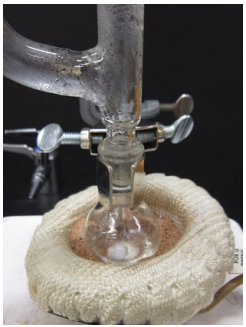
If a manometer is available, take note of the pressure inside the apparatus. This may be used to predict the boiling point of the sample. - When confident that the apparatus is adequately evacuated and any low-boiling compounds have been removed, begin heating the sample (Figure 5.52b).
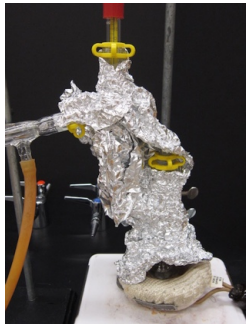
- If it is difficult to achieve more than a reflux, the Claisen and three-way adapter can be insulated by wrapping them tightly with glass wool then aluminum foil (Figure 5.52c). Insulation allows the column to maintain heat and the sample to remain in the gas phase longer. A small gap should be left in the insulation near the distilling flask to "peek in" and make sure the stirring mechanism continues to work properly.
- Record the temperature over which material is collected, making sure the value corresponds to a temperature when the thermometer bulb is fully immersed in vapors. If a manometer is used, also record the pressure. If no manometer is used, record the vacuum source (e.g. aspirator).
Pure liquids do not always distill at a constant temperature when under vacuum, as variations in pressure so easily occur and affect the boiling temperature. A range of \(5^\text{o} \text{C}\) is not uncommon for pure liquids. This is especially true when the vacuum source is a water aspirator, where variations in water flow alter the pressure. - If more than one fraction of distillate is desired, the distillation must be stopped before changing the receiving flask (see the next section for how). If available, a "cow" receiving flask can be used to collect different fractions without ceasing the vacuum (Figure 5.53a).

Stop the Distillation
- To stop the distillation, first remove the heat source, cool the flask to room temperature then further cool in a tap water bath (Figure 5.53a).
- Slowly reinstate the atmospheric pressure into the flask by opening the pinch clamp at the vacuum trap (Figure 5.53c), or by removing the rubber tubing at the vacuum adapter or aspirator (Figure 5.53d). You will know the system is open to the atmosphere when there is an increase in water flow at the aspirator, or if a hissing sound is heard. Then turn off the vacuum source.
It is important to first cool the system before allowing air back in as the superheated residue in the flask may react unexpectedly with oxygen in the air.
It is also important to first allow air back into the system before turning off the vacuum source. If the vacuum is turned off first, sometimes changes in pressure inside the apparatus (as it cools) cause back-suction. If a water aspirator is used, this may cause water from the sink to be pulled into the vacuum line. The vacuum trap prevents this back suction from ruining the distillate. - Disassemble and clean up the distillation apparatus as quickly as is practical, as the joints can sometimes freeze if left connected for prolonged periods.
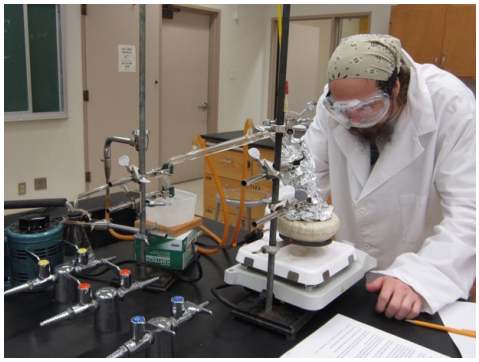
Vacuum Distillation Summary
 |
 |
 |
 |
|
Always use a stir bar, not boiling stones. Grease all joints. Use a Claisen adapter, as solutions tend to bump under vacuum. Connect thick-walled hosing at the vacuum adapter to a trap, then to the vacuum source (water aspirator or vacuum pump). |
Turn on the vacuum first, before heating, to remove very volatile components. When confident the apparatus is maintaining a reduced pressure, then heat the sample. Use glass wool or foil insulation if the sample is stubbornly refluxing instead of distilling. |
Record temperature and pressure if using a manometer during active distillation. Pure compounds may not distill over a constant temperature due to changes in pressure. If multiple fractions will be collected, the system needs to be vented and cooled in between (or a cow receiving flask used). |
To stop the distillation, remove the heat and cool the flask in a tap water bath. Then open the apparatus to the atmosphere by opening the pinch clamp on the trap, or removing the tubing on the vacuum adapter. Lastly turn off the vacuum. Correct order: cool, open to atmosphere, then turn off vacuum. |


