1.3C: Transferring Methods - Inert Atmospheric Methods
- Page ID
- 93193
\( \newcommand{\vecs}[1]{\overset { \scriptstyle \rightharpoonup} {\mathbf{#1}} } \)
\( \newcommand{\vecd}[1]{\overset{-\!-\!\rightharpoonup}{\vphantom{a}\smash {#1}}} \)
\( \newcommand{\dsum}{\displaystyle\sum\limits} \)
\( \newcommand{\dint}{\displaystyle\int\limits} \)
\( \newcommand{\dlim}{\displaystyle\lim\limits} \)
\( \newcommand{\id}{\mathrm{id}}\) \( \newcommand{\Span}{\mathrm{span}}\)
( \newcommand{\kernel}{\mathrm{null}\,}\) \( \newcommand{\range}{\mathrm{range}\,}\)
\( \newcommand{\RealPart}{\mathrm{Re}}\) \( \newcommand{\ImaginaryPart}{\mathrm{Im}}\)
\( \newcommand{\Argument}{\mathrm{Arg}}\) \( \newcommand{\norm}[1]{\| #1 \|}\)
\( \newcommand{\inner}[2]{\langle #1, #2 \rangle}\)
\( \newcommand{\Span}{\mathrm{span}}\)
\( \newcommand{\id}{\mathrm{id}}\)
\( \newcommand{\Span}{\mathrm{span}}\)
\( \newcommand{\kernel}{\mathrm{null}\,}\)
\( \newcommand{\range}{\mathrm{range}\,}\)
\( \newcommand{\RealPart}{\mathrm{Re}}\)
\( \newcommand{\ImaginaryPart}{\mathrm{Im}}\)
\( \newcommand{\Argument}{\mathrm{Arg}}\)
\( \newcommand{\norm}[1]{\| #1 \|}\)
\( \newcommand{\inner}[2]{\langle #1, #2 \rangle}\)
\( \newcommand{\Span}{\mathrm{span}}\) \( \newcommand{\AA}{\unicode[.8,0]{x212B}}\)
\( \newcommand{\vectorA}[1]{\vec{#1}} % arrow\)
\( \newcommand{\vectorAt}[1]{\vec{\text{#1}}} % arrow\)
\( \newcommand{\vectorB}[1]{\overset { \scriptstyle \rightharpoonup} {\mathbf{#1}} } \)
\( \newcommand{\vectorC}[1]{\textbf{#1}} \)
\( \newcommand{\vectorD}[1]{\overrightarrow{#1}} \)
\( \newcommand{\vectorDt}[1]{\overrightarrow{\text{#1}}} \)
\( \newcommand{\vectE}[1]{\overset{-\!-\!\rightharpoonup}{\vphantom{a}\smash{\mathbf {#1}}}} \)
\( \newcommand{\vecs}[1]{\overset { \scriptstyle \rightharpoonup} {\mathbf{#1}} } \)
\(\newcommand{\longvect}{\overrightarrow}\)
\( \newcommand{\vecd}[1]{\overset{-\!-\!\rightharpoonup}{\vphantom{a}\smash {#1}}} \)
\(\newcommand{\avec}{\mathbf a}\) \(\newcommand{\bvec}{\mathbf b}\) \(\newcommand{\cvec}{\mathbf c}\) \(\newcommand{\dvec}{\mathbf d}\) \(\newcommand{\dtil}{\widetilde{\mathbf d}}\) \(\newcommand{\evec}{\mathbf e}\) \(\newcommand{\fvec}{\mathbf f}\) \(\newcommand{\nvec}{\mathbf n}\) \(\newcommand{\pvec}{\mathbf p}\) \(\newcommand{\qvec}{\mathbf q}\) \(\newcommand{\svec}{\mathbf s}\) \(\newcommand{\tvec}{\mathbf t}\) \(\newcommand{\uvec}{\mathbf u}\) \(\newcommand{\vvec}{\mathbf v}\) \(\newcommand{\wvec}{\mathbf w}\) \(\newcommand{\xvec}{\mathbf x}\) \(\newcommand{\yvec}{\mathbf y}\) \(\newcommand{\zvec}{\mathbf z}\) \(\newcommand{\rvec}{\mathbf r}\) \(\newcommand{\mvec}{\mathbf m}\) \(\newcommand{\zerovec}{\mathbf 0}\) \(\newcommand{\onevec}{\mathbf 1}\) \(\newcommand{\real}{\mathbb R}\) \(\newcommand{\twovec}[2]{\left[\begin{array}{r}#1 \\ #2 \end{array}\right]}\) \(\newcommand{\ctwovec}[2]{\left[\begin{array}{c}#1 \\ #2 \end{array}\right]}\) \(\newcommand{\threevec}[3]{\left[\begin{array}{r}#1 \\ #2 \\ #3 \end{array}\right]}\) \(\newcommand{\cthreevec}[3]{\left[\begin{array}{c}#1 \\ #2 \\ #3 \end{array}\right]}\) \(\newcommand{\fourvec}[4]{\left[\begin{array}{r}#1 \\ #2 \\ #3 \\ #4 \end{array}\right]}\) \(\newcommand{\cfourvec}[4]{\left[\begin{array}{c}#1 \\ #2 \\ #3 \\ #4 \end{array}\right]}\) \(\newcommand{\fivevec}[5]{\left[\begin{array}{r}#1 \\ #2 \\ #3 \\ #4 \\ #5 \\ \end{array}\right]}\) \(\newcommand{\cfivevec}[5]{\left[\begin{array}{c}#1 \\ #2 \\ #3 \\ #4 \\ #5 \\ \end{array}\right]}\) \(\newcommand{\mattwo}[4]{\left[\begin{array}{rr}#1 \amp #2 \\ #3 \amp #4 \\ \end{array}\right]}\) \(\newcommand{\laspan}[1]{\text{Span}\{#1\}}\) \(\newcommand{\bcal}{\cal B}\) \(\newcommand{\ccal}{\cal C}\) \(\newcommand{\scal}{\cal S}\) \(\newcommand{\wcal}{\cal W}\) \(\newcommand{\ecal}{\cal E}\) \(\newcommand{\coords}[2]{\left\{#1\right\}_{#2}}\) \(\newcommand{\gray}[1]{\color{gray}{#1}}\) \(\newcommand{\lgray}[1]{\color{lightgray}{#1}}\) \(\newcommand{\rank}{\operatorname{rank}}\) \(\newcommand{\row}{\text{Row}}\) \(\newcommand{\col}{\text{Col}}\) \(\renewcommand{\row}{\text{Row}}\) \(\newcommand{\nul}{\text{Nul}}\) \(\newcommand{\var}{\text{Var}}\) \(\newcommand{\corr}{\text{corr}}\) \(\newcommand{\len}[1]{\left|#1\right|}\) \(\newcommand{\bbar}{\overline{\bvec}}\) \(\newcommand{\bhat}{\widehat{\bvec}}\) \(\newcommand{\bperp}{\bvec^\perp}\) \(\newcommand{\xhat}{\widehat{\xvec}}\) \(\newcommand{\vhat}{\widehat{\vvec}}\) \(\newcommand{\uhat}{\widehat{\uvec}}\) \(\newcommand{\what}{\widehat{\wvec}}\) \(\newcommand{\Sighat}{\widehat{\Sigma}}\) \(\newcommand{\lt}{<}\) \(\newcommand{\gt}{>}\) \(\newcommand{\amp}{&}\) \(\definecolor{fillinmathshade}{gray}{0.9}\)Meticulously dry or oxygen-free conditions are sometimes necessary when using reagents that react with water or oxygen in the air. To safely and effectively use these reagents, glassware should be oven or flame dried, then the air displaced with a dry, inert gas (often nitrogen or argon). This creates an "inert atmosphere" inside an apparatus, one that will not react with the reagents.
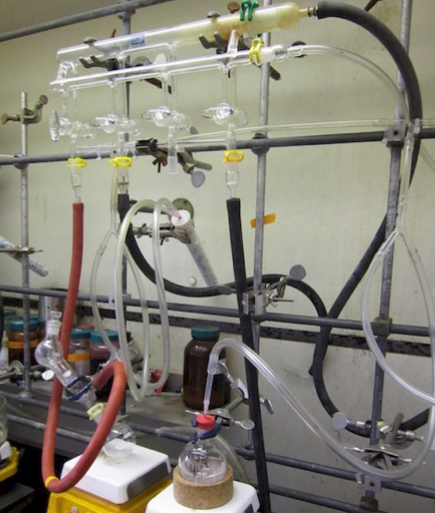
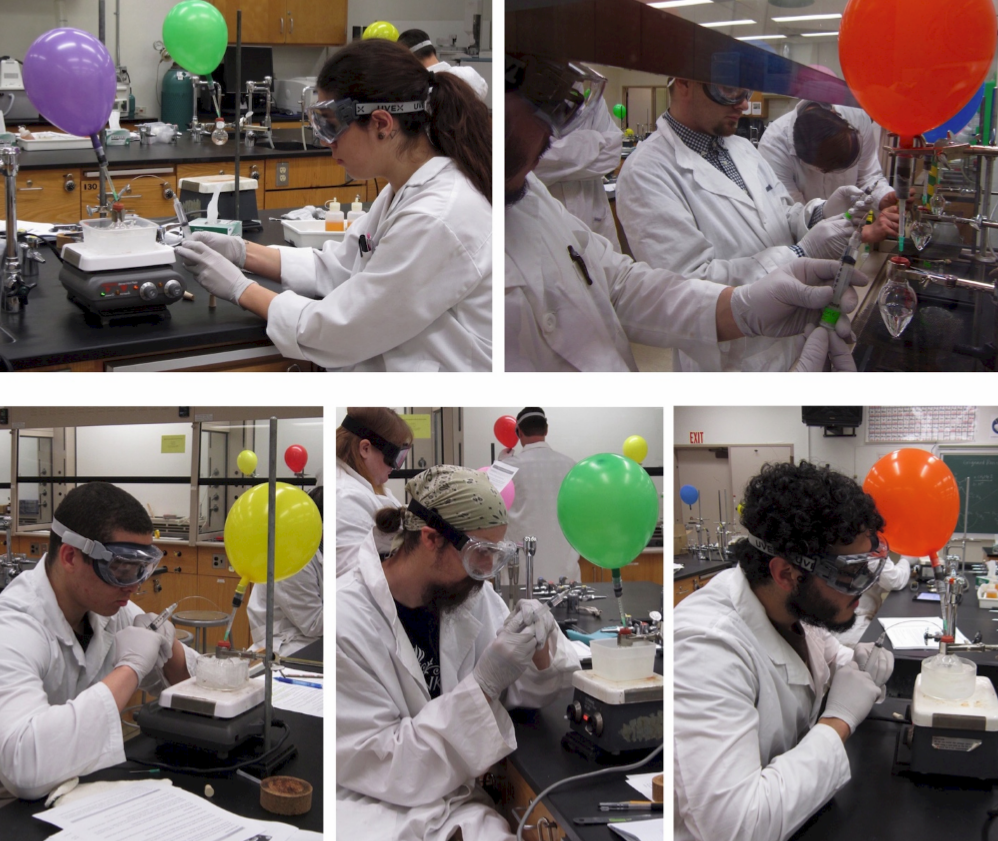
Inert gases can be delivered to a flask through gas lines and a gas manifold (in a research setting, Figure 1.28), or through a balloon of inert gas (more common in teaching labs, Figure 1.29).
Step-By-Step Procedures
The techniques shown in this section use balloons of nitrogen gas to create inert atmospheric conditions in a round bottomed flask, and syringes to transfer liquids from dry reagent bottles. These techniques can be easily adapted to use with a gas manifold if available.

Prepare a balloon of inert gas
1. Prepare a needle attachment for a balloon: Cut the end off a plastic \(1 \: \text{mL}\) syringe and fit the barrel into a piece of thick rubber tubing. Attach a helium-quality balloon to the rubber tubing, and seal all joints with Parafilm. Alternatively, attach a balloon directly to a \(2\)-\(3 \: \text{mL}\) plastic syringe.
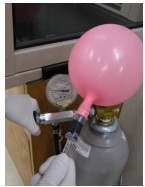
2. Fill the balloon by connecting to a hose on the regulator of a tank of inert gas (nitrogen or argon, Figure 1.30a). Open the gas regulator to fill the balloon to between 7" – 8" in diameter (Figure 1.30b).
[For use with very sensitive reagents, the gas should first be passed through a column of drying agent.]
3. While holding the balloon close to your body, twist the balloon to prevent gas from escaping. Then attach a green needle (#21 gauge, \(0.8 \: \text{mm}\) × \(25 \: \text{mm}\), safety note: very sharp!) securely to the end of the syringe (Figure 1.30c).
4. To prevent gas from escaping when the balloon is untwisted, insert the needle into a rubber stopper (Figure 1.30d). The balloon can now be set aside while other parts of the setup are prepared.

Prepare the reagent flask
5. Remove the surface water from a reagent flask (with stir bar if applicable), by either flame drying the flask or placing it in a hot oven for several hours. Safety note: flask will be very hot! Use thick gloves to handle the hot glass.
6. Immediately insert a rubber septum (Figure 1.31a) into the ground glass joint. Fold one side of the septum over the lip of the flask and hold it in place while folding the opposite sides over as well (Figures 1.31b–d). This can be difficult to do with thick gloves. An alternative is to hold the flask against your body with the thick gloves, and fold the septum flaps over while using your bare hands (or thinner gloves, Figures 1.32 a+b).
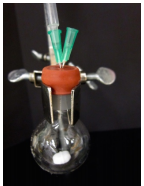
7. Immediately secure the reaction flask to a ring stand or latticework using an extension clamp and insert the needle of the inert gas balloon into the inner circle on the septum (Figure 1.32c, see Figure 1.31d for the circle on the septum).
8. Insert a single needle into the circle on the septum (called an "exit needle") to "flush" the air from the reaction flask (Figure 1.32d). The goal is to use the pressure from the balloon to force inert gas into the reaction flask and displace the air in the flask out the exit needle.
9. Allow the system to flush for at least 5 minutes if using nitrogen gas and perhaps 1-2 minutes if using argon gas (argon is denser than air so will displace the air more easily than nitrogen). Then remove the exit needle and allow the flask to fully cool under the balloon of inert gas.

10. If a mass is required of the empty flask, remove the inert gas balloon (insert the needle into a rubber stopper) and obtain the mass of the cool, empty flask with septum.
.png?revision=1)
Prepare the syringe for reagent transfer
11. Remove a long, flexible needle from a hot oven and immediately screw it into the barrel of a plastic syringe, freshly opened from its packaging (Figure 1.33a).
The syringe needs to be able to hold a volume larger than the volume of reagent intended to deliver in order to have enough flexibility to properly manipulate the reagent. For example, a \(10\)-\(\text{mL}\) syringe is too small to deliver \(10 \: \text{mL}\) of reagent, but could be used to deliver \(7 \: \text{mL}\) of reagent.
Hold the syringe such that the volume markings are visible, and connect the bent needle pointed upwards, so that when screwed on (which normally requires roughly a half turn) the bent needle points downwards with the numbers visible. With this approach, the volume markings can be seen while withdrawing liquid, instead of being inconveniently on the back face of the syringe (as in Figure 1.33d).
Glass syringes are often used with air-sensitive reagents dissolved in nonpolar solvents (e.g. hexanes), and require some further considerations that are not described in this section. Consult with your instructor for further instructions if you are to use a glass syringe.
12. Wrap the joint between the needle and syringe with Teflon tape or Parafilm (Figure 1.33b).
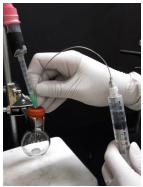
13. Flush the needle with inert gas: Insert the needle into the septum of an empty, dry flask attached to a balloon of inert gas (Figure 1.33c), withdraw a full volume of inert gas (Figure 1.33d), then expunge it into the air.
14. Immediately insert the flushed syringe into the reagent flask septum if nearby , or into a rubber stopper until the syringe is to be used.
.png?revision=1&size=bestfit&width=1109&height=422)
Withdraw the reagent
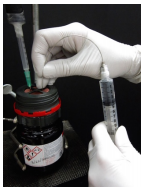
15. A balloon of inert gas must be inserted into the reagent bottle in order to equalize pressures during withdrawal of liquid. A platform (e.g. ring clamp/wire mesh) should also be used beneath the reagent bottle if positioned above the bench, to provide support in case the bottle slips from the grasp of the clamp.
16. Insert the needle of the flushed syringe into the septum of the air-sensitive reagent, and into the liquid (Figure 1.34a).
17. Slowly withdraw some liquid into the syringe. If the plunger is pulled back too quickly, the low pressure inside the syringe may cause air to seep through the joint between the needle and syringe (through or around the Teflon tape or Parafilm).
18. Inevitably a bubble will form in the syringe. Keeping the syringe upside down and vertical (Figure 1.34b), push on the plunger to force the gas pocket back into the bottle.
19. Slowly withdraw liquid to \(1\)-\(2 \: \text{mL}\) greater than the desired volume (Figure 1.34c), then keeping the syringe vertical, expunge liquid back to the desired volume (Figure 1.34d shows \(2.0 \: \text{mL}\) of liquid).
Withdrawing greater than the desired volume at first allows you to be confident that no gas bubbles are in the needle, and that you have measured an accurate volume.
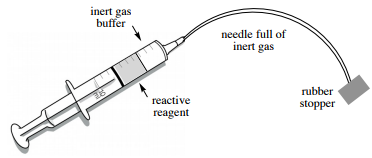
20. The needle should be full of the air-sensitive reagent at this point, and if it were removed from the bottle the reagent would come into contact with the atmosphere at the needle tip. This can have disastrous consequences if the reagent is quite reactive (smoking or potentially fire). Safety note: It is therefore essential that a "buffer" of inert gas (Figure 1.36) is placed between the air-sensitive reagent and the atmosphere before removing the needle.
.png?revision=1&size=bestfit&width=1103&height=411)
21. To create the "inert gas buffer":
a. Place the needle into the headspace of the reagent bottle (Figures 1.35 a+b).
b. Keeping the syringe upside down and vertical, gently pull back on the plunger until a bubble is seen in the barrel (approximately \(20\%\) of the syringe capacity, Figure 1.35c).
Immediately insert the syringe into the reaction flask septum if nearby, or into a rubber stopper if the flask is a distance away (Figure 1.35d).
.png?revision=1&size=bestfit&width=1026&height=439)
Deliver the reagent
22. With an inert gas balloon inserted in the reaction flask, place the syringe with reagent into the reaction flask septum. Keeping the syringe vertical, push on the plunger to first deliver the inert gas buffer (Figure 1.37a), then slowly deliver reagent to the flask.
23. Stop delivering reagent when the rubber plunger of the syringe meets the end of the barrel (Figure 1.37b). Do not invert the syringe and push out the residual liquid: this would result in delivering a larger volume of reagent than measured by the syringe.
24. The needle will still be full of the air-sensitive reagent, so with the needle tip still in the headspace of the reaction flask, withdraw an inert gas buffer into the syringe. Insert the needle tip into a rubber stopper if the cleaning station is not nearby.
Clean the needle and syringe
25. The syringe and needle should be cleaned as soon as possible, as over time deposits may form in the needle creating a plug. To clean the syringe and needle:
a. Withdraw into the syringe a few \(\text{mL}\) of clean solvent similar to the solvent used in the air-sensitive solution (Figure 1.37c). For example, the pictures in this section show transfer of a \(\ce{BH_3}\) reagent dissolved in THF. An ideal rinse solvent would then be THF. As THF was not available, diethyl ether was a good substituted as the two solvents are structurally similar (they are both ethers).
b. Expunge the solvent into a waste beaker. Repeat with another solvent rinse, being sure to rinse the entire area in the syringe where the reagent touched.
c. Rinse the syringe once with water to dissolve and remove any inorganic salts.
d. Further rinse the syringe and needle twice with a few \(\text{mL}\) of acetone.
e. Remove the needle from the syringe and retain for future use. The plastic syringe should not be reused, but instead thrown away: solvent present in many air-sensitive solutions degrade the rubber plunger on the syringe, causing them to swell and be ineffective after one use.
Inert Atmospheric Methods Summary
 |
 |
 |
 |
|
Prepare the balloon Fill a balloon with an inert gas (nitrogen or argon) to 7-8 inches in diameter. Twist the balloon to prevent gas from escaping, then attach a needle and insert into a rubber stopper to plug. |
Prepare the reaction flask Flame or oven dry a reaction flask (with stir bar, and fold a rubber septum over the joint while wearing thick gloves. Clamp the hot flask to the ring stand or latticework and insert the balloon of inert gas. Insert an "exit needle" and allow the flask to flush for ~5 minutes (to displace the air). Remove the exit needle and allow the flask to cool. |
Prepare the syringe Obtain a needle from the hot oven and screw it into the tip of a freshly opened plastic syringe. Wrap the needle/syringe joint with Teflon tape or Parafilm. Flush the syringe with inert gas by using an empty flask attached to a balloon of inert gas. Withdraw a volume of gas and expunge into the air. Insert the needle tip into a rubber stopper to plug. |
Withdraw the reagent Use the prepared syringe to slowly withdraw some reagent (or air may enter the syringe). Push out the gas bubble. Withdraw reagent to a slightly greater volume than needed, then expunge liquid to the exact volume. Place the needle in the headspace of the bottle and withdraw an "inert gas buffer", ~\(20\%\) of the volume of the syringe. Insert the needle into a rubber stopper for transport. |
 |
Deliver the reagent Into the reaction flask (with inert gas balloon), deliver first the inert gas buffer, then the air-sensitive reagent. Don't push out the residual liquid. |
 |
Withdraw an inert gas buffer into the mostly empty syringe. Clean by rinsing with two portions (few \(\text{mL}\) each) of solvent (similar to reagent solvent), then one portion of water and two portions of acetone. |


