
1.4.1: Cannula Transfer
- Page ID
- 491593
\( \newcommand{\vecs}[1]{\overset { \scriptstyle \rightharpoonup} {\mathbf{#1}} } \)
\( \newcommand{\vecd}[1]{\overset{-\!-\!\rightharpoonup}{\vphantom{a}\smash {#1}}} \)
\( \newcommand{\id}{\mathrm{id}}\) \( \newcommand{\Span}{\mathrm{span}}\)
( \newcommand{\kernel}{\mathrm{null}\,}\) \( \newcommand{\range}{\mathrm{range}\,}\)
\( \newcommand{\RealPart}{\mathrm{Re}}\) \( \newcommand{\ImaginaryPart}{\mathrm{Im}}\)
\( \newcommand{\Argument}{\mathrm{Arg}}\) \( \newcommand{\norm}[1]{\| #1 \|}\)
\( \newcommand{\inner}[2]{\langle #1, #2 \rangle}\)
\( \newcommand{\Span}{\mathrm{span}}\)
\( \newcommand{\id}{\mathrm{id}}\)
\( \newcommand{\Span}{\mathrm{span}}\)
\( \newcommand{\kernel}{\mathrm{null}\,}\)
\( \newcommand{\range}{\mathrm{range}\,}\)
\( \newcommand{\RealPart}{\mathrm{Re}}\)
\( \newcommand{\ImaginaryPart}{\mathrm{Im}}\)
\( \newcommand{\Argument}{\mathrm{Arg}}\)
\( \newcommand{\norm}[1]{\| #1 \|}\)
\( \newcommand{\inner}[2]{\langle #1, #2 \rangle}\)
\( \newcommand{\Span}{\mathrm{span}}\) \( \newcommand{\AA}{\unicode[.8,0]{x212B}}\)
\( \newcommand{\vectorA}[1]{\vec{#1}} % arrow\)
\( \newcommand{\vectorAt}[1]{\vec{\text{#1}}} % arrow\)
\( \newcommand{\vectorB}[1]{\overset { \scriptstyle \rightharpoonup} {\mathbf{#1}} } \)
\( \newcommand{\vectorC}[1]{\textbf{#1}} \)
\( \newcommand{\vectorD}[1]{\overrightarrow{#1}} \)
\( \newcommand{\vectorDt}[1]{\overrightarrow{\text{#1}}} \)
\( \newcommand{\vectE}[1]{\overset{-\!-\!\rightharpoonup}{\vphantom{a}\smash{\mathbf {#1}}}} \)
\( \newcommand{\vecs}[1]{\overset { \scriptstyle \rightharpoonup} {\mathbf{#1}} } \)
\( \newcommand{\vecd}[1]{\overset{-\!-\!\rightharpoonup}{\vphantom{a}\smash {#1}}} \)
\(\newcommand{\avec}{\mathbf a}\) \(\newcommand{\bvec}{\mathbf b}\) \(\newcommand{\cvec}{\mathbf c}\) \(\newcommand{\dvec}{\mathbf d}\) \(\newcommand{\dtil}{\widetilde{\mathbf d}}\) \(\newcommand{\evec}{\mathbf e}\) \(\newcommand{\fvec}{\mathbf f}\) \(\newcommand{\nvec}{\mathbf n}\) \(\newcommand{\pvec}{\mathbf p}\) \(\newcommand{\qvec}{\mathbf q}\) \(\newcommand{\svec}{\mathbf s}\) \(\newcommand{\tvec}{\mathbf t}\) \(\newcommand{\uvec}{\mathbf u}\) \(\newcommand{\vvec}{\mathbf v}\) \(\newcommand{\wvec}{\mathbf w}\) \(\newcommand{\xvec}{\mathbf x}\) \(\newcommand{\yvec}{\mathbf y}\) \(\newcommand{\zvec}{\mathbf z}\) \(\newcommand{\rvec}{\mathbf r}\) \(\newcommand{\mvec}{\mathbf m}\) \(\newcommand{\zerovec}{\mathbf 0}\) \(\newcommand{\onevec}{\mathbf 1}\) \(\newcommand{\real}{\mathbb R}\) \(\newcommand{\twovec}[2]{\left[\begin{array}{r}#1 \\ #2 \end{array}\right]}\) \(\newcommand{\ctwovec}[2]{\left[\begin{array}{c}#1 \\ #2 \end{array}\right]}\) \(\newcommand{\threevec}[3]{\left[\begin{array}{r}#1 \\ #2 \\ #3 \end{array}\right]}\) \(\newcommand{\cthreevec}[3]{\left[\begin{array}{c}#1 \\ #2 \\ #3 \end{array}\right]}\) \(\newcommand{\fourvec}[4]{\left[\begin{array}{r}#1 \\ #2 \\ #3 \\ #4 \end{array}\right]}\) \(\newcommand{\cfourvec}[4]{\left[\begin{array}{c}#1 \\ #2 \\ #3 \\ #4 \end{array}\right]}\) \(\newcommand{\fivevec}[5]{\left[\begin{array}{r}#1 \\ #2 \\ #3 \\ #4 \\ #5 \\ \end{array}\right]}\) \(\newcommand{\cfivevec}[5]{\left[\begin{array}{c}#1 \\ #2 \\ #3 \\ #4 \\ #5 \\ \end{array}\right]}\) \(\newcommand{\mattwo}[4]{\left[\begin{array}{rr}#1 \amp #2 \\ #3 \amp #4 \\ \end{array}\right]}\) \(\newcommand{\laspan}[1]{\text{Span}\{#1\}}\) \(\newcommand{\bcal}{\cal B}\) \(\newcommand{\ccal}{\cal C}\) \(\newcommand{\scal}{\cal S}\) \(\newcommand{\wcal}{\cal W}\) \(\newcommand{\ecal}{\cal E}\) \(\newcommand{\coords}[2]{\left\{#1\right\}_{#2}}\) \(\newcommand{\gray}[1]{\color{gray}{#1}}\) \(\newcommand{\lgray}[1]{\color{lightgray}{#1}}\) \(\newcommand{\rank}{\operatorname{rank}}\) \(\newcommand{\row}{\text{Row}}\) \(\newcommand{\col}{\text{Col}}\) \(\renewcommand{\row}{\text{Row}}\) \(\newcommand{\nul}{\text{Nul}}\) \(\newcommand{\var}{\text{Var}}\) \(\newcommand{\corr}{\text{corr}}\) \(\newcommand{\len}[1]{\left|#1\right|}\) \(\newcommand{\bbar}{\overline{\bvec}}\) \(\newcommand{\bhat}{\widehat{\bvec}}\) \(\newcommand{\bperp}{\bvec^\perp}\) \(\newcommand{\xhat}{\widehat{\xvec}}\) \(\newcommand{\vhat}{\widehat{\vvec}}\) \(\newcommand{\uhat}{\widehat{\uvec}}\) \(\newcommand{\what}{\widehat{\wvec}}\) \(\newcommand{\Sighat}{\widehat{\Sigma}}\) \(\newcommand{\lt}{<}\) \(\newcommand{\gt}{>}\) \(\newcommand{\amp}{&}\) \(\definecolor{fillinmathshade}{gray}{0.9}\)Cannula transfers are routinely used during the preparation and manipulation of air- and moisture-sensitive compounds to transfer solvents, solutions and suspensions between vessels. Cannulae are typically made of stainless steel or Teflon and come in a range of gauges depending on the volume of liquid to be transferred.
Step 1: Cycle a solvent ampoule onto the Schlenk line with a minimum of three vacuum/inert gas cycles.
Cycling a solvent ampoule onto the Schlenk line.
Step 2: Once cycled onto the line, replace the Teflon tap with a rubber septum under a positive pressure of inert gas. Insert a bleed needle (also called an exit or vent needle) into the septum for 5-10 seconds to purge out any air that is introduced into the ampoule. Ensure that the bleed needle only just pierces the septum so that the air/inert gas is forced out of the needle.

A solvent ampoule ready for cannula transfer.
Step 3: Insert a cannula through the septum on the solvent ampoule and allow inert gas to purge through the cannula for 15-30 seconds before inserting the cannula into the septum on the receiving flask.

Inserting a cannula into the solvent ampoule and receiving flask.
Step 4: The cannula is lowered down into the solvent, then the stopcock on the receiving flask in closed, and a bleed needle is inserted into the septum on the receiving flask. This establishes a pressure differential which will transfer the liquid from the transfer flask into the receiving flask (inert gas flow marked with red arrows).

Transferring solvent from the ampoule to the receiving flask.
Step 5: Once the desired volume of solvent has been transferred, the cannula is raised above the liquid level, the stopcock on the receiving flask is opened to inert gas, and the bleed needle is removed. The cannula is then removed from the receiving flask and transfer flask, and the septa are replaced with the corresponding stopper or Teflon tap.
This same technique can also be used to transfer solutions, slurries or liquid reagents between flasks. In these cases, the cannula should be cleaned immediately after use (typically with acetone and water).
Dropwise Addition
Step 1: Replace the glass stoppers on the transfer and receiving flask with rubber septa under a positive pressure of inert gas. Insert a cannula in through the septum of the transfer flask and purge for 15-30 seconds before inserting through the septum of the receiving flask.

Transfer and receiving flasks prior to dropwise addition.
Step 2: Lower the cannula into the solution of the transfer flask. Ensure that the bottom of the cannula in the transfer flask is higher than the bottom of the cannula in the receiving flask.

Lowering the cannula into the solution to be transferred.
Step 3: Insert a bleed needle through the septum on the receiving flask and close the stopcock to stop the flow of inert gas and initiate the cannula transfer. As soon as the first drop of solution passes through the cannula, open the stopcock on the receiving flask and remove the bleed needle to re-equalise the gas pressure and create a syphon.

Initiating the transfer by establishing a pressure differential.
Step 4: The rate of addition can be controlled by adjusting the relative height of the transfer and receiving flasks – raising the level of the transfer flask or lowering the cannula into the receiving flask will increase the rate of addition and vice versa.

Dropwise addition via cannula transfer.
Step 5: Once all of the solution from the transfer flask has been added, remove the cannula from both flasks and replace the rubber septa with greased ground glass stoppers.

Reaction flasks after addition.
Cleaning Cannulae
Cannulae can be easily cleaned by flushing them with suitable solvents or quenching solutions. For typical organic reaction mixtures, acetone and water are used, whilst cannulae used to transfer phosphines or thiols are typically washed with bleach. In any case, cannulae should be cleaned immediately after use to prevent blocking.
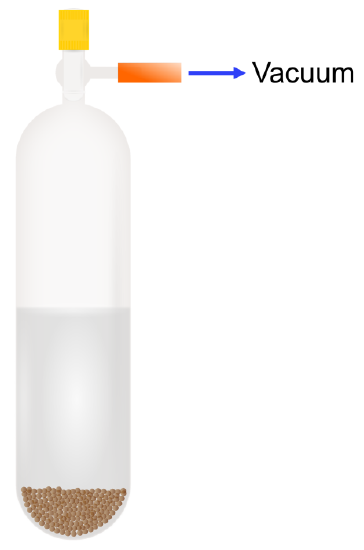
Using a water aspirator or diaphragm pump to pull a vacuum provides a simple way of pulling the cleaning solvents/solutions through the cannulae. Ensure that the final rinse is with a low boiling organic solvent (typically acetone) and allow to air dry before placing into the lower shelf (or away from clean and dry cannulae) of an oven.

Cleaning a cannula with acetone.