Proper Use of Balances
- Page ID
- 74518
\( \newcommand{\vecs}[1]{\overset { \scriptstyle \rightharpoonup} {\mathbf{#1}} } \)
\( \newcommand{\vecd}[1]{\overset{-\!-\!\rightharpoonup}{\vphantom{a}\smash {#1}}} \)
\( \newcommand{\dsum}{\displaystyle\sum\limits} \)
\( \newcommand{\dint}{\displaystyle\int\limits} \)
\( \newcommand{\dlim}{\displaystyle\lim\limits} \)
\( \newcommand{\id}{\mathrm{id}}\) \( \newcommand{\Span}{\mathrm{span}}\)
( \newcommand{\kernel}{\mathrm{null}\,}\) \( \newcommand{\range}{\mathrm{range}\,}\)
\( \newcommand{\RealPart}{\mathrm{Re}}\) \( \newcommand{\ImaginaryPart}{\mathrm{Im}}\)
\( \newcommand{\Argument}{\mathrm{Arg}}\) \( \newcommand{\norm}[1]{\| #1 \|}\)
\( \newcommand{\inner}[2]{\langle #1, #2 \rangle}\)
\( \newcommand{\Span}{\mathrm{span}}\)
\( \newcommand{\id}{\mathrm{id}}\)
\( \newcommand{\Span}{\mathrm{span}}\)
\( \newcommand{\kernel}{\mathrm{null}\,}\)
\( \newcommand{\range}{\mathrm{range}\,}\)
\( \newcommand{\RealPart}{\mathrm{Re}}\)
\( \newcommand{\ImaginaryPart}{\mathrm{Im}}\)
\( \newcommand{\Argument}{\mathrm{Arg}}\)
\( \newcommand{\norm}[1]{\| #1 \|}\)
\( \newcommand{\inner}[2]{\langle #1, #2 \rangle}\)
\( \newcommand{\Span}{\mathrm{span}}\) \( \newcommand{\AA}{\unicode[.8,0]{x212B}}\)
\( \newcommand{\vectorA}[1]{\vec{#1}} % arrow\)
\( \newcommand{\vectorAt}[1]{\vec{\text{#1}}} % arrow\)
\( \newcommand{\vectorB}[1]{\overset { \scriptstyle \rightharpoonup} {\mathbf{#1}} } \)
\( \newcommand{\vectorC}[1]{\textbf{#1}} \)
\( \newcommand{\vectorD}[1]{\overrightarrow{#1}} \)
\( \newcommand{\vectorDt}[1]{\overrightarrow{\text{#1}}} \)
\( \newcommand{\vectE}[1]{\overset{-\!-\!\rightharpoonup}{\vphantom{a}\smash{\mathbf {#1}}}} \)
\( \newcommand{\vecs}[1]{\overset { \scriptstyle \rightharpoonup} {\mathbf{#1}} } \)
\(\newcommand{\longvect}{\overrightarrow}\)
\( \newcommand{\vecd}[1]{\overset{-\!-\!\rightharpoonup}{\vphantom{a}\smash {#1}}} \)
\(\newcommand{\avec}{\mathbf a}\) \(\newcommand{\bvec}{\mathbf b}\) \(\newcommand{\cvec}{\mathbf c}\) \(\newcommand{\dvec}{\mathbf d}\) \(\newcommand{\dtil}{\widetilde{\mathbf d}}\) \(\newcommand{\evec}{\mathbf e}\) \(\newcommand{\fvec}{\mathbf f}\) \(\newcommand{\nvec}{\mathbf n}\) \(\newcommand{\pvec}{\mathbf p}\) \(\newcommand{\qvec}{\mathbf q}\) \(\newcommand{\svec}{\mathbf s}\) \(\newcommand{\tvec}{\mathbf t}\) \(\newcommand{\uvec}{\mathbf u}\) \(\newcommand{\vvec}{\mathbf v}\) \(\newcommand{\wvec}{\mathbf w}\) \(\newcommand{\xvec}{\mathbf x}\) \(\newcommand{\yvec}{\mathbf y}\) \(\newcommand{\zvec}{\mathbf z}\) \(\newcommand{\rvec}{\mathbf r}\) \(\newcommand{\mvec}{\mathbf m}\) \(\newcommand{\zerovec}{\mathbf 0}\) \(\newcommand{\onevec}{\mathbf 1}\) \(\newcommand{\real}{\mathbb R}\) \(\newcommand{\twovec}[2]{\left[\begin{array}{r}#1 \\ #2 \end{array}\right]}\) \(\newcommand{\ctwovec}[2]{\left[\begin{array}{c}#1 \\ #2 \end{array}\right]}\) \(\newcommand{\threevec}[3]{\left[\begin{array}{r}#1 \\ #2 \\ #3 \end{array}\right]}\) \(\newcommand{\cthreevec}[3]{\left[\begin{array}{c}#1 \\ #2 \\ #3 \end{array}\right]}\) \(\newcommand{\fourvec}[4]{\left[\begin{array}{r}#1 \\ #2 \\ #3 \\ #4 \end{array}\right]}\) \(\newcommand{\cfourvec}[4]{\left[\begin{array}{c}#1 \\ #2 \\ #3 \\ #4 \end{array}\right]}\) \(\newcommand{\fivevec}[5]{\left[\begin{array}{r}#1 \\ #2 \\ #3 \\ #4 \\ #5 \\ \end{array}\right]}\) \(\newcommand{\cfivevec}[5]{\left[\begin{array}{c}#1 \\ #2 \\ #3 \\ #4 \\ #5 \\ \end{array}\right]}\) \(\newcommand{\mattwo}[4]{\left[\begin{array}{rr}#1 \amp #2 \\ #3 \amp #4 \\ \end{array}\right]}\) \(\newcommand{\laspan}[1]{\text{Span}\{#1\}}\) \(\newcommand{\bcal}{\cal B}\) \(\newcommand{\ccal}{\cal C}\) \(\newcommand{\scal}{\cal S}\) \(\newcommand{\wcal}{\cal W}\) \(\newcommand{\ecal}{\cal E}\) \(\newcommand{\coords}[2]{\left\{#1\right\}_{#2}}\) \(\newcommand{\gray}[1]{\color{gray}{#1}}\) \(\newcommand{\lgray}[1]{\color{lightgray}{#1}}\) \(\newcommand{\rank}{\operatorname{rank}}\) \(\newcommand{\row}{\text{Row}}\) \(\newcommand{\col}{\text{Col}}\) \(\renewcommand{\row}{\text{Row}}\) \(\newcommand{\nul}{\text{Nul}}\) \(\newcommand{\var}{\text{Var}}\) \(\newcommand{\corr}{\text{corr}}\) \(\newcommand{\len}[1]{\left|#1\right|}\) \(\newcommand{\bbar}{\overline{\bvec}}\) \(\newcommand{\bhat}{\widehat{\bvec}}\) \(\newcommand{\bperp}{\bvec^\perp}\) \(\newcommand{\xhat}{\widehat{\xvec}}\) \(\newcommand{\vhat}{\widehat{\vvec}}\) \(\newcommand{\uhat}{\widehat{\uvec}}\) \(\newcommand{\what}{\widehat{\wvec}}\) \(\newcommand{\Sighat}{\widehat{\Sigma}}\) \(\newcommand{\lt}{<}\) \(\newcommand{\gt}{>}\) \(\newcommand{\amp}{&}\) \(\definecolor{fillinmathshade}{gray}{0.9}\)During the course you will be asked to make a variety of weighings. It is important for you to realize with what sort of accuracy these weighings should be made. Depending on the desired accuracy you should use the proper balance to make your weighings. There are two types of balances available to you in this course:
Top-loading balances
Located in the room adjacent to the laboratory. These will weigh to an accuracy of ± 1 mg and are suitable for most weighings of amounts that are specified to only two or three significant figures. Directions for the use of these balances are posted in the balance room.
Analytical balances
Also located in the room adjacent to the laboratory. These will weigh to an accuracy of ± 0.1 mg and must be used whenever you desire four or more significant figure accuracy. This will be the case when you weigh out samples of an unknown, primary standards or when taking crucibles to constant weight. Directions for the use of these balances are posted in the balance room.
VARIOUS TYPES OF WEIGHING
When mass amounts are specified in chemical procedures the following terms are commonly used:
a. "Weigh out about 2 g of ...... " This statement means that you are required to weigh an amount of approximately two grams. The accuracy to which this mass amount needs to known is not high and the top-loading balance will suffice.
b. "Accurately weigh out about 0.2 g of ...." This statement means that you should, with the aid of the analytical balance, weigh out an amount that is close to 0.2 g, but you must know the exact amount to an accuracy of ± 0.1 mg. Note that this does not mean that you must weigh out exactly 0.2000 g. An amount between 0.1900 g and 0.2100 g is perfectly acceptable. However, you must know the exact amount to the nearest tenth of a milligram. When weighing out triplicate samples it is not necessary that all three weights be exactly the same, indeed, it is poor procedure to attempt to do so.
RULES FOR ANALYTICAL BALANCES
The following rules summarize those procedures which must be followed in order to obtain accurate and reliable mass measurements with a single-pan analytical balance. Adherence to these rules will, at the same time, prevent damage to the balance.
- Close the balance door, while weighing an object, in order to prevent air currents from disturbing the reading. When finished, the operator should close the balance door to prevent dust and dirt from entering the balance.
- Only glass, ceramic, metal or plastic objects and containers should be placed in direct contact with the balance pan.
- Do not handle objects to be weighed with bare hands. Moisture, grease and dirt on you fingers will affect the weight of the objects.
- To be weighed accurately, all objects must be at room temperature. A warm object sets up convection currents inside the balance enclosure, which will make an object appear lighter than it really is. Also, warm air inside the enclosure is less dense than the air that it displaces and this also leads to a negative determinate error.
- Never weigh chemicals directly in contact with the balance pan. Use containers such as beakers, flasks and weighing bottles.
- All objects and materials that have recently been removed from a desiccator will absorb moisture and thereby gain weight. It is therefore good practice to record weights after identical time intervals. For example if you are taking crucibles to constant weight. Always record the weight of the crucible exactly 5 seconds after having placed the crucible on the balance pan. Using this technique it is possible to minimize the effect of moisture absorption.
- The use of weighing paper must be strictly avoided when using an analytical balance.
- Do not spill chemicals inside the balance enclosure. If a spill occurs, clean it up immediately.
Discussion
The images shown on this page are supplementary to the information given on the use of laboratory balances in your text book. This Web page and all direct links on it are in the public domain and may be copied without restriction.
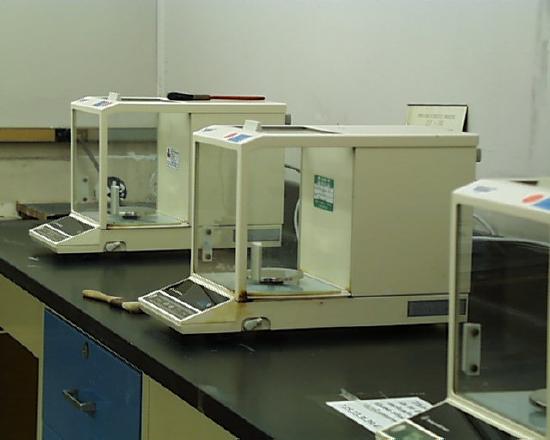
One of the electronic analytical balances we shall be using is shown at the right.
Your objective is to develop techniques which allow you to transfer samples of material from one container to another and to have confidence that you know the amounts transferred to a precision of one tenth of a milligram or one ten-thousanth of a gram, ±0.0001 g.
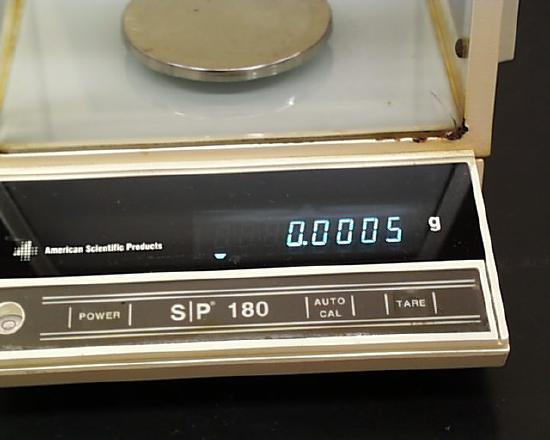
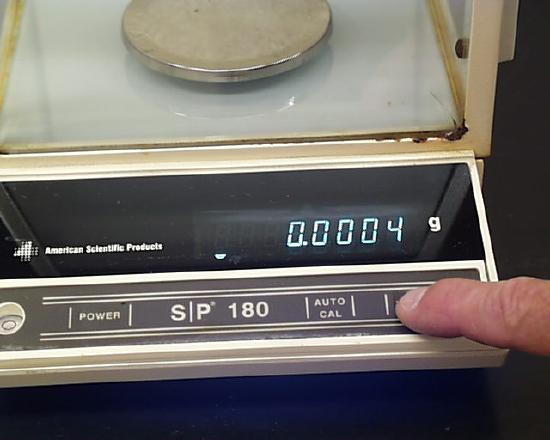
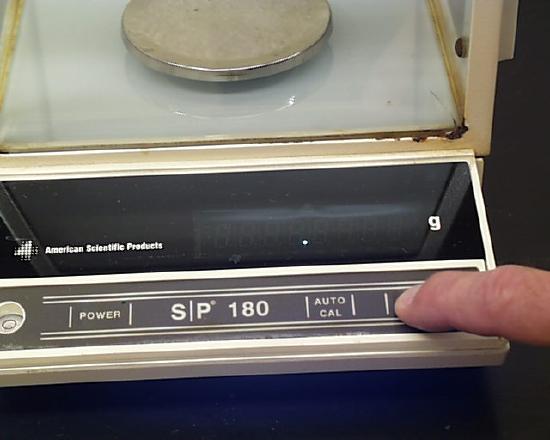
First, before weighing anything on this analytical balance, it needs to be "tared," or recalibrated to read 0.0000 g. When first turned on, or when left by the previous user, the balance may indicate something other than 0.0000 g. The Tare button needs to be pressed and released to effect this recalibration. The four images below illustrate this process.
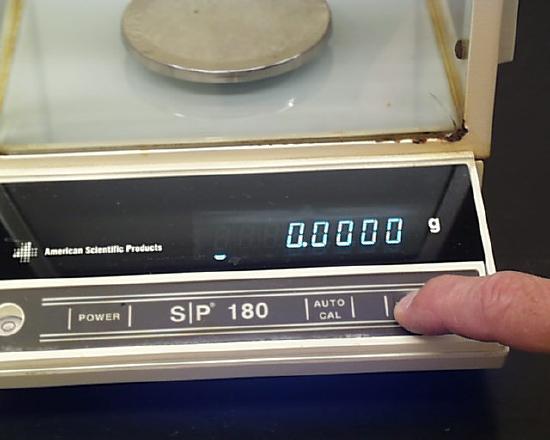
An analytical balance is so sensitive that it can detect the mass of a single grain of a chemical substance. Thus, if a method of direct weighing is used, the substance ought to be added to the tared container which will hold it, NEVER directly to the pan or even to weighing paper placed on the pan. The container used should be completely dry and at room temperature, never at an elevated or reduced temperature. Even slight temperature differences can produce APPARENT changes in mass of the container. Finally, the container ought to be completely dry, inside and out. All that having been said, here are some images showing various correct ways of carrying out weighings using an analytical balance.
Regardless of which method illustrated below is used accurately to weigh a sample, the sample, placed in a weighing bottle set in the upturned cap in a beaker with a watch glass placed on top, must be first dried in the oven. You may identify your sample by marking the beaker but DO NOT mark the weighing bottle.
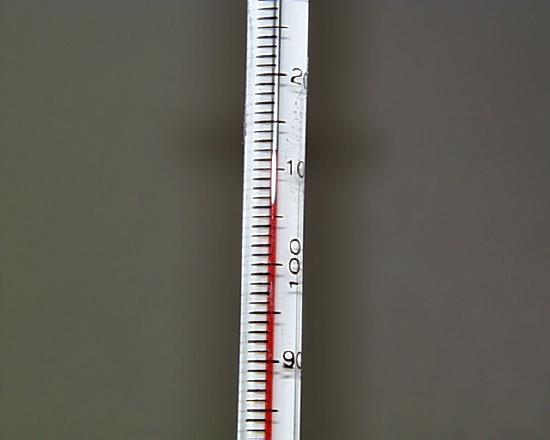
The ovens are kept at 110oC, but our ovens may show slightly lower temperatures owing to the doors being opened repeatedly during normal laboratory activities.
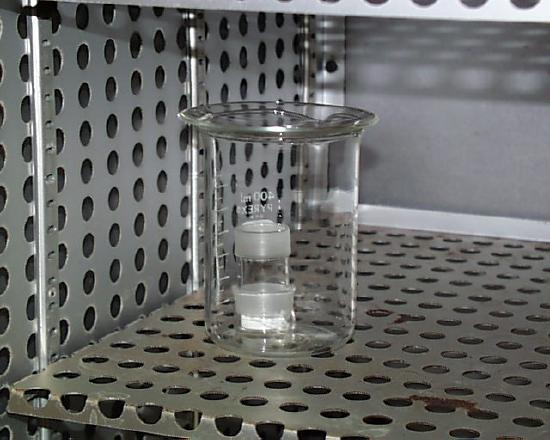
The tried-and-true method of transferring a precisely weighed sample uses "weighing by difference," shown here. The empty balance is tared, then the weighing bottle with cap is placed on the pan and weighed to ±0.0001 g.
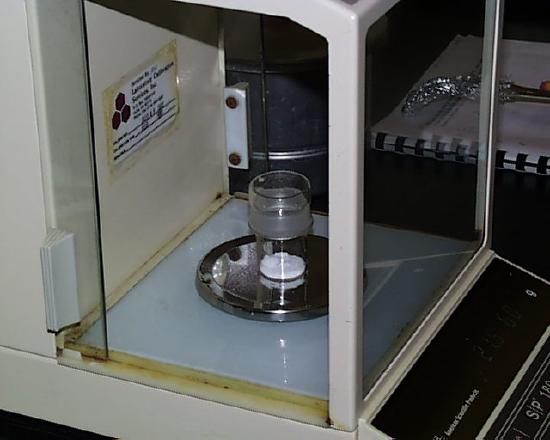
The weighing bottle is removed in a manner which avoids the transference of oil or other matter from one's fingers.
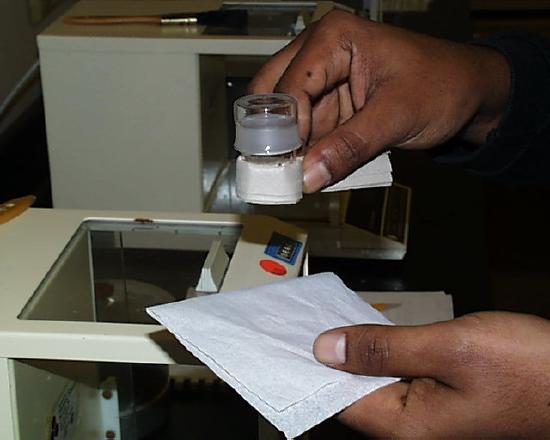
The cap is likewise removed from the weighing bottle.
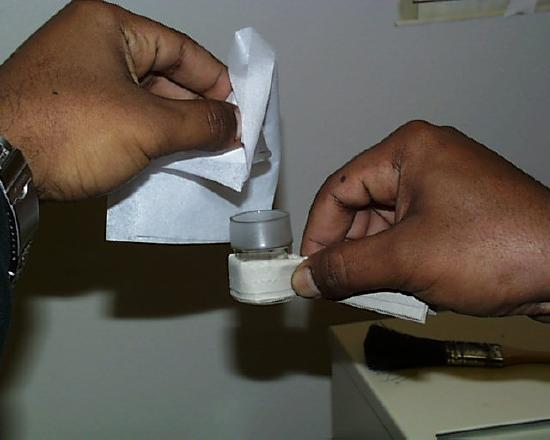
The weighing bottle is tipped above the container to receive the sample and a small amount is allowed to fall out of the weighing bottle. The weighing bottle is tipped back up and tapped gently to make sure all of the substance falls back in the bottle and doesn't remain on the bottle rim. The cap is replaced and the bottle weighed once again. The difference between the first and second weighings represents the amount transferred. If your sample has a tendency to absorb water and thus to gain weight when exposed to the moisture of the air, this method MUST be used to minimize exposure to the atmosphere. Still, the method is not foolproof and has its own perils:
- several transfers may be necessary until an amount close to that needed is added to the receiving container,
- too much may be transferred the first time, forcing one to discard the entire sample ("Drat and blast, I have to start over," is a common epithet heard in weighing rooms),
- sample which remains on the weighing bottle rim may be lost and produce a weighing error. This peril is repeated each time a transfer is attempted.
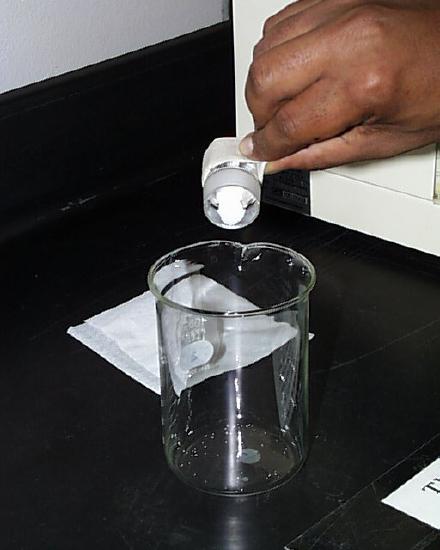
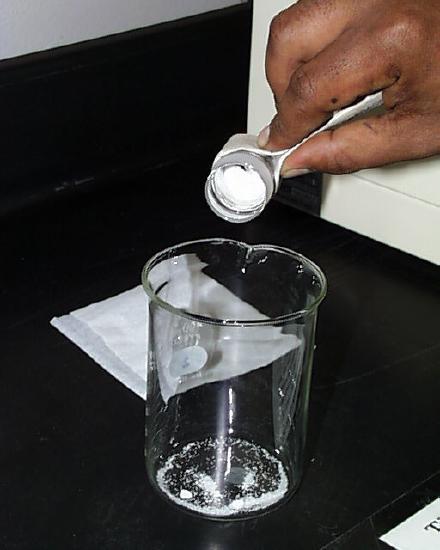
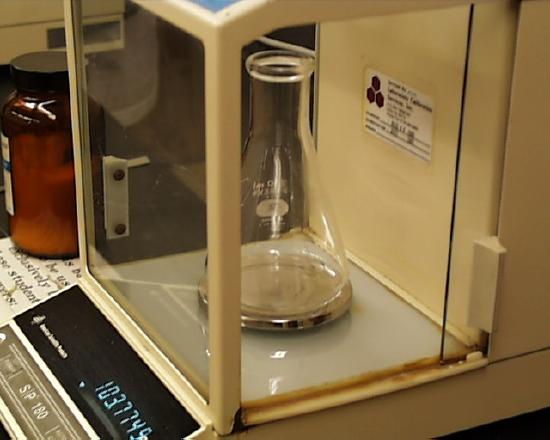
The direct transfer of samples to receiving containers is possible using modern analytical balances which allow one to tare a receiving container before the transfer is begun. Note the Erlenmeyer flask on the pan. The Erlenmeyer flask needs to be completely dry so that there will be no systematic error due to the evaporation of water.

A spatula can be used to remove a sample from the weighing bottle and the sample placed directly into the flask.
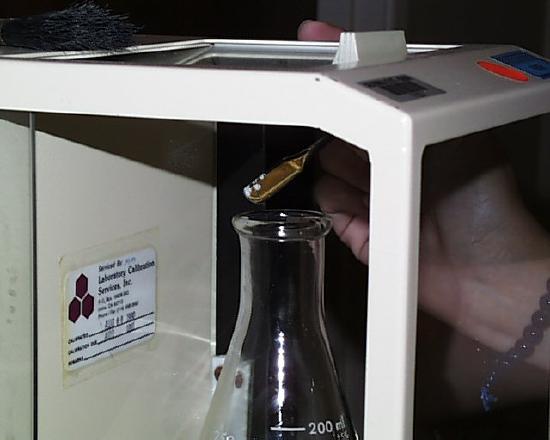

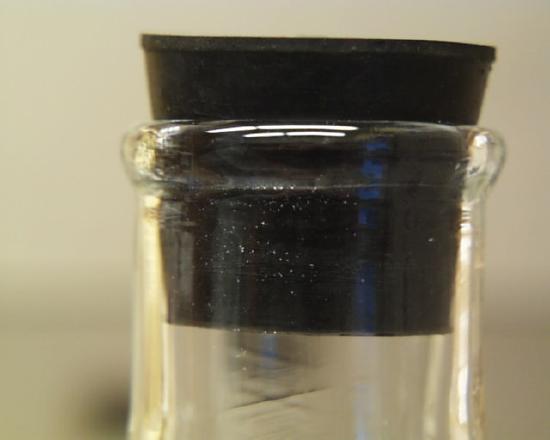
This method has some perils associated with it: (1) one risks losing the sample on the outside of the Erlenmeyer flask due to the small diameter of the flask neck and (2) the point of entry is rather high; one must have good coordination to orient the spatula above the mouth of the flask. Advantage: The sample is placed directly into the flask and the mass read is that of the sample added. Eternal vigilance being the price of good results, note in the image at the right the particles of sodium carbonate which didn't quite make it to the bottom of the flask. The titration yielding the molarity of the hydrochloric acid standard for the percent sodium carbonate in soda ash experiment showed a precision within one part per thousand with the other titrated samples but only because both the stopper, which was removed gently before the titration, and the inside of the flask neck were rinsed carefully to dissolve the particles of carbonate and to allow them to drain into the body of the flask.
The mass limit of our analytical balances beyond which one receives an error message is 200.0000 grams. Even this 400 mL beaker can be placed on the pan. Note that its mass is just above 149 g.
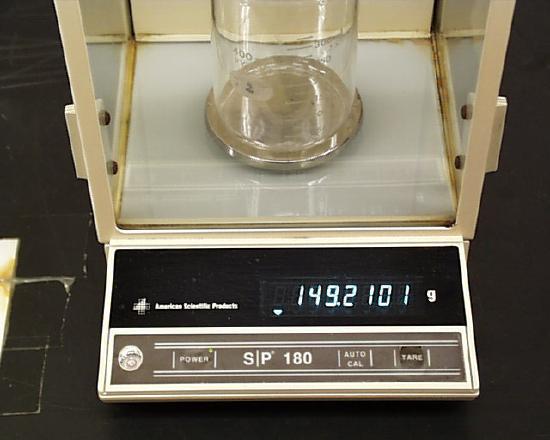

Once tared, the sample may be placed directly into the beaker, as shown below.
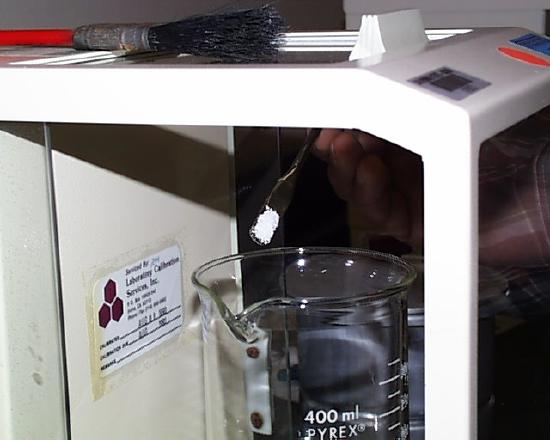
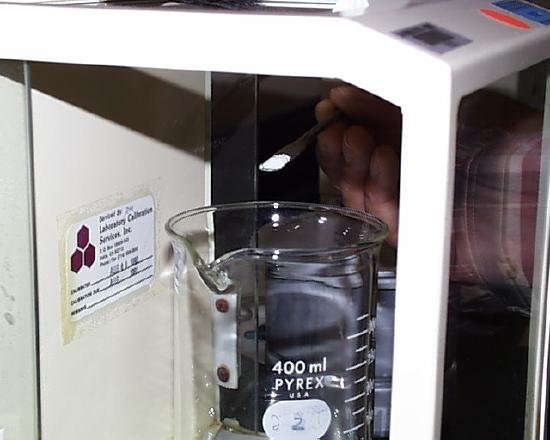
The perils using this method are similar to those encountered during a direct transfer to an Erlenmeyer flask. The beaker must be clean, dry and at the same temperature as the room and the balance. The mouth of the beaker is rather high, so one must have good coordination to orient the spatula over the mouth without knocking it against the beaker or the windows of the balance, thus losing the sample.
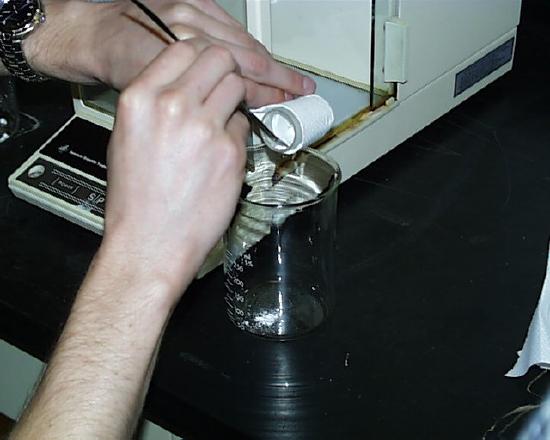
You can still weigh your sample directly but do it in a manner which doesn't require as much care and coordination as that illustrated above by removing the beaker from the pan, adding your sample and replacing the beaker on the pan. The advantage of this method is that you have more room for sample addition and the placement of your hands, arms and the transfer spatula is less awkward, but the disadvantage is that you must check the weight of your beaker and sample after each addition; it is not good practice to remove excess sample from the beaker if you add too much. You must be sure that the removed beaker is placed on a clean and dry part of the bench so to avoid picking up any particles which will change your weight and decrease your accuracy. The removal and replacement of the beaker must also be done with a small folded piece of paper or paper towel so as to avoid adding weight to the beaker in the form of fingerprints.
Using the Top Loading Balance
Several top loading balances, precise to ±0.001 g, are available for your use in the balance room. Many professors of Quantitative Analysis do not allow them to be placed in the same room where the analytical balances are kept because students often use them to save time when they ought to be using the analytical balances.
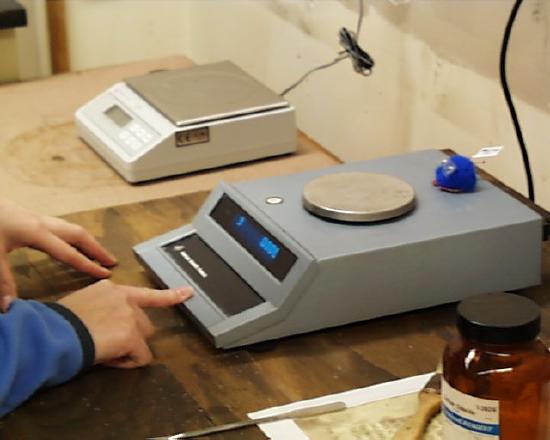
First of all, the top loading balances are less precise by a factor of 10 and secondly, air currents around the pan can reduce that precision by as much as another factor of 3 or 4. But the top loading balance is the instrument of choice where precision is not of great importance. Here is one our top loading balances. It can be "tared" by pressing the front bar, as shown at the right
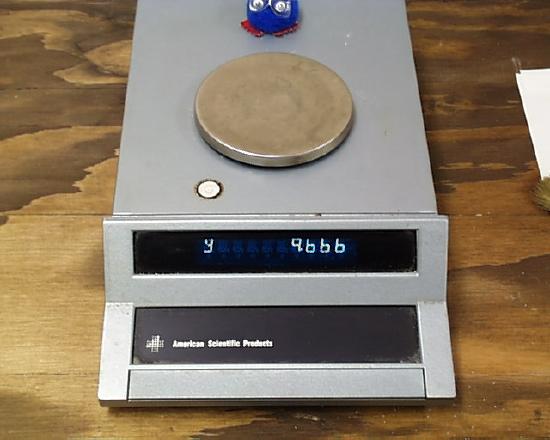
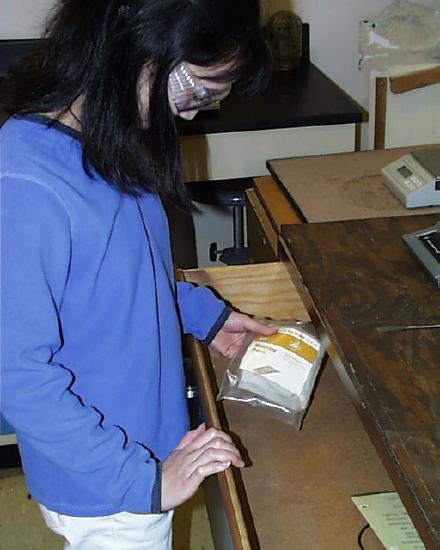
In the drawer below the top loading balances you will find weighing paper. This paper must be used ONLY on the top loading balances, NEVER on the analytical balances, because there is always the chance that some of the substance being weighed will stick to the weighing paper after the weight has been recorded thus producing an error on the low side. The precision of the top loading balances is ±0.001 and it is possible to see particles which have a mass of 0.001 g. Moreover, often one wants to weigh a reagent which is to be used in excess, and a precision of ±0.001 is well beyond what is needed for such a weighing.

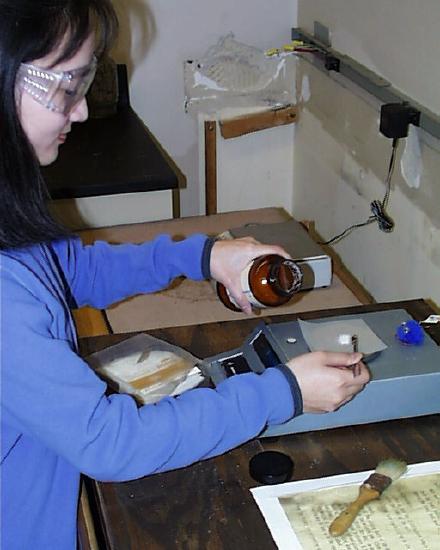
Once a piece of weighing paper has been placed on the pan, and the balance set to 0.000 by taring it, a sample can be removed from the container holding it and placed on the pan, repeating the process as many times as are necessary until the weight of material needed is achieved, as shown here.
Contributors
- Ulrich de la Camp and Oliver Seely (California State University, Dominguez Hills).


