
1: Google email account for class
- Page ID
- 431575

\( \newcommand{\vecs}[1]{\overset { \scriptstyle \rightharpoonup} {\mathbf{#1}} } \)
\( \newcommand{\vecd}[1]{\overset{-\!-\!\rightharpoonup}{\vphantom{a}\smash {#1}}} \)
\( \newcommand{\id}{\mathrm{id}}\) \( \newcommand{\Span}{\mathrm{span}}\)
( \newcommand{\kernel}{\mathrm{null}\,}\) \( \newcommand{\range}{\mathrm{range}\,}\)
\( \newcommand{\RealPart}{\mathrm{Re}}\) \( \newcommand{\ImaginaryPart}{\mathrm{Im}}\)
\( \newcommand{\Argument}{\mathrm{Arg}}\) \( \newcommand{\norm}[1]{\| #1 \|}\)
\( \newcommand{\inner}[2]{\langle #1, #2 \rangle}\)
\( \newcommand{\Span}{\mathrm{span}}\)
\( \newcommand{\id}{\mathrm{id}}\)
\( \newcommand{\Span}{\mathrm{span}}\)
\( \newcommand{\kernel}{\mathrm{null}\,}\)
\( \newcommand{\range}{\mathrm{range}\,}\)
\( \newcommand{\RealPart}{\mathrm{Re}}\)
\( \newcommand{\ImaginaryPart}{\mathrm{Im}}\)
\( \newcommand{\Argument}{\mathrm{Arg}}\)
\( \newcommand{\norm}[1]{\| #1 \|}\)
\( \newcommand{\inner}[2]{\langle #1, #2 \rangle}\)
\( \newcommand{\Span}{\mathrm{span}}\) \( \newcommand{\AA}{\unicode[.8,0]{x212B}}\)
\( \newcommand{\vectorA}[1]{\vec{#1}} % arrow\)
\( \newcommand{\vectorAt}[1]{\vec{\text{#1}}} % arrow\)
\( \newcommand{\vectorB}[1]{\overset { \scriptstyle \rightharpoonup} {\mathbf{#1}} } \)
\( \newcommand{\vectorC}[1]{\textbf{#1}} \)
\( \newcommand{\vectorD}[1]{\overrightarrow{#1}} \)
\( \newcommand{\vectorDt}[1]{\overrightarrow{\text{#1}}} \)
\( \newcommand{\vectE}[1]{\overset{-\!-\!\rightharpoonup}{\vphantom{a}\smash{\mathbf {#1}}}} \)
\( \newcommand{\vecs}[1]{\overset { \scriptstyle \rightharpoonup} {\mathbf{#1}} } \)
\( \newcommand{\vecd}[1]{\overset{-\!-\!\rightharpoonup}{\vphantom{a}\smash {#1}}} \)
\(\newcommand{\avec}{\mathbf a}\) \(\newcommand{\bvec}{\mathbf b}\) \(\newcommand{\cvec}{\mathbf c}\) \(\newcommand{\dvec}{\mathbf d}\) \(\newcommand{\dtil}{\widetilde{\mathbf d}}\) \(\newcommand{\evec}{\mathbf e}\) \(\newcommand{\fvec}{\mathbf f}\) \(\newcommand{\nvec}{\mathbf n}\) \(\newcommand{\pvec}{\mathbf p}\) \(\newcommand{\qvec}{\mathbf q}\) \(\newcommand{\svec}{\mathbf s}\) \(\newcommand{\tvec}{\mathbf t}\) \(\newcommand{\uvec}{\mathbf u}\) \(\newcommand{\vvec}{\mathbf v}\) \(\newcommand{\wvec}{\mathbf w}\) \(\newcommand{\xvec}{\mathbf x}\) \(\newcommand{\yvec}{\mathbf y}\) \(\newcommand{\zvec}{\mathbf z}\) \(\newcommand{\rvec}{\mathbf r}\) \(\newcommand{\mvec}{\mathbf m}\) \(\newcommand{\zerovec}{\mathbf 0}\) \(\newcommand{\onevec}{\mathbf 1}\) \(\newcommand{\real}{\mathbb R}\) \(\newcommand{\twovec}[2]{\left[\begin{array}{r}#1 \\ #2 \end{array}\right]}\) \(\newcommand{\ctwovec}[2]{\left[\begin{array}{c}#1 \\ #2 \end{array}\right]}\) \(\newcommand{\threevec}[3]{\left[\begin{array}{r}#1 \\ #2 \\ #3 \end{array}\right]}\) \(\newcommand{\cthreevec}[3]{\left[\begin{array}{c}#1 \\ #2 \\ #3 \end{array}\right]}\) \(\newcommand{\fourvec}[4]{\left[\begin{array}{r}#1 \\ #2 \\ #3 \\ #4 \end{array}\right]}\) \(\newcommand{\cfourvec}[4]{\left[\begin{array}{c}#1 \\ #2 \\ #3 \\ #4 \end{array}\right]}\) \(\newcommand{\fivevec}[5]{\left[\begin{array}{r}#1 \\ #2 \\ #3 \\ #4 \\ #5 \\ \end{array}\right]}\) \(\newcommand{\cfivevec}[5]{\left[\begin{array}{c}#1 \\ #2 \\ #3 \\ #4 \\ #5 \\ \end{array}\right]}\) \(\newcommand{\mattwo}[4]{\left[\begin{array}{rr}#1 \amp #2 \\ #3 \amp #4 \\ \end{array}\right]}\) \(\newcommand{\laspan}[1]{\text{Span}\{#1\}}\) \(\newcommand{\bcal}{\cal B}\) \(\newcommand{\ccal}{\cal C}\) \(\newcommand{\scal}{\cal S}\) \(\newcommand{\wcal}{\cal W}\) \(\newcommand{\ecal}{\cal E}\) \(\newcommand{\coords}[2]{\left\{#1\right\}_{#2}}\) \(\newcommand{\gray}[1]{\color{gray}{#1}}\) \(\newcommand{\lgray}[1]{\color{lightgray}{#1}}\) \(\newcommand{\rank}{\operatorname{rank}}\) \(\newcommand{\row}{\text{Row}}\) \(\newcommand{\col}{\text{Col}}\) \(\renewcommand{\row}{\text{Row}}\) \(\newcommand{\nul}{\text{Nul}}\) \(\newcommand{\var}{\text{Var}}\) \(\newcommand{\corr}{\text{corr}}\) \(\newcommand{\len}[1]{\left|#1\right|}\) \(\newcommand{\bbar}{\overline{\bvec}}\) \(\newcommand{\bhat}{\widehat{\bvec}}\) \(\newcommand{\bperp}{\bvec^\perp}\) \(\newcommand{\xhat}{\widehat{\xvec}}\) \(\newcommand{\vhat}{\widehat{\vvec}}\) \(\newcommand{\uhat}{\widehat{\uvec}}\) \(\newcommand{\what}{\widehat{\wvec}}\) \(\newcommand{\Sighat}{\widehat{\Sigma}}\) \(\newcommand{\lt}{<}\) \(\newcommand{\gt}{>}\) \(\newcommand{\amp}{&}\) \(\definecolor{fillinmathshade}{gray}{0.9}\)Introduction
In this class you will be hard coding your email and password, which may be discoverable by hackers. You also need to run your account with the "less secure apps access" option as we will not be using high levels of verification. Therefor it is imperative that you do not use your normal account, and this section shows you how to set up an email account in Google and adjust the settings so your Raspberry Pi can talk to it.
Setting Up Google Account
The very first thing that you need to do is to obtain a new gmail account at https://www.google.com/gmail. Do not use your UALR account, or a Google Account that you use in normal transactions. You need to set up an account that is used just for this class and your Raspberry Pis, and we suggest you use the gmail address of your last name followed by IOST, PcompYourFirstName@gmail.com, as this should be easy to remember. Make sure you don’t use the password for this email account for anything else, and make it something easy to remember. If you have problems you can go to their help page, https://support.google.com/mail/answer/56256.
Adjusting your Security Settings
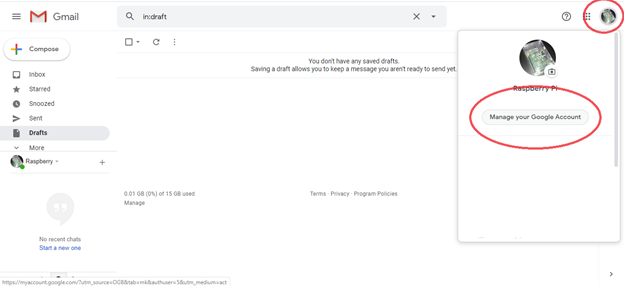
- Now you need to do some tweaks to the gmail settings. Go to your profile picture (Or a circle with initials if you didn’t add a profile picture) in the upper right corner and click “Manage your Google Account” (figure \(\PageIndex{1}\)).
2. Once in your account click security on the left (figure \(\PageIndex{2}\)).
 Figure \(\PageIndex{2}\): Click on Security and then scroll down to "Signing in to Google". Now open up "App passwords
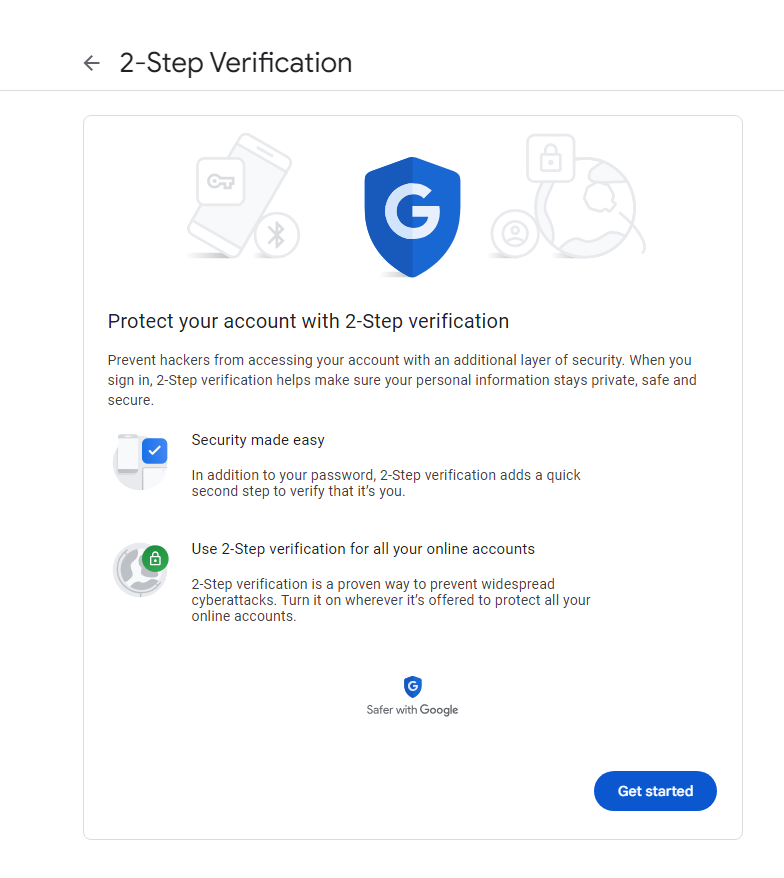 Figure \(\PageIndex{1}\): Copy and Paste Caption here. (Copyright; author via source)
 Figure \(\PageIndex{1}\): Copy and Paste Caption here. (Copyright; author via source)
You will get a text message with your code, include the G- when you submit it.
Now go to 2-Step Verification
 Figure \(\PageIndex{1}\): Copy and Paste Caption here. (Copyright; author via source)
click continue
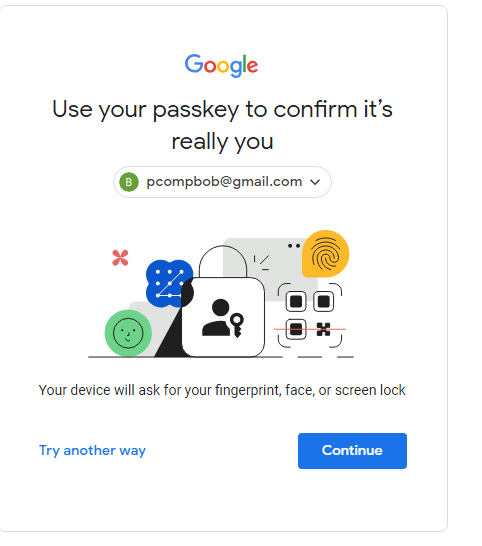 Figure \(\PageIndex{1}\): Copy and Paste Caption here. (Copyright; author via source)
Choose the PIN option and give the login pin for your computer
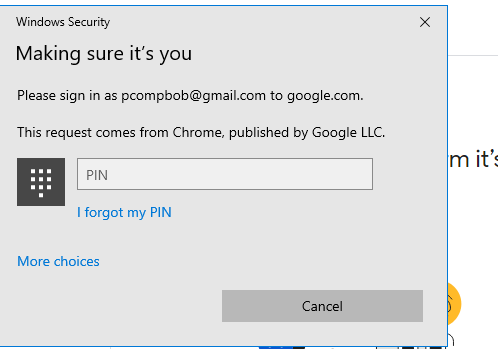 Figure \(\PageIndex{1}\): Copy and Paste Caption here. (Copyright; author via source)
Now you can see "App Passwords" at the bottom of the page, and you can generate a password to your gmail that your Raspberry Pi can use to log in.
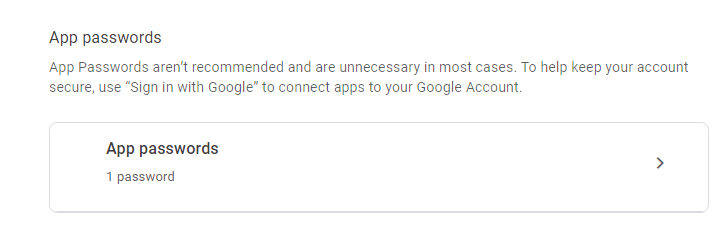 Figure \(\PageIndex{1}\): Copy and Paste Caption here. (Copyright; author via source)

Figure \(\PageIndex{3}\): On select App, choose Mail. then on Select Device, choose a name for your Pi, and then click generate. This will give you a 16 digit key that you can use as a password when you code on your Pi. Note there are currently two Pis up. Realize your password will be put into the code of programs on your Pi, and so anyone who can access your Pi can get your password
Note, Google's interface evolves over time and these screenshots will become out of date, but the functionality is the same.
App Passwords
For obvious reasons Google is always changing how they verify third party apps and your normal gmail loging will not work. Your UALR account will probably not work either, and you want to use a special email account for this class, as your passwords will be in the scripts of multiple programs. You will need to generate a 16 digit key, and you will need to do this for every app that you use. Note, if you change your account password all app passwords are revoked.
Go to
- Passkeys and security keys
- create a passkey
- click more choices pin
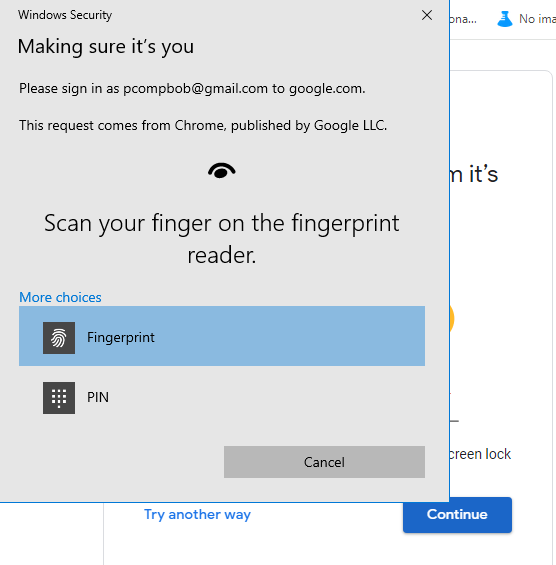 Figure \(\PageIndex{1}\): Copy and Paste Caption here. (Copyright; author via source)Enter the pin for your computer
- Enter your pin
- Go to the bottom and you will find App passwords, there youcan create a key that will let an app sign into your Google account.
As of 2024/0204 the instructions for creating an app password can be found here: Sign in with app passwords , but these only work if you choose the pin option and you must have two party authentication turned on.