8.1: Importing LibreTexts into a LMS
- Page ID
- 111230
\( \newcommand{\vecs}[1]{\overset { \scriptstyle \rightharpoonup} {\mathbf{#1}} } \)
\( \newcommand{\vecd}[1]{\overset{-\!-\!\rightharpoonup}{\vphantom{a}\smash {#1}}} \)
\( \newcommand{\dsum}{\displaystyle\sum\limits} \)
\( \newcommand{\dint}{\displaystyle\int\limits} \)
\( \newcommand{\dlim}{\displaystyle\lim\limits} \)
\( \newcommand{\id}{\mathrm{id}}\) \( \newcommand{\Span}{\mathrm{span}}\)
( \newcommand{\kernel}{\mathrm{null}\,}\) \( \newcommand{\range}{\mathrm{range}\,}\)
\( \newcommand{\RealPart}{\mathrm{Re}}\) \( \newcommand{\ImaginaryPart}{\mathrm{Im}}\)
\( \newcommand{\Argument}{\mathrm{Arg}}\) \( \newcommand{\norm}[1]{\| #1 \|}\)
\( \newcommand{\inner}[2]{\langle #1, #2 \rangle}\)
\( \newcommand{\Span}{\mathrm{span}}\)
\( \newcommand{\id}{\mathrm{id}}\)
\( \newcommand{\Span}{\mathrm{span}}\)
\( \newcommand{\kernel}{\mathrm{null}\,}\)
\( \newcommand{\range}{\mathrm{range}\,}\)
\( \newcommand{\RealPart}{\mathrm{Re}}\)
\( \newcommand{\ImaginaryPart}{\mathrm{Im}}\)
\( \newcommand{\Argument}{\mathrm{Arg}}\)
\( \newcommand{\norm}[1]{\| #1 \|}\)
\( \newcommand{\inner}[2]{\langle #1, #2 \rangle}\)
\( \newcommand{\Span}{\mathrm{span}}\) \( \newcommand{\AA}{\unicode[.8,0]{x212B}}\)
\( \newcommand{\vectorA}[1]{\vec{#1}} % arrow\)
\( \newcommand{\vectorAt}[1]{\vec{\text{#1}}} % arrow\)
\( \newcommand{\vectorB}[1]{\overset { \scriptstyle \rightharpoonup} {\mathbf{#1}} } \)
\( \newcommand{\vectorC}[1]{\textbf{#1}} \)
\( \newcommand{\vectorD}[1]{\overrightarrow{#1}} \)
\( \newcommand{\vectorDt}[1]{\overrightarrow{\text{#1}}} \)
\( \newcommand{\vectE}[1]{\overset{-\!-\!\rightharpoonup}{\vphantom{a}\smash{\mathbf {#1}}}} \)
\( \newcommand{\vecs}[1]{\overset { \scriptstyle \rightharpoonup} {\mathbf{#1}} } \)
\(\newcommand{\longvect}{\overrightarrow}\)
\( \newcommand{\vecd}[1]{\overset{-\!-\!\rightharpoonup}{\vphantom{a}\smash {#1}}} \)
\(\newcommand{\avec}{\mathbf a}\) \(\newcommand{\bvec}{\mathbf b}\) \(\newcommand{\cvec}{\mathbf c}\) \(\newcommand{\dvec}{\mathbf d}\) \(\newcommand{\dtil}{\widetilde{\mathbf d}}\) \(\newcommand{\evec}{\mathbf e}\) \(\newcommand{\fvec}{\mathbf f}\) \(\newcommand{\nvec}{\mathbf n}\) \(\newcommand{\pvec}{\mathbf p}\) \(\newcommand{\qvec}{\mathbf q}\) \(\newcommand{\svec}{\mathbf s}\) \(\newcommand{\tvec}{\mathbf t}\) \(\newcommand{\uvec}{\mathbf u}\) \(\newcommand{\vvec}{\mathbf v}\) \(\newcommand{\wvec}{\mathbf w}\) \(\newcommand{\xvec}{\mathbf x}\) \(\newcommand{\yvec}{\mathbf y}\) \(\newcommand{\zvec}{\mathbf z}\) \(\newcommand{\rvec}{\mathbf r}\) \(\newcommand{\mvec}{\mathbf m}\) \(\newcommand{\zerovec}{\mathbf 0}\) \(\newcommand{\onevec}{\mathbf 1}\) \(\newcommand{\real}{\mathbb R}\) \(\newcommand{\twovec}[2]{\left[\begin{array}{r}#1 \\ #2 \end{array}\right]}\) \(\newcommand{\ctwovec}[2]{\left[\begin{array}{c}#1 \\ #2 \end{array}\right]}\) \(\newcommand{\threevec}[3]{\left[\begin{array}{r}#1 \\ #2 \\ #3 \end{array}\right]}\) \(\newcommand{\cthreevec}[3]{\left[\begin{array}{c}#1 \\ #2 \\ #3 \end{array}\right]}\) \(\newcommand{\fourvec}[4]{\left[\begin{array}{r}#1 \\ #2 \\ #3 \\ #4 \end{array}\right]}\) \(\newcommand{\cfourvec}[4]{\left[\begin{array}{c}#1 \\ #2 \\ #3 \\ #4 \end{array}\right]}\) \(\newcommand{\fivevec}[5]{\left[\begin{array}{r}#1 \\ #2 \\ #3 \\ #4 \\ #5 \\ \end{array}\right]}\) \(\newcommand{\cfivevec}[5]{\left[\begin{array}{c}#1 \\ #2 \\ #3 \\ #4 \\ #5 \\ \end{array}\right]}\) \(\newcommand{\mattwo}[4]{\left[\begin{array}{rr}#1 \amp #2 \\ #3 \amp #4 \\ \end{array}\right]}\) \(\newcommand{\laspan}[1]{\text{Span}\{#1\}}\) \(\newcommand{\bcal}{\cal B}\) \(\newcommand{\ccal}{\cal C}\) \(\newcommand{\scal}{\cal S}\) \(\newcommand{\wcal}{\cal W}\) \(\newcommand{\ecal}{\cal E}\) \(\newcommand{\coords}[2]{\left\{#1\right\}_{#2}}\) \(\newcommand{\gray}[1]{\color{gray}{#1}}\) \(\newcommand{\lgray}[1]{\color{lightgray}{#1}}\) \(\newcommand{\rank}{\operatorname{rank}}\) \(\newcommand{\row}{\text{Row}}\) \(\newcommand{\col}{\text{Col}}\) \(\renewcommand{\row}{\text{Row}}\) \(\newcommand{\nul}{\text{Nul}}\) \(\newcommand{\var}{\text{Var}}\) \(\newcommand{\corr}{\text{corr}}\) \(\newcommand{\len}[1]{\left|#1\right|}\) \(\newcommand{\bbar}{\overline{\bvec}}\) \(\newcommand{\bhat}{\widehat{\bvec}}\) \(\newcommand{\bperp}{\bvec^\perp}\) \(\newcommand{\xhat}{\widehat{\xvec}}\) \(\newcommand{\vhat}{\widehat{\vvec}}\) \(\newcommand{\uhat}{\widehat{\uvec}}\) \(\newcommand{\what}{\widehat{\wvec}}\) \(\newcommand{\Sighat}{\widehat{\Sigma}}\) \(\newcommand{\lt}{<}\) \(\newcommand{\gt}{>}\) \(\newcommand{\amp}{&}\) \(\definecolor{fillinmathshade}{gray}{0.9}\)Currently, LibreTexts can be imported into a Learning Management System (LMS) using Common Cartridges v1.1. Once you've identified a LibreText to bring into your LMS, the process is quite quick and consists of the following steps:
Instructions for downloading the Common Cartridge file
This procedure is used to import a LibreTexts into your Learning Management System (LMS) as a set of links.
- If the LibreText you want has
 in the upper right corner of the cover page, you can use the Downloads Dropdown.
 - If you want to peruse our full collection of complete LibreTexts, try out our LibreTexts Commons
- If neither of these options are available on the content you want, please get in contact with us at info@libretexts.org to see when that LibreTexts may be available in the downloads center.
Downloads Dropdown
The Downloads Dropdown is present on the front page of most courses to provide easy access to popular download formats. If this blue Downloads button is present in the upper right corner of your LibreText front page, use this method.

- Hover over the blue Downloads button. A dropdown menu should appear with a few download formats.
- Click on Import into LMS. You will be prompted to save the file LibreTexts.imscc to your computer.
- Make sure to save the .imscc file in a place that you will remember for later steps. If you would like, feel free to rename the file.
- Finally, move on to our section on Importing this file into your LMS.
Download Method 2: LibreTexts Commons
LibreTexts Commons has a collection of almost all of the LibreTexts in each library.

- Find the LibreText you want, either by using the search bar or by scrolling through our collection.
- Double Click on the book you need to bring into your LMS.

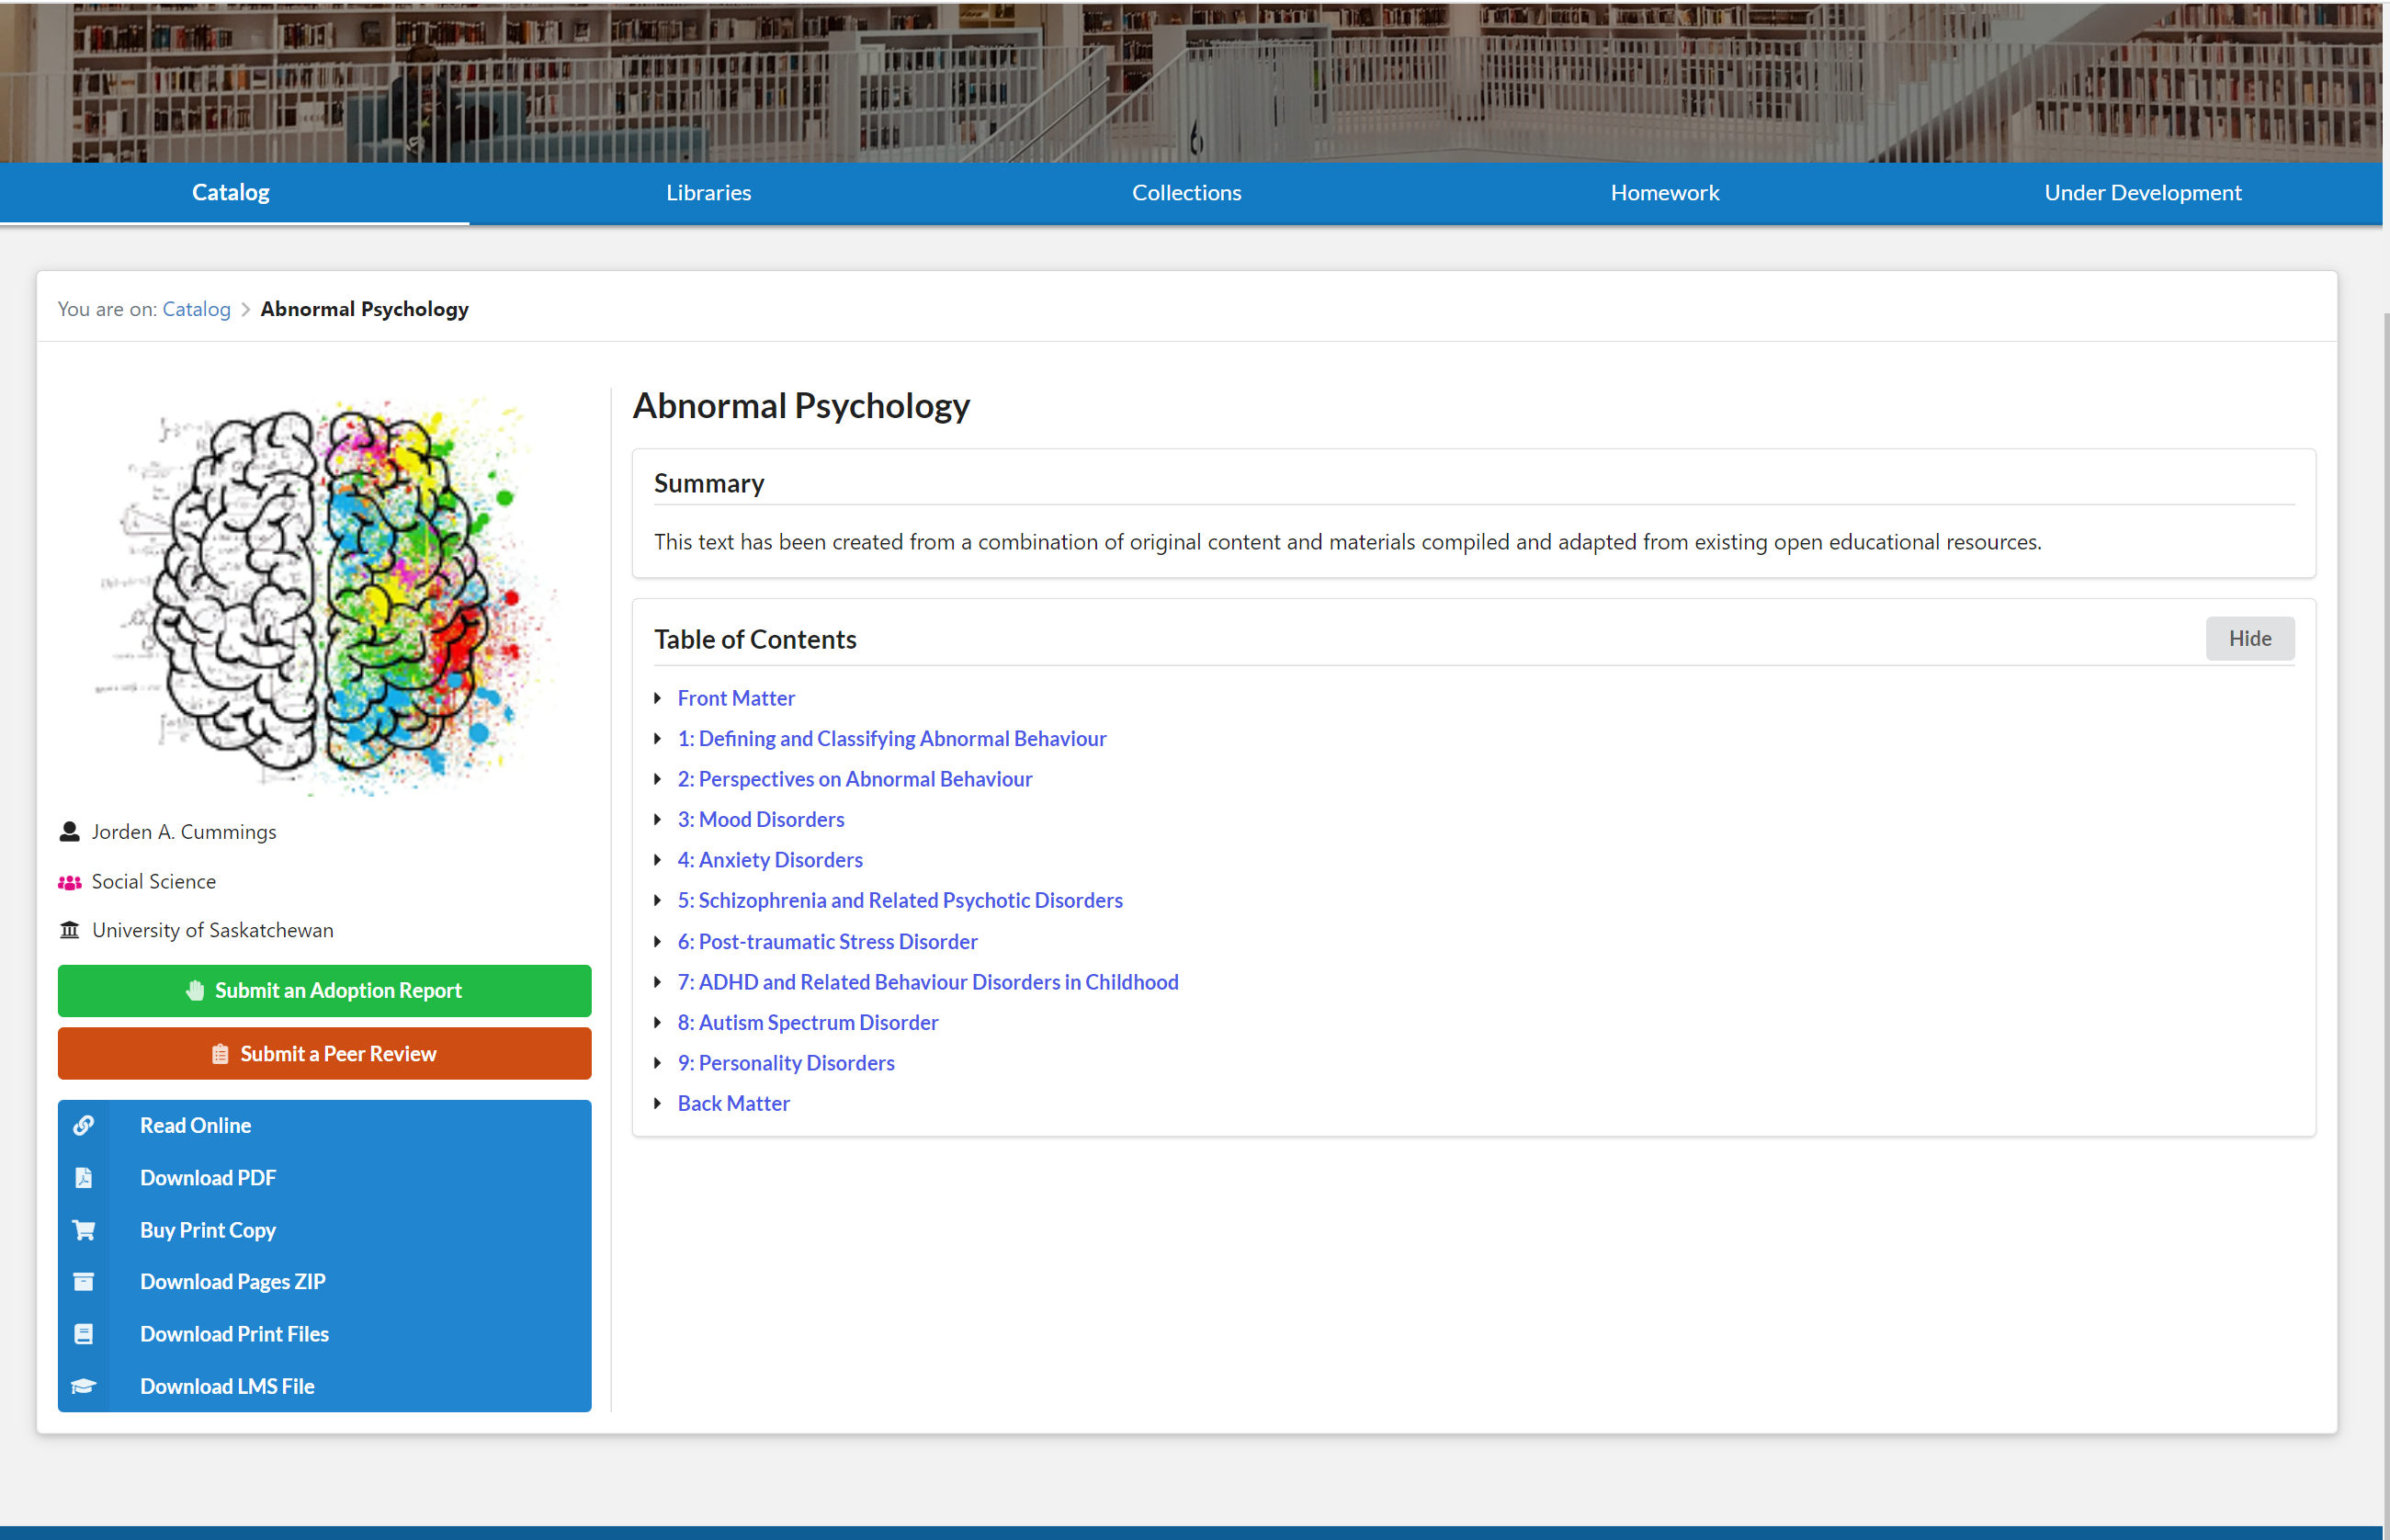
- Click on Download LMS File. You will be prompted to save the file LibreTexts.imscc to your computer.
- Make sure to save the .imscc file in a place that you will remember for later steps. If you would like, feel free to rename the file.
- Finally, move on to our section on Importing this file into your LMS.
Instructions for importing into your LMS
Almost all LMS support importing using the IMS Common Cartridge format. We have listed instructions for some of the most popular LMS below.
Blackboard also supports the Common Cartridge v1.1 specification for course imports but you may have to give the imscc file to your campus Blackboard administrator for them to set up the files for your courses. If they have problems write to info@libretexts.org and we will link them to those who have done this.
Importing into Canvas
- Go to your course in canvas.
- Go to settings on the left side of the course pane.
- Go to
 on the right side of the course pane.
 - Set the Content Type as a Common Cartridge 1.x Package.
- For source, select the Common Cartridge (.imscc) [in the video called imsmanifest.xml] file that you downloaded previously.
- Select All Content.
- Click Import!
- Wait for the loading bar to finish.
- You content is now available in modules!
Importing into Moodle
- Navigate to your course in Moodle.
- Click on the gear in the upper right of the page.
- Click Restore.
- You will be taken to the course page. Choose a file.
- Use the File picker to select your previously downloaded Common Cartridge (.imscc) file.
- Click Restore.
- On the backup details page, click Continue.
- You will most likely use Restore into this course, but you can instead Restore as a new course if desired.
- If you are restoring into this course, you have the option to Merge the backup or to Delete the contents. Pick which option you want before continuing.
- Click Continue. There are multiple on the page, so click the one corresponding to the Restore option you are choosing.
- On the next screen, click Next.
- On this Schema screen, you have an opportunity to look at the content that is going to be imported as well as to chose any content that you want excluded. At the bottom of the page, click Next when done.
- This is the review screen. Make sure everything is as you expect it to be. At the bottom of the page, click Next when done.
- The import should process, and you will have the option to return to the course homepage to see your new content!
Importing into D2L
- On your course homepage, click the gear in the upper right corner.
- Click Import/Export/Copy Components.
- Click Import Components and then click Start.
- Use the Upload button and select the Common Cartridge (.imscc) file that you downloaded earlier.
- Click Advanced Options. It is NOT recommended to use Import All Components as it double imports the sections.
- After the file upload completes, you will be prompted to continue and will wait for a brief moment as the file is read. Click Continue again.
- On the Customize Your Course Package, click Select All Components and then tick Select individual items to import. Click Continue at the bottom of the page.
- On this page, you must tick only the Chapters. For an unknown reason, D2L makes a bunch of duplicate sections that should be excluded from the import. Chapters are most easily identified by the lack of a section number. When finished, click Continue at the bottom of the page.
- You will be taken to a final page to review your selection. When you are content with your selection, click Continue at the bottom of the page to finish the import.
- Please wait as the import processes. You should be redirected back to your course with the new modules on the left sidebar!


