
Heating a Crucible to Constant Weight
- Page ID
- 77629

\( \newcommand{\vecs}[1]{\overset { \scriptstyle \rightharpoonup} {\mathbf{#1}} } \)
\( \newcommand{\vecd}[1]{\overset{-\!-\!\rightharpoonup}{\vphantom{a}\smash {#1}}} \)
\( \newcommand{\dsum}{\displaystyle\sum\limits} \)
\( \newcommand{\dint}{\displaystyle\int\limits} \)
\( \newcommand{\dlim}{\displaystyle\lim\limits} \)
\( \newcommand{\id}{\mathrm{id}}\) \( \newcommand{\Span}{\mathrm{span}}\)
( \newcommand{\kernel}{\mathrm{null}\,}\) \( \newcommand{\range}{\mathrm{range}\,}\)
\( \newcommand{\RealPart}{\mathrm{Re}}\) \( \newcommand{\ImaginaryPart}{\mathrm{Im}}\)
\( \newcommand{\Argument}{\mathrm{Arg}}\) \( \newcommand{\norm}[1]{\| #1 \|}\)
\( \newcommand{\inner}[2]{\langle #1, #2 \rangle}\)
\( \newcommand{\Span}{\mathrm{span}}\)
\( \newcommand{\id}{\mathrm{id}}\)
\( \newcommand{\Span}{\mathrm{span}}\)
\( \newcommand{\kernel}{\mathrm{null}\,}\)
\( \newcommand{\range}{\mathrm{range}\,}\)
\( \newcommand{\RealPart}{\mathrm{Re}}\)
\( \newcommand{\ImaginaryPart}{\mathrm{Im}}\)
\( \newcommand{\Argument}{\mathrm{Arg}}\)
\( \newcommand{\norm}[1]{\| #1 \|}\)
\( \newcommand{\inner}[2]{\langle #1, #2 \rangle}\)
\( \newcommand{\Span}{\mathrm{span}}\) \( \newcommand{\AA}{\unicode[.8,0]{x212B}}\)
\( \newcommand{\vectorA}[1]{\vec{#1}} % arrow\)
\( \newcommand{\vectorAt}[1]{\vec{\text{#1}}} % arrow\)
\( \newcommand{\vectorB}[1]{\overset { \scriptstyle \rightharpoonup} {\mathbf{#1}} } \)
\( \newcommand{\vectorC}[1]{\textbf{#1}} \)
\( \newcommand{\vectorD}[1]{\overrightarrow{#1}} \)
\( \newcommand{\vectorDt}[1]{\overrightarrow{\text{#1}}} \)
\( \newcommand{\vectE}[1]{\overset{-\!-\!\rightharpoonup}{\vphantom{a}\smash{\mathbf {#1}}}} \)
\( \newcommand{\vecs}[1]{\overset { \scriptstyle \rightharpoonup} {\mathbf{#1}} } \)
\(\newcommand{\longvect}{\overrightarrow}\)
\( \newcommand{\vecd}[1]{\overset{-\!-\!\rightharpoonup}{\vphantom{a}\smash {#1}}} \)
\(\newcommand{\avec}{\mathbf a}\) \(\newcommand{\bvec}{\mathbf b}\) \(\newcommand{\cvec}{\mathbf c}\) \(\newcommand{\dvec}{\mathbf d}\) \(\newcommand{\dtil}{\widetilde{\mathbf d}}\) \(\newcommand{\evec}{\mathbf e}\) \(\newcommand{\fvec}{\mathbf f}\) \(\newcommand{\nvec}{\mathbf n}\) \(\newcommand{\pvec}{\mathbf p}\) \(\newcommand{\qvec}{\mathbf q}\) \(\newcommand{\svec}{\mathbf s}\) \(\newcommand{\tvec}{\mathbf t}\) \(\newcommand{\uvec}{\mathbf u}\) \(\newcommand{\vvec}{\mathbf v}\) \(\newcommand{\wvec}{\mathbf w}\) \(\newcommand{\xvec}{\mathbf x}\) \(\newcommand{\yvec}{\mathbf y}\) \(\newcommand{\zvec}{\mathbf z}\) \(\newcommand{\rvec}{\mathbf r}\) \(\newcommand{\mvec}{\mathbf m}\) \(\newcommand{\zerovec}{\mathbf 0}\) \(\newcommand{\onevec}{\mathbf 1}\) \(\newcommand{\real}{\mathbb R}\) \(\newcommand{\twovec}[2]{\left[\begin{array}{r}#1 \\ #2 \end{array}\right]}\) \(\newcommand{\ctwovec}[2]{\left[\begin{array}{c}#1 \\ #2 \end{array}\right]}\) \(\newcommand{\threevec}[3]{\left[\begin{array}{r}#1 \\ #2 \\ #3 \end{array}\right]}\) \(\newcommand{\cthreevec}[3]{\left[\begin{array}{c}#1 \\ #2 \\ #3 \end{array}\right]}\) \(\newcommand{\fourvec}[4]{\left[\begin{array}{r}#1 \\ #2 \\ #3 \\ #4 \end{array}\right]}\) \(\newcommand{\cfourvec}[4]{\left[\begin{array}{c}#1 \\ #2 \\ #3 \\ #4 \end{array}\right]}\) \(\newcommand{\fivevec}[5]{\left[\begin{array}{r}#1 \\ #2 \\ #3 \\ #4 \\ #5 \\ \end{array}\right]}\) \(\newcommand{\cfivevec}[5]{\left[\begin{array}{c}#1 \\ #2 \\ #3 \\ #4 \\ #5 \\ \end{array}\right]}\) \(\newcommand{\mattwo}[4]{\left[\begin{array}{rr}#1 \amp #2 \\ #3 \amp #4 \\ \end{array}\right]}\) \(\newcommand{\laspan}[1]{\text{Span}\{#1\}}\) \(\newcommand{\bcal}{\cal B}\) \(\newcommand{\ccal}{\cal C}\) \(\newcommand{\scal}{\cal S}\) \(\newcommand{\wcal}{\cal W}\) \(\newcommand{\ecal}{\cal E}\) \(\newcommand{\coords}[2]{\left\{#1\right\}_{#2}}\) \(\newcommand{\gray}[1]{\color{gray}{#1}}\) \(\newcommand{\lgray}[1]{\color{lightgray}{#1}}\) \(\newcommand{\rank}{\operatorname{rank}}\) \(\newcommand{\row}{\text{Row}}\) \(\newcommand{\col}{\text{Col}}\) \(\renewcommand{\row}{\text{Row}}\) \(\newcommand{\nul}{\text{Nul}}\) \(\newcommand{\var}{\text{Var}}\) \(\newcommand{\corr}{\text{corr}}\) \(\newcommand{\len}[1]{\left|#1\right|}\) \(\newcommand{\bbar}{\overline{\bvec}}\) \(\newcommand{\bhat}{\widehat{\bvec}}\) \(\newcommand{\bperp}{\bvec^\perp}\) \(\newcommand{\xhat}{\widehat{\xvec}}\) \(\newcommand{\vhat}{\widehat{\vvec}}\) \(\newcommand{\uhat}{\widehat{\uvec}}\) \(\newcommand{\what}{\widehat{\wvec}}\) \(\newcommand{\Sighat}{\widehat{\Sigma}}\) \(\newcommand{\lt}{<}\) \(\newcommand{\gt}{>}\) \(\newcommand{\amp}{&}\) \(\definecolor{fillinmathshade}{gray}{0.9}\)As part of the procedure for the determination of the sulfate content of an unknown sample it will be necessary to accurately determine the empty weights of a set of crucibles. This is accomplished by first cleaning the crucible and then heating them in the flame of a Tirrel burner. They are then cooled and weighed. This process of heating and cooling is repeated until successive weighings agree to within 0.2mg. The procedure will, in addition, acquaint the student with the use of the analytical balance and the proper use of the desiccator. Be sure that you read the appendix section dealing with the use of desiccator.
Procedure
Wash and rinse four 10 ml crucibles and their lids. Identify each of the crucibles by means of existing visual differences. Carefully note in your lab notebook what these identifying marks are and assign a number to each crucible. Do not use marking pens or pencils to mark your crucibles. The high heat which will be used to take them to constant weight will obliterate such markings and more importantly will affect their weight in an unpredictable manner. The lids to the crucibles do not need to be taken to constant weight, however, they should be clean.
Place a Tirrel burner under the crucible and adjust the flame of the burner to give a non-luminous flame with a full gas supply. The tip of the flame cone should be just below but not touching the crucible. Heat the crucible at red heat in this manner for 5-10 minutes. Allow it to cool for a few minutes and then place it in the desiccator. When it has reached room temperature weigh the crucible accurately, to ± 0.1 mg, and then put it back into the desiccator. Reheat and reweigh it until successive weighings agree to within 0.2 mg.
NOTES
- Both the hot and cool crucibles should only be handled with tongs. It is therefore imperative that the tips of the tongs be very clean. If they appear dirty or rusty be sure that you clean them. Dipping them into some dilute HCl is helpful in removing rust. Never allow the tips to come in contact with the desk top.
- Never touch a red hot crucible with the tongs. The high heat used will soften the enamel enough so that some it will stick to the tongs and thereby lead to erratic weights.
- Crucibles should never be placed directly on your desk. Obtain a piece of aluminum foil which can be used to place the crucibles and tongs.
- Make sure that the plate in the desiccator is completely clean. Also check to see that crucibles sitting in the holes of the plate do not touch any part of the wire gauze which separates the desiccant from the rest of the desiccator.
Demonstration
Your first exercise teaches you some skills on the proper use of the laboratory burner (in this case called a Tirill Burner), the adjustment of the flame and the proper placement of a crucible which is to be heated to constant weight.
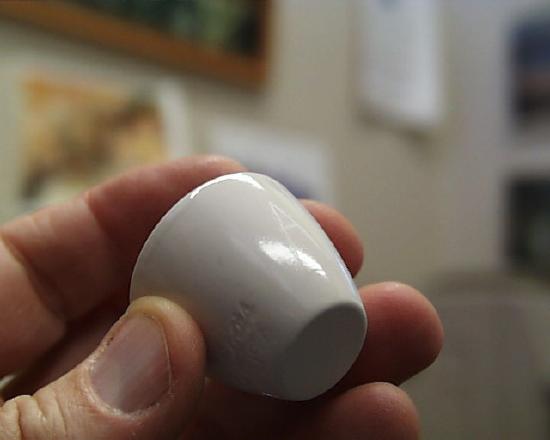
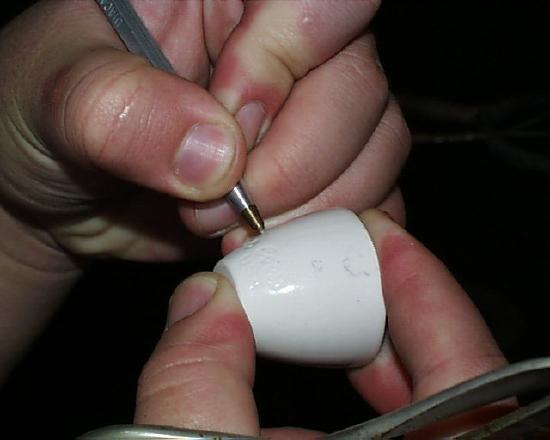
You ought to make sure at the outset that the crucibles you use have indelible identifying marks on them. Sometimes there are indentations left during the manufacture of a crucible which will allow you to distinguish one from another. More likely, there will be a letter or number written into the side by a former student, such as the one shown at the left. Note the "A" scratched into the glossy surface. This can be done with the diamond pencil available in the lab, as shown at the right .
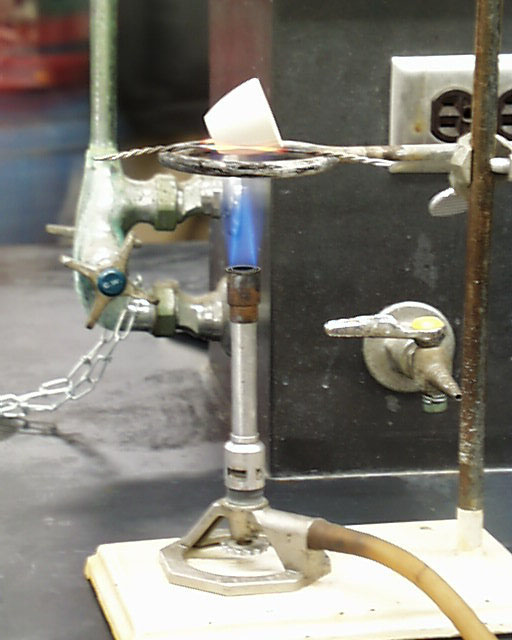
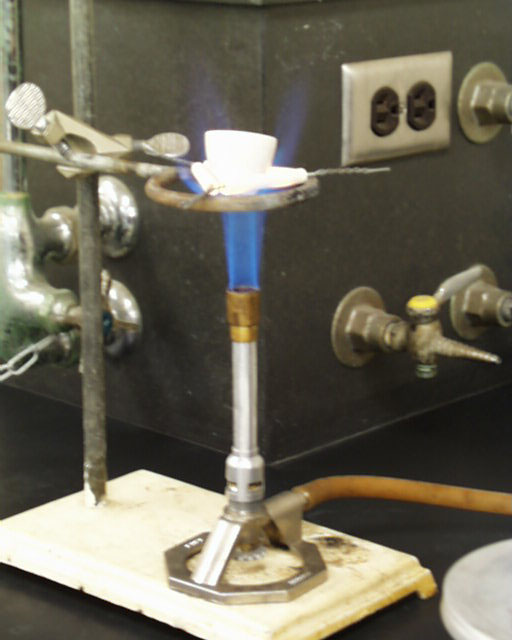
The hottest part of the flame is at the top of the bright cone of oxidation. The zone beneath the sharp point of the cone is filled with a rising mixture of cool gases not yet in the process of combustion. Although the rim around this zone is quite hot, the gases inside are essentially at room temperature. See that placement on the left. Such a placement is not recommended Note the correct placement of the crucible in the photograph at the right.

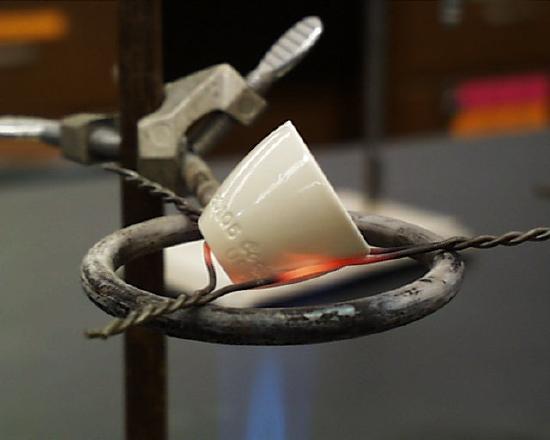
The crucible may be placed right side up, as in the left photo, or on its side, as in the right photo. Heating it on its side is preferred because the overall strain on the ceramic material at the high temperatures used is somewhat less.
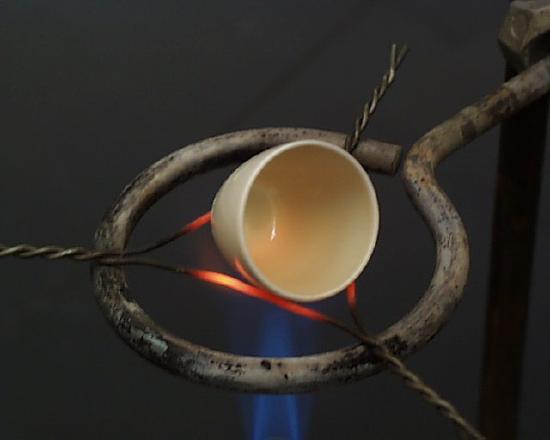
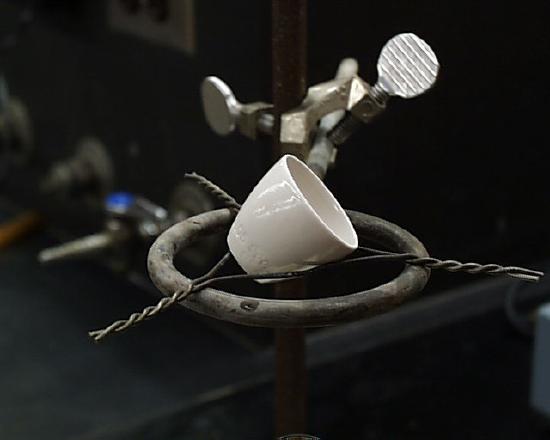
The crucible ought to be heated to incandescence for 5-10 minutes (left). At the end of this time, remove the flame and allow the crucible to cool on the iron triangle for a few minutes (right)

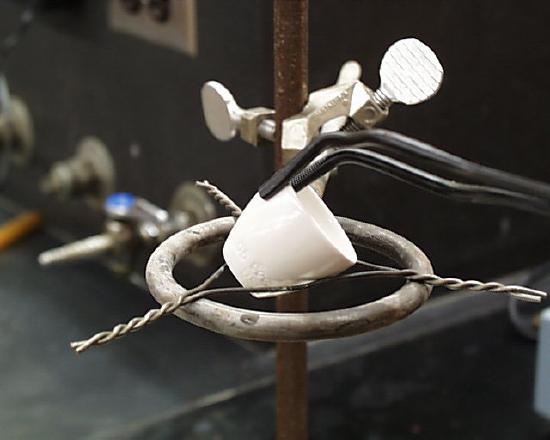
When transferring a crucible to the dessicator tongs must be used. If the crucible has been allowed to cool, you may use bare tongs (left), but if you must transfer a hot crucible, make sure that you cover the ends of the tongs with aluminum foil (right) as the paint on the tongs might melt onto the crucible and change its weight. Make sure you grab the crucible on the edge as shown. Don't try to pick up a crucible by squeezing the tongs on the outer rim both because the crucible may slip from your grip owing to its slick walls. There is also the possibility of breaking a hot crucible that way.

Place the cool crucible into one of the holes in the plate in your dessicator and cover until it has reached room temperature. At that time you may remove it for weighing.
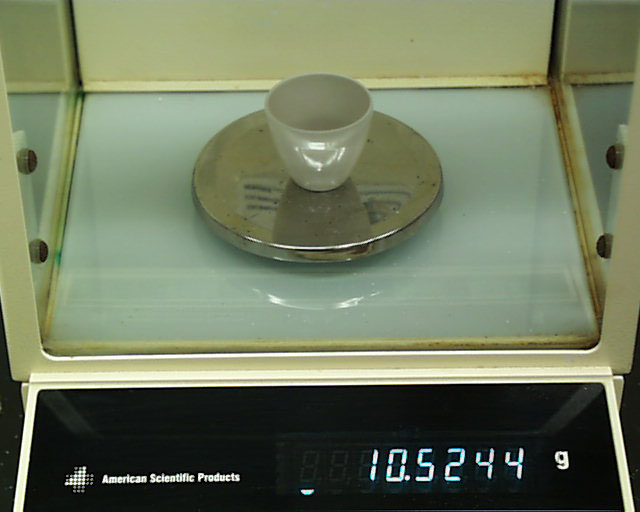
If a crucible is not at the temperature of the balance compartment it will likely show a weight different from that it would show were it at the same temperature. If it is hotter the weight will be slightly less, if colder slightly more owing to the production of convection currents which affect the apparent mass. Here are some photos to prove the point. (Please note that two separate analytical balances had to be used for this sequence of photos so as not to interfere with student use. The final agreement is within that which is routinely observed for two separate balances.) A dry cold crucible is weighed to the nearest 0.0001 g.
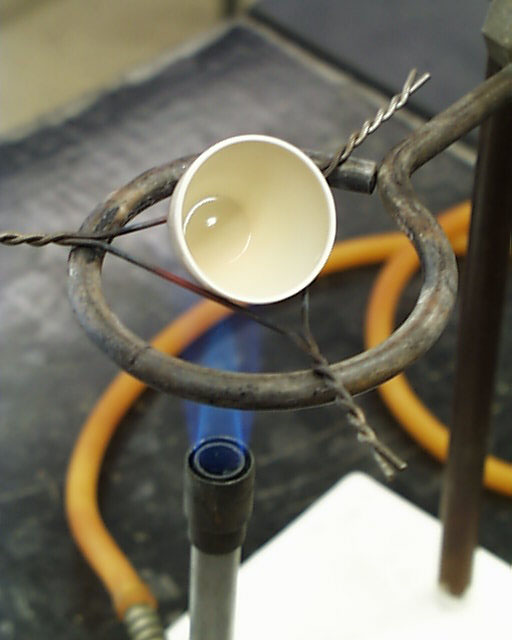
The crucible is then heated to incandescence for five minutes, as shown at the left. The fire is extinguished and the crucible is allowed to cool for five minutes.

Its apparent weight is less by more than four milligrams.
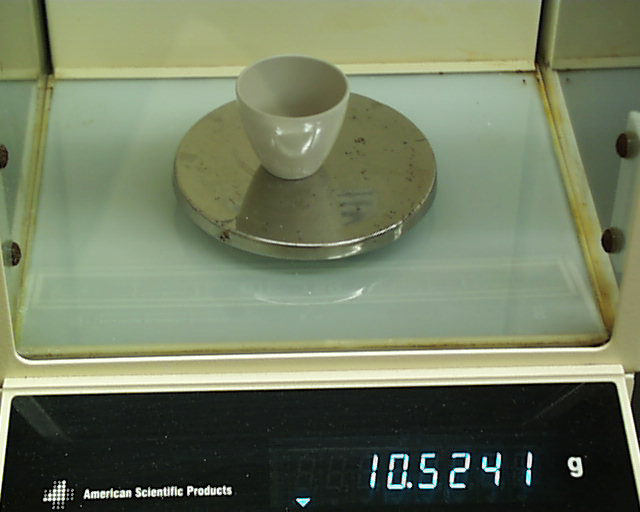
It is allowed to cool for an additional five minutes.
Its exhibited weight is still 0.0003 g less than that of the cold crucible, above.
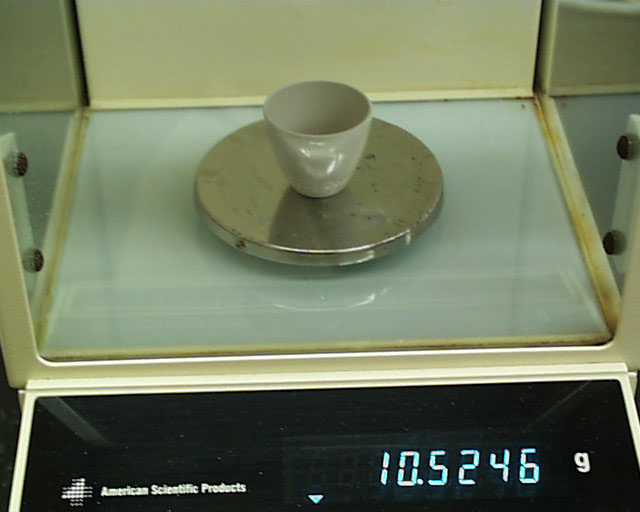
Finally, after an additional five minutes of cooling, the crucible exhibits a weight slightly greater than that of the cold crucible, above. The agreement here is within that which is routinely observed for two separate balances. This cooling sequence took place outside the dessicator. The amount of time necessary to achieve thermal equilibrium with the environment will likely be somewhat longer when you let the crucible cool in the dessicator.
Contributor
Oliver Seely (Professor of Chemistry, Emeritus; California State University Dominguez Hills). This content are in the public domain and may be copied without restriction.