
Appendix 4: Experimental Techniques
- Page ID
- 305739
Using a burette
The reagents will be in a burette and before proceeding you need to familiarize yourself with the proper procedure for using a burette. Remember, a burette is a TD (To Deliver) device and the scale is upside down.
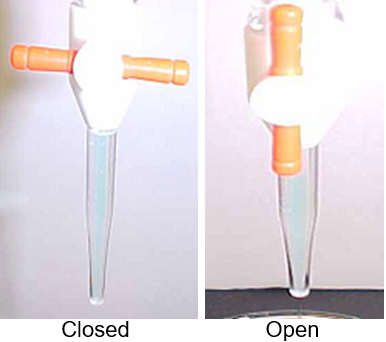
Figure \(\PageIndex{2}\): Before adding fluid make sure the stopcock is closed. The handle points in the direction of the orifice (Copyright; Belford, cc 0.0)
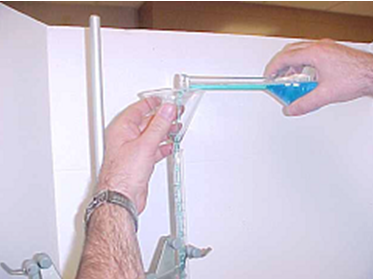
Figure \(\PageIndex{3}\): Carefully add fluid, you may want to slightly lift the funnel to avoid vapor lock, which can impede the flow. (Copyright; Belford cc 0.0)

Figure \(\PageIndex{4}\): Be sure to flush any air that is trapped below the stopcock. (Copyright; Belford cc 0.0)
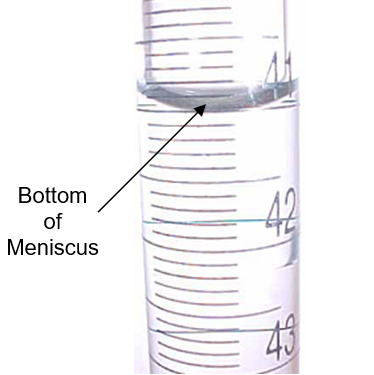
Figure \(\PageIndex{5}\): Be careful reading the meniscus as a Burette is delivered to deliver not contain a fluid and the scale goes from top to bottom. Students are often advised to read the volume of the air, not the fluid. (Copyright; Belford, cc 0.0)
The following YouTube from Georgia Highland College goes over the techniques for reading a burette.
Video \(\PageIndex{2}\): 0:48 video uploaded by GHS on reading a burette (https://youtu.be/uYMMJuackzo)
In figure \(\PageIndex{1}\) we defined two reagent flasks and a reaction flask, but in reality you can use one of the reagent flasks as the reactant flask. You need to carefully mark each flask, and you might want to use a beaker for one of the solutions, so the potassium iodide, and an Erlenmeyer flask for the other (ferric nitrate), and then pour from the beaker into the Erlenmeyer flask, and once the solutions are mixed, it becomes the reaction flask.