
Appendix 2 - Quantitative Techniques
- Page ID
- 216828
Using a Pipet
Step 1
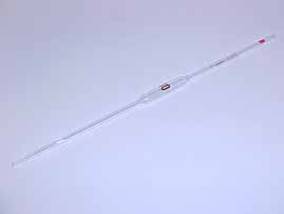
Keep the index finger of your dominant hand near the mouth of the pipet. Then place pipet tip into container where liquid is to be removed. Do not let the tip touch the bottom or sides of the container.
Step 2
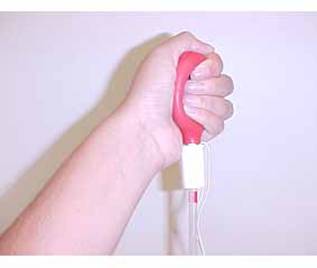
Using your other hand, squeeze the rubber bulb and place it over the mouth of the pipet. NEVER PLACE YOUR MOUTH ON THE PIPET!
Step 3

Release the bulb slowly in order for the pipet to obtain a specific amount of liquid. Allow the liquid level to rise so that it is 1-2cm above the calibration mark. If not enough liquid enters the pipet, quickly remove and squeeze the bulb and then place it back on the pipet and release. DO NOT LET THE LIQUID ENTER THE BULB. THIS MAY CAUSE CONTAMINATION.
Step 4
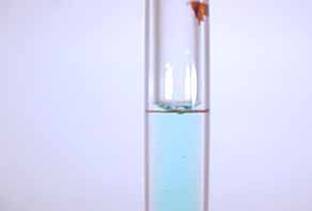
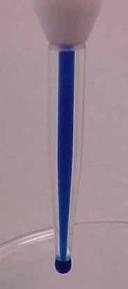
Figure \(\PageIndex{4}\): Step 4
Quickly remove the bulb and simultaneously place your index finger tightly over the top of the pipet to prevent any liquid from escaping. Now slightly move your finger in order to release the liquid until the meniscus is even with the calibration mark.
Step 5

Some liquid remains in the tip of a volumetric TD pipet
Figure \(\PageIndex{5}\): Step 5
Place the pipet, with your finger still on the mouth, over the container to which you will transfer the liquid. Release your finger and let the liquid drain completely out of the pipet. If a drop of liquid remains in the pipet tip, do not blow into the pipet to force the liquid out. The pipet is calibrated to deliver an accurate volume in spite of some liquid remaining in the tip.
Note: Some TD pipets you will use in upper level courses (mohr and serological pipets) are calibrated to require blowout, but in this class TD pipets do not require blowout.
Using the Analytical Balance
Step 1
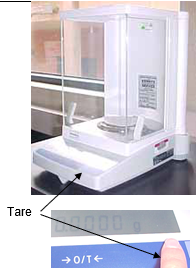
Figure \(\PageIndex{6}\): Step 1
-The analytical balance measures the mass of substances to within 0.0001g.
-The balance must be dry and contain no extraneous materials that may affect the accuracy of the measurement.
-Place the weighing paper onto the balance pan and close the side doors. To make sure the weight is stable, wait for the mass to stop changing or for a green triangle to appear.
-Press the “tare” button to recalibrate the balance to read 0.0000g. This prevents the mass of the weighing container from being included in the measurementFigure \(\PageIndex{1}\): Copy and Paste Caption here
Step 2

Figure \(\PageIndex{7}\): Step 2
-Open the door and use a spatula to add the substance up to the desired mass. NEVER PLACE CHEMICALS ON THE BALANCE PAN
-Once again, close the door and then record the mass once the scale has stabilized.
-Do not to lean on the balance while weighing!
Step 3
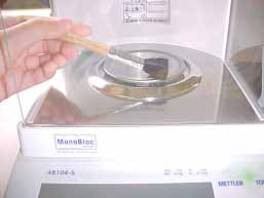
Figure \(\PageIndex{8}\): Step 3
-After finishing the measurements, brush the area around the balance pan to clean it of any remaining substance particles or spills.
-Discard any weighing paper.
-Keep the balance room clean!
Using A Burette
Step 1
A vertical stopcock means the buret is closed and a horizontal stopcock means the buretet is open. A helpful tip: the direction of the stopcock follows the direction of the flow.
Step 2
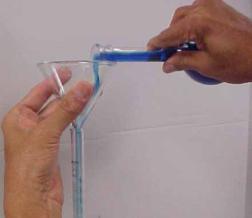
Figure \(\PageIndex{10}\): Step 2
Rinse the burette and glassware with the titrant a few times to prevent contamination. Attach the buret to the stand. Close the stopcock at the bottom of the buret and pour the titrant through a funnel at the mouth of the burette. Slightly lift the funnel to prevent the liquid from overflowing.
Step 3
If any air bubble appears, open the stopcock, and tap the side of the burette until the bubble disappears.
Step 4

Note that the burette reads in ascending order with the 0.00 mark at the top. You must be at eye level with the bottom of the meniscus (curved surface of liquid) to read the burette. Reading from above or below the meniscus will result in a parallax error. In order to better read the meniscus, keep a dark piece of paper behind the buret.
Step 5
During a Titration, keep the liquid flowing normally until a few mL from the endpoint (the point at which the color changes). Around the endpoint, allow the liquid to flow drop-by-drop. After reaching the endpoint, rinse and dry the tip of the burette.