
Iodometric Determination of Cu in Brass
- Page ID
- 75716

In acid solution practically all oxidizing agents will oxidize iodide ion to iodine quantitatively. The iodine formed in the reaction can then be titrated by means of a standard sodium thiosulfate solution. This type of indirect titration is given the general name of iodometry. Iodometric methods of analysis have a wide applicability for the following reasons:
- Potassium iodide, KI, is readily available in high purity.
- A good indicator, starch, is available to signal the equivalence point in the reaction between iodine and thiosulfate. Starch turns blue-black in the presence of iodine. Therefore, when the blue-black color disappears, the iodine has been completely reduced to the iodide ion.
- Iodometric reactions are rapid and quantitative.
- A precise and stable reducing agent, sodium thiosulfate (Na2S2O3), is available to react with the iodine.
The amount of iodine liberated in the reaction between iodide ion and an oxidizing agent is a measure of the quantity of oxidizing agent originally present in the solution. The amount of standard sodium thiosulfate solution required to titrate the liberated iodine is then equivalent to the amount of oxidizing agent. Iodometric methods can be used for the quantitative determination of strong oxidizing agents such as potassium dichromate, permanganate, hydrogen peroxide, cupric ion and oxygen.
As has been mentioned above, the endpoint in a titration of iodine with thiosulfate is signaled by the color change of the starch indicator. When starch is heated in water, various decomposition products are formed, among which is beta-amylose which forms a deep blue-black complex with iodine. The sensitivity of the indicator is increased by the presence of iodide ion in solution. However, if the starch indicator solution is added in the presence of a high concentration of iodine, the disappearance of the blue-black color is very gradual. For use in indirect methods, the indicator is therefore added at a point when virtually all of the iodine has been reduced to iodide ion, causing the disappearance of the color to be more rapid and sudden. The starch indicator solution must be freshly prepared since it will decompose and its sensitivity is decreased. However, a properly prepared solution will keep for a period of a few weeks. A preservative such as a small amount of mercuric ions may be added to inhibit the decomposition.
Solutions of sodium thiosulfate are made up to an approximate concentration by dissolving the sodium salt in water that has previously been boiled. Boiling the water is necessary to destroy micro-organisms which metabolize the thiosulfate ion. A small amount of Na2CO3 is added to the solution in order to bring the pH to about 9. The solution is standardized by taking a known amount of oxidizing agent, treating it with excess iodide ion and then titrating the liberated iodine with the solution to be standardized. Oxidizing agents such as potassium dichromate, bromate, iodate or cupric ion can be employed for this procedure. You will be using potassium iodate, KIO3, as your primary standard. The reaction between IO3- and I- is given as
\[6H^++IO_3^-+5I^- \rightarrow 3I_2+3H_2O\]
Reactions Involved in Iodometric Processes
Iodometric methods depend on the following equilibrium:
Since the solubility of I2 in water is quite low, the formation of the tri-iodide ion, I3-, allows us to obtain useful concentrations of I2 in aqueous solutions. The equilibrium constant for this reaction is approximately 700. For this reason iodometric methods are carried out in the presence of excess iodide ion.
The reaction between iodine and the thiosulfate ion is:
This reaction proceeds quantitatively in neutral or slightly acidic solutions. In strongly alkaline or acidic solutions the oxidation of the thiosulfate does not proceed by a single reaction. In the former, the thiosulfate ion is oxidized to sulfate as well as to the tetrathionate. In the latter, the thiosulfuric acid formed undergoes an internal oxidation-reduction reaction to sulfurous acid and sulfur. Both of these reactions lead to errors since the stoichiometry of the reactions differs from that shown above for the thiosulfate as a reducing agent. The control of pH is clearly important. In many cases the liberated iodine is titrated in the mildly acidic solution employed for the reaction of a strong oxidizing agent and iodide ion. In these cases the titration of the liberated iodine must be completed quickly in order to eliminate undue exposure to the atmosphere since an acid medium constitutes an optimum condition for atmospheric oxidation of the excess iodide ion.
The basic reaction in the determination of copper using the iodometric method is represented by the equation:
This is a rapid, quantitative reaction in slightly acidic solutions, if there is a large excess of iodide ion present and if the copper is in the form of a simple ion rather than a complex one. The iodine that is liberated can be titrated in the usual manner with standard thiosulfate solution. The reaction involving cupric ion and iodide takes place quantitatively since the cuprous ion formed as result of the reduction is removed from the solution as a precipitate of cuprous iodide.
Iron interferes since iron(III) ions will oxidize iodide. Since the iron will be found in the +3 oxidation state as a result of the dissolution of the brass sample, a means of preventing this interference is necessary. This can be accomplished by converting the iron(III) to a soluble iron(III) phosphate complex using phosphoric acid. At a pH of 3.0-4.0 the iron phosphate complex is not reduced by iodide ion. If arsenic and antimony are present, they will provide no interference at this pH if they are in their higher oxidation states. Brass formulations also may contain up to 39% Zn, 2.5% Sn and 8.5% Pb. When dissolved in concentrated nitric acid, the zinc and the lead become Pb2+ and Zn2+ . These do not interfere with the analysis of copper because they are not reduced to the Pb+ and Zn+ states by the action of iodide ion under the conditions of this experiment. The tin is oxidized to Sn4+ by the concentrated nitric acid and after dilution and adjustment of pH this form becomes SnO2 which is insoluble and may be observed as an inert white precipitate at the bottom of your flask. Under these conditions the tin does not interfere with the analysis.
Sources of Error
The following are the most important sources of error in the iodometric method:
- Loss of iodine by evaporation from the solution. This can be minimized by having a large excess of iodide in order to keep the iodine tied up as tri-iodide ion. It should also be apparent that the titrations involving iodine must be made in cold solutions in order to minimize loss through evaporation.
- Atmospheric oxidation of iodide ion in acidic solution. In acid solution, prompt titration of the liberated iodine is necessary in order to prevent oxidation.
- Starch solutions that are no longer fresh or improperly prepared. The indicator will then not behave properly at the endpoint and a quantitative determination is not possible.
EXPERIMENTAL
Click here to see images of what one can expect in this experiment.
Preparation of a 0.10 M Standard Na2S2O3 Solution
With a graduated cylinder measure out 1 liter of distilled water. Place it in your 1 liter beaker and boil the water for at least 5 minutes. Weigh out 25 g of Na2S2O3·5H2O and 0.1 g of Na2CO3. Dissolve the thiosulfate in the hot water and then cool this solution with the aid of an ice bath to room temperature. Then add the carbonate and stir until it is completely dissolved. Transfer the solution to your plastic 1 liter bottle. When not in use store this bottle in the darkness of your equipment cabinet as the decomposition of thiosulfate is catalyzed by light.
Blank Determination
Potassium iodide may contain appreciable amounts of iodate ion which in acid solution will react with iodide and yield iodine. The liberated iodine would react with thiosulfate and thereby cause the apparent molarity of the thiosulfate to be too low. The following procedure allows for the determination of a blank correction which will properly correct for any iodate that might be present. Prepare a solution of exactly 2.00 g of KI dissolved in 50 mL of distilled water and then acidify the solution with 5 mL of 3 M sulfuric acid and then immediately add 5 mL of starch indicator. If a blue-black color appears right after mixing, use the thiosulfate solution in the buret to determine the volume of solution required to cause the color- to disappear. This volume must be subtracted from the standardization and analyses volumes. If the potassium iodide is completely iodate-free no color will of course develop and no blank correction is necessary.
Standardization of the Na2S2O3 Solution
Dry approximately 2 g of potassium iodate, KIO3, at a temperature of 110 oC for one hour. Weigh to a precision of ±0.0001g three samples of the potassium iodate having weights near 0.12 g directly into three 250 mL Erlenmeyer flasks. Dissolve the iodate in 75 mL of distilled water. Cover the flasks with parafilm and store them. Rinse and fill your buret with the solution. Add 2.00 g of KI to each of the potassium iodate solutions. If a blank correction is required add exactly 2.00 g of KI to each. If no blank determination is required, the exact amount of KI is not crucial but should be close to 2 g. Then add 10 mL of 1 M HCl to one of the solutions. It will turn a dark-brown color. Immediately titrate it with the thiosulfate solution. When the color of the solution becomes very pale yellow add 5 mL of starch indicator. Continue the titration until the blue color of the starch complex just disappears. Follow the same procedure with each of the other two solutions, first adding the HCl then titrating. Correct your titration data for buret error and if necessary apply the blank correction. Calculate the molarity of the Na2S2O3 solution. Results should agree to within 0.2% of the average. If you do not achieve that kind of precision, titrate additional samples.
Dissolution of the Brass Sample
The following procedures in this section make use of the hot plates in the fume hoods. The solutions of dissolved brass generally have a low volume and high acid and salt concentrations. "Bumping" or little explosions of steam in the superheated liquid can occur. You don't want your hand to be close to the mouth of the flask should the solution suddenly "bump" because drops of acid (not to mention part of your sample) will fly out of the flask and possibly onto your hand. For that reason you must use your tongs to place the flasks on the hot plate and to remove them. Don't use strips of paper towel or the rubber Hot Hands because your real hand will end up being too close to the mouth of the flask.
The brass sample which you will receive does not have to be dried before use. Accurately weigh out three brass samples, of about 0.3 g each, directly into separate 250 mL Erlenmeyer flasks. In the fume hood add 5 mL of 6 M HNO3. Warm the solution on a hot plate in the fume hood until dissolution is complete. Add 10 mL of concentrated (not 3 M) H2SO4 and continue heating until white SO3 fumes appear. It is important that you do not mistake ordinary water vapor for SO3 fumes. It is also important at this point that the flask not be removed from the hood. SO3 fumes are dangerous and ought not to be inhaled. Only when the slightly denser white fumes of SO3 are observed can you be sure that all HNO3 has been removed. NO3- will oxidize I- and hence will seriously interfere with the procedure. Cool the flask in air for one or two minutes and then in an ice bath, then carefully add 20 mL of distilled H2O. Boil for one or two minutes then again cool in an ice bath. Continue to keep the flask in the ice bath and using your medicine dropper add concentrated NH3(aq) dropwise, and with adequate mixing, until the light-blue color of the solution is completely changed to the dark-blue color of the copper tetraammine complex. As many as 400 drops (20 mL) may be required. The solution must be kept cool in an ice bath since the reaction between the concentrated H2SO4 and concentrated NH3 is highly exothermic. Now add 3 M H2SO4 dropwise until the dark-blue color just disappears. You don't have to produce a complete disappearance of the dark blue color but you need to approach that point. The subsequent addition of phosphoric acid will lower the pH appropriately to around 3.5. If you add too much 3M H2SO4 the pH may turn out to be sufficiently low to cause unwanted side reactions to occur when you reduce the Cu2+ with iodide. If you are uncertain about the disappearance of the dark blue color you may put 50 mL of 0.06 M Cu2+ in a clean 250 mL flask and add 12 M ammonia dropwise until you have that unmistakable dark blue color. Then add 3M H2SO4 dropwise until the blue color almost disappears. Then add 2 mL concentrated phosphoric acid and you ought to see the dark color completely disappear. You may copy that procedure to achieve an appropriate pH of around 3.5 for subsequent steps in the analysis. Now, back to your real sample: Once you are confident that you haven't added too much 3M H2SO4, but that you have caused the dark color of the copper tetraammine complex almost to disappear, add 2.0 mL of concentrated phosphoric acid, H3PO4, to each sample. Verify to yourself that they exhibit the light copper color rather than the dark color and cover the flasks with parafilm and set them aside until you are ready to proceed with the titration.
Titration of the Dissolved Brass Sample
If you have let the dissolved samples stand overnight, be sure to warm the sample on a hot plate (this can be done at your desk) in order to dissolve all larger crystals of copper sulfate that might have formed. Be sure to cool the samples to room temperature, or below, with the aid of an ice bath. The solutions will still contain a fine, white precipitate at this point; however, this will not interfere with the rest of the procedure. From this point on work with only one sample at a time. Add 4.0 g of KI to one of your samples and titrate immediately with the standard thiosulfate solution. The sample contains white CuI precipitate and the color of I3- must be observed against that precipitate. The slurry will at first appear brown or dark yellow-brown. Continue adding thiosulfate until the slurry is a light mustard color. At this point add 5 mL of starch indicator and titrate until the mixture in the flask takes on a milky pink or lavender hue. Now add 2 g of KSCN and mix well; the solution will darken somewhat. After the addition of thiocyanate, continue to add more thiosulfate dropwise. You should observe a sudden change to a white or cream color. That is the endpoint of the titration. After you have titrated all three samples calculate the percentage of Cu in each of the brass samples, the average percentage and the average deviation.
The description above applies for brass samples with low concentrations of zinc (<10%). Some of you may have brass samples with higher concentrations of zinc. Such samples will become quite dark after the addition of KI and will lighten only slightly as thiosulfate is added. The "mustard color" will be darker than samples having low percentages of copper. When the starch is added the sample will become dark blue-black again and as you approach the end point with the thiosulfate the slurry will turn a violet color rather than milky pink or lavender hue. With the addition of the KSCN the solution will darken somewhat as in the case of the other samples, but the final end point will be a bit darker than the white or cream color described above. If you think that you have a sample with high zinc content, observe your progress carefully and take notes which will allow you to achieve repeatability.
Explanation: The reduction of Cu2+ to Cu+ occurs as the result of the oxidation of I- to I2. The I2 combines with iodide ion to produce the dark brown triodide ion, I3-. The excess iodide ion also causes the reduced copper to precipitate as white cuprous iodide, CuI. I2 and I3- in solution tend to adsorb on the surface of CuI thus becoming unavailable for rapid reduction by the thiosulfate. As a result, iodometric titrations involving reduced copper tend to yield lower results unless the adsorbed I2 can be liberated by adding thiocyanate ion, SCN-, which competes with the adsorbed iodine molecules on the surface of solid particles of CuI. After the addition of thiocyanate, continue to add more thiosulfate dropwise. You should observe a sudden change to a white or cream color. That is the endpoint of the titration. After you have titrated all three samples calculate the percentage of Cu in each of the brass samples, the average percentage and the average deviation.
REPORT
Your report must include the following information in the two sections below.
1. Unknown number
2. The three weights of KIO3 used for the standardization of thiosulfate
3. Volume in mL of thiosulfate for each of your standardization titrations
4. Average molarity of the thiosulfate solution
5. Weight of brass used for each sample
6. Volume of thiosulfate solution used for each sample
7. Cu percentage for each sample
8. The average percentage of Cu in your brass sample
9. The average deviation from the mean of the percent Cu for the three samples
10. Pages in your lab notebook containing the pertinent data
Questions on Cu in Brass Analysis
1. Why is it necessary to boil the water used to prepare the thiosulfate solution?
2. Why is Na2CO3 added to the thiosulfate solution?
3. Why is the thiosulfate solution stored in the dark?
4. Why is HCl added to the IO3- mixture and why must the solution be titrated immediately?
5. Why is the solution containing the dissolved brass sample heated to expel SO3 fumes?
6. Why is H3PO4 added to the brass sample?
7. What is the purpose of the KSCN that is added just before the endpoint in the titration?
8. Why is the solution containing the dissolved brass made basic with concentrated NH3 and then again acidified with H2SO4?
9. What is the formula of the tetrammine copper(II) complex?
10. Why do Zn2+ and Pb2+ not interfere in this procedure?
11. What sort of complications would arise if the iodinethiosulfate titration were carried out in a highly acidic solution?
12. If the solution were highly basic, how would the iodinethiosulfate reaction be influenced?
13. Why is the starch indicator not added at the beginning of the tritration?
Supplement
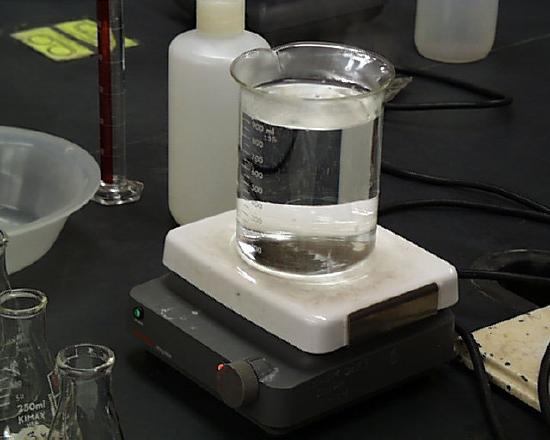
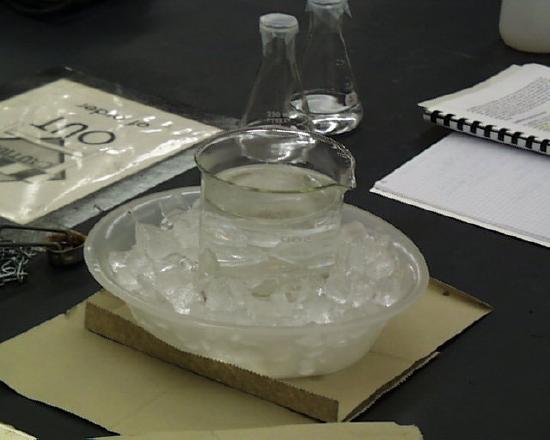
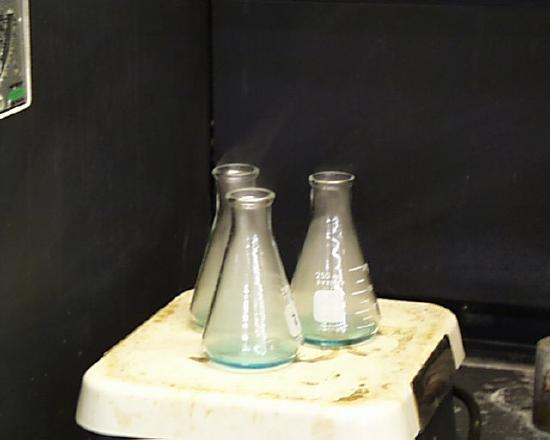
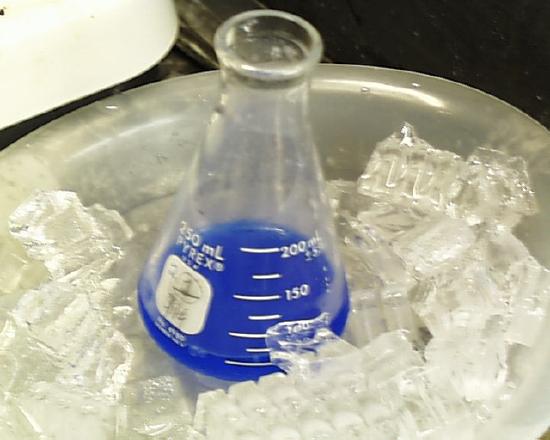
The iodometric determination of copper in brass is both a delight and a challenge to carry out both because of the disproportionation of iodate and iodide in acid solution to produce iodine, which must be titrated quickly owing to the volatile nature of elemental iodine, because of the care which must be taken in the preparation of the thiosulfate solution so that it doesn't get eaten up by bacteria (see it being heated in a one-liter beaker at the left and subsequently cooled in ice at the right) before it is used and because of the subtlety of the color changes one observes.
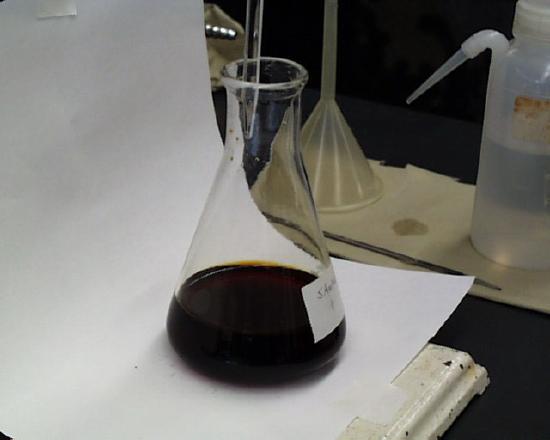
Here we have a solution of precisely weighed potassium iodate with added HCl that has just been served with an excess of potassium iodide. A disproportionation has occurred in the oxidation states of the iodine in iodate and iodide to produce elemental iodine complexed with the excess iodide to produce the triodide ion. A deep red-brown solution results (almost black), as on the right.
As the precisely weighed (and now reduced) iodate is titrated with thiosulfate solution in the process of standardizing it, the solution first turns a dark red, then orange, then yellow. The titration showed here on the left and right illustrates the colors you can expect to see during the progress of this standardization titration.
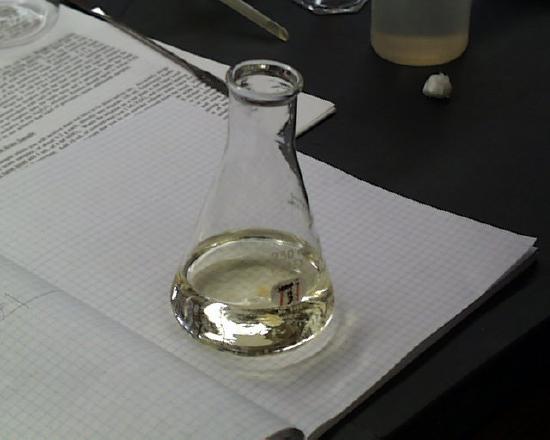
Finally, a light yellow color is achieved. The images on the left and right are about what one would expect before adding the starch indicator. Your solution can be a bit darker than this without significantly affecting your accuracy (excessive binding of starch to iodine, producing a premature end point), but not too much.
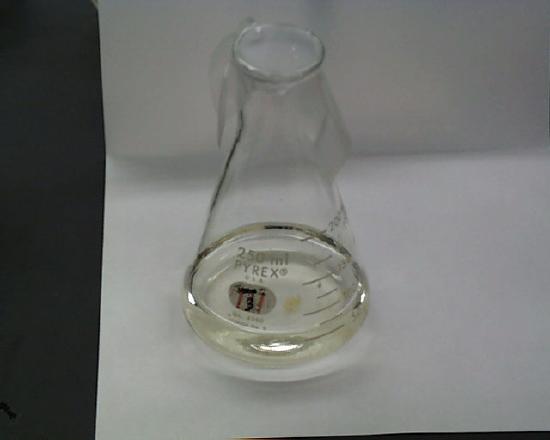
Likewise, you must be careful not to go beyond the light yellow stage. The example on the right illustrates the point at which one wouldn't want to go any further without risking the possibility that the end point has been exceeded.
A precalibrated 5 mL aliquot of starch indicator solution may be added at this stage, as on the left. Your solution ought to turn purple immediately as shown. Swirl the solution gently to mix the starch with the remaining iodine in solution to prepare it for immediate titration to the end point, as on the left.
One would expect to be just a few drops from the end point if the procedure has been followed correctly. Gently swirl while adding your thiosulfate solution dropwise until all purple color has disappeared.
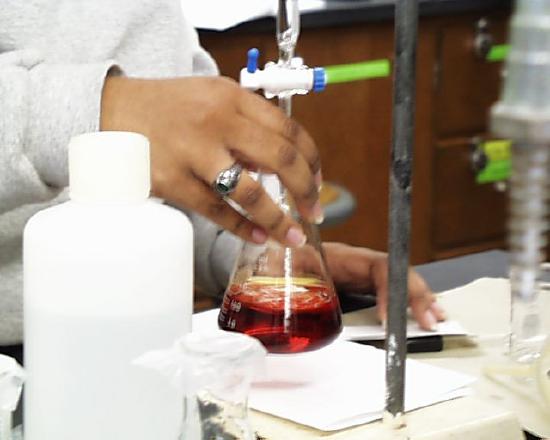
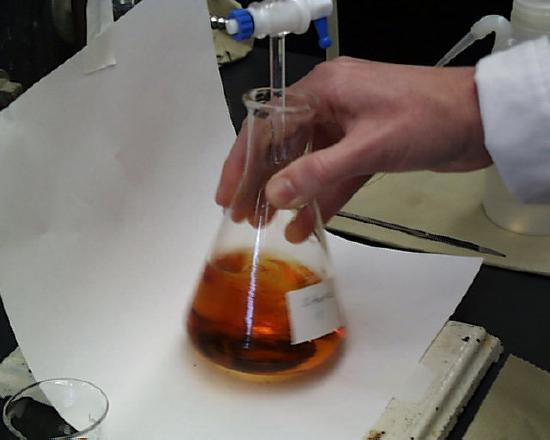
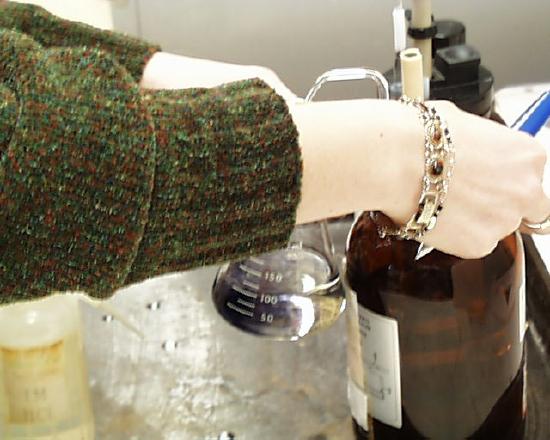
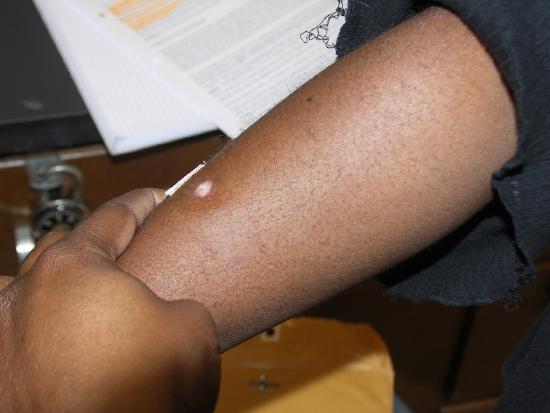
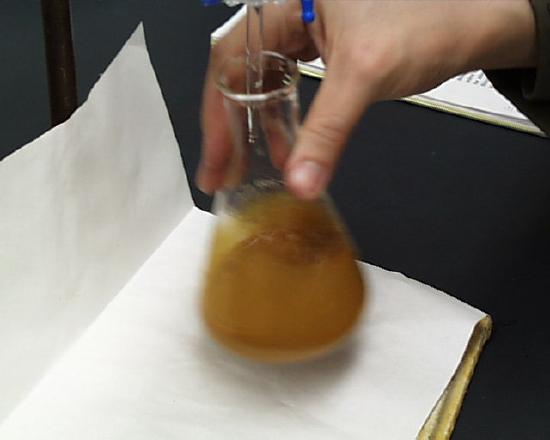
Your brass sample is to be dissolved in concentrated nitric acid while heating the solution on a hot plate as shown at the left. Since nitrogen oxides can interfere with the thiosulfate titration, they must be removed by the addition of 10mL of concentrated sulfuric acid, as shown at the right, but the student's hand really ought not to be exposed to the mouth of the other flask. The solutions of dissolved brass generally have a low volume and high acid and salt concentrations. "Bumping" or little explosions of steam in the superheated liquid can occur. You don't want your hand to be close to the mouth of the flask should the solution suddenly "bump" because drops of acid (not to mention part of your sample) will fly out of the flask and possibly onto your hand.
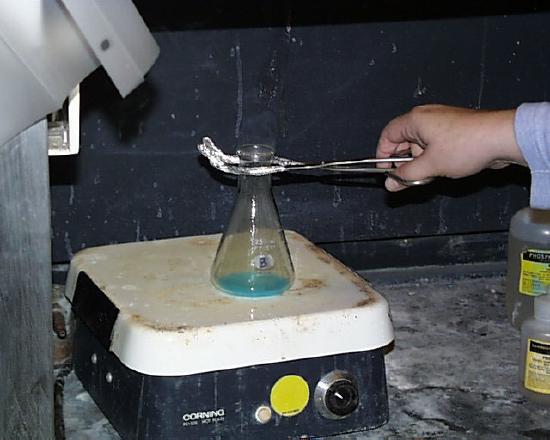
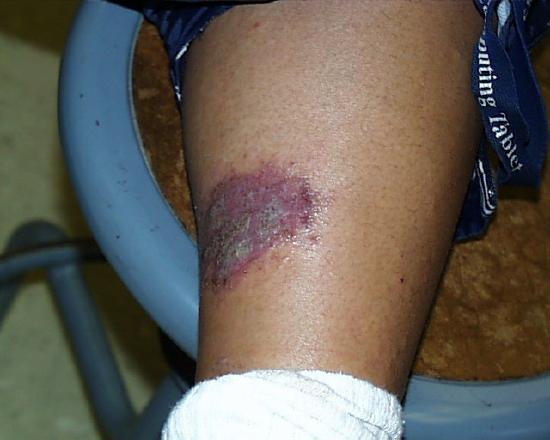
The image on the left shows the results of just such a spattering five days after it occurred. This student was holding a flask with the rubber Hot Hand and as the flask was removed, it "bumped", splattering her hand. The student washed her hand immediately with copious quantities of water and the instructor helped her to rub a slurry of sodium carbonate all over the spots. She then went to the student health center for treatment, but the hot concentrated acid had already done its work. The use of crucible tongs, as shown on the right, is a safer method for moving around flasks containing these solutions.
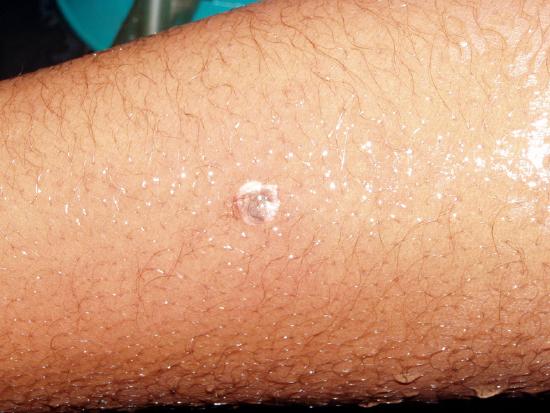
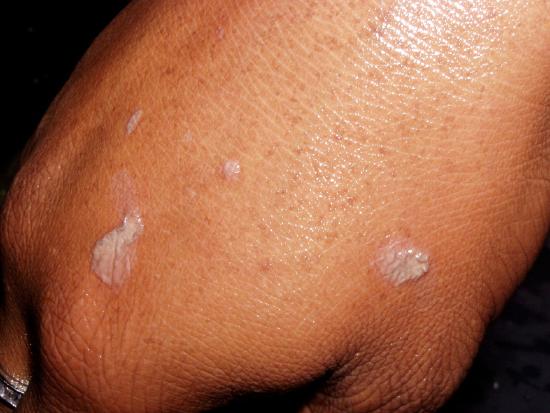
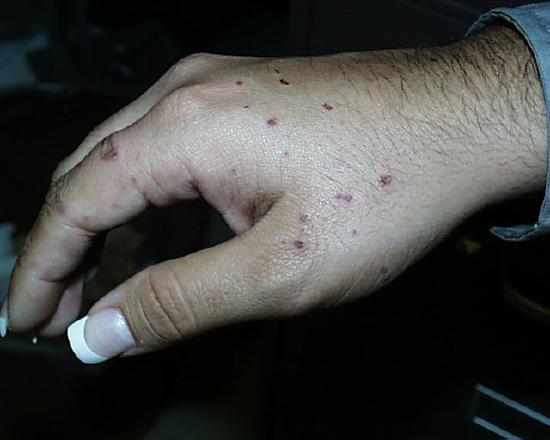
A similar spattering occurred recently in which five seconds passed between the time the droplets of hot nitric and sulfuric acid spattered onto the student's arm and hand and when she began rinsing off the acid in copious quantities of running water. The top pair of photos show where the droplets hit minutes after it happened. She thereafter visited the Student Health Center for medical treatment.

One week later.

Two weeks later.
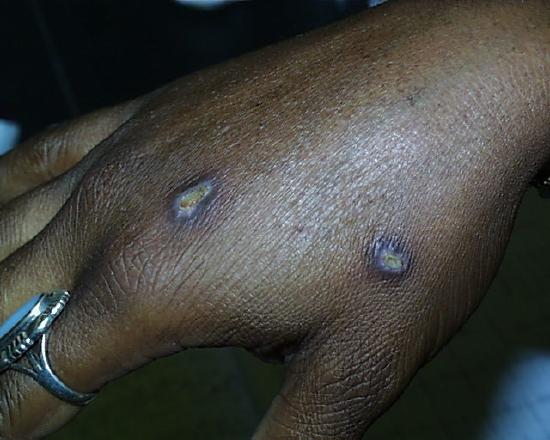
So as not to leave anything to chance, we can't emphasize too strongly that strong acids are to be treated with respect and care. The image on the right shows the result of a splash and extended contact of 3M sulfuric acid six months after it occurred. The student was working in a non-university laboratory. His supervisor spilled and splashed some 3M sulfuric acid but was not aware that any had gone beyond the immediate work bench area. The student was standing a few feet away. An hour after the splash occurred the student felt a burning sensation near his ankle. He was wearing elastic sweat pants with direct contact with his skin in that area. When he tried to pull up his pant leg to find out what was causing the burning sensation he noticed that the fabric had bonded (more or less) to his skin at the place producing the burning sensation. He realized what had happened and soon thereafter cut away the bottom of his pant leg and sought medical treatment. The remaining scar is a good indication of the long-lasting appearance of such an injury.
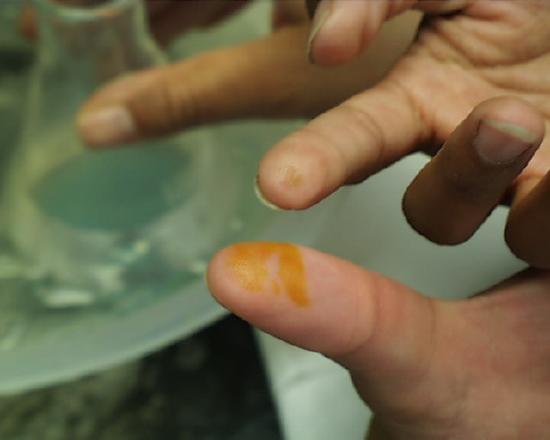
Any acid which contacts the skin must be washed off immediately. Acid which dribbles down the outside of laboratory stock bottles offers a familiar peril to students who use bottles of reagents in common.
One is not immediately conscious of such contact because even in the case of concentrated acids there is some delay before the reaction between acid and skin raises the temperature sufficiently for one to feel the effect. Students are advised to be conscious at all times of potential mishaps caused by their procedures and to be prepared to take immediate and appropriate action. If fingers or other areas having exposed skin feel wet when they ought not to be wet, the surface should be washed immediately in running water. The images at the left and right show the effect of either concentrated sulfuric or nitric acids which stayed on the skin for more than a few seconds (but less than a minute) before being washed off. Fortunately most discolorations caused by such contact disappear within a few days, but constant vigilance in the laboratory is the rule which should be followed at all times.

Continuing with the presentation of helpful hints, the presence of the concentrated sulfuric acid aids in the exclusion of the remaining nitrogen oxides from the hot solution. Those red oxides first boil off, then one sees fumes of sulfur trioxide beginning to escape, as at the left
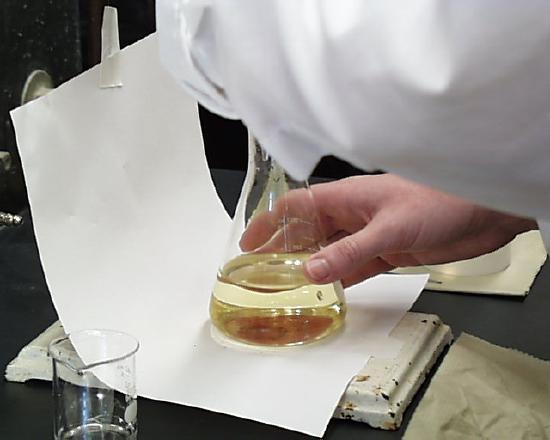
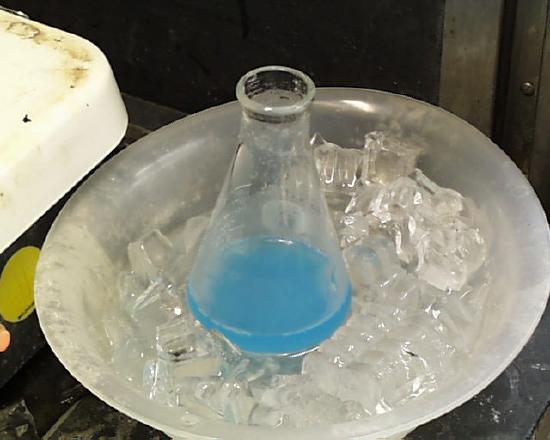
The resulting sample is first cooled in ice, as on the left.
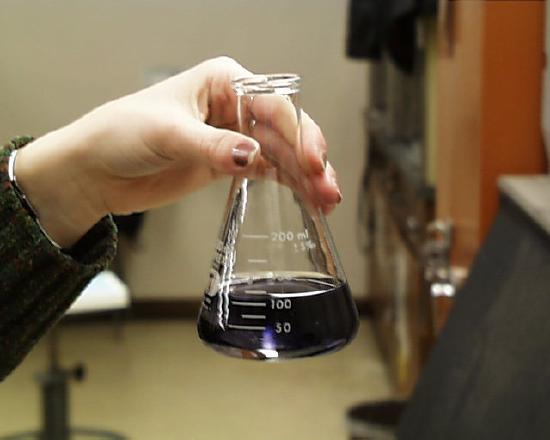
Then concentrated ammonia is added dropwise until the dark blue copper tetraamine complex is formed, as on the right. 3M sulfuric acid is then added until the dark color ALMOST disappears, then concentrated phosphoric acid is added to bring the pH to a point at which the titration can be ideally performed.

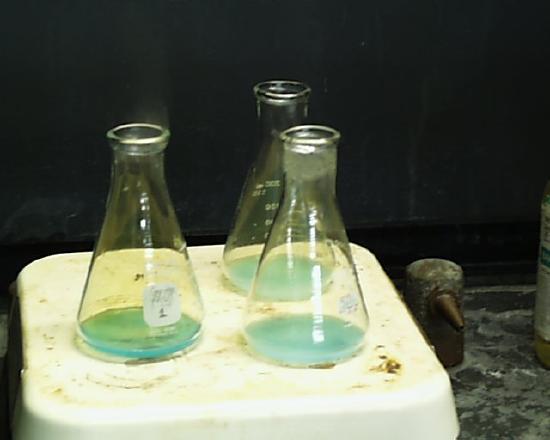
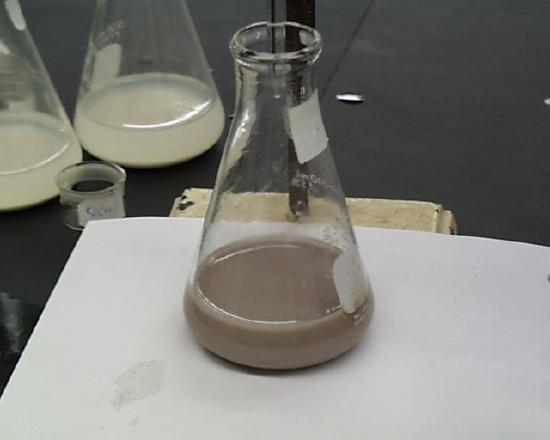
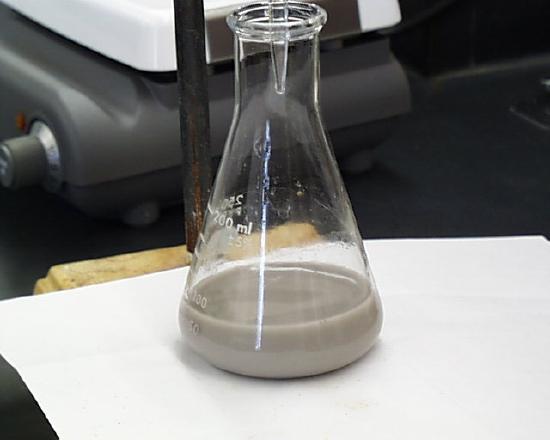
Potassium iodide is added and the solution, when swirled, looks like the image on the left. The actual color you get will vary somewhat and it will depend on the amount of zinc in the brass. High concentrations of zinc give darker colors. The solution is titrated and it slowly loses its dark color. Notice the slightly lighter color at the right. Finally, it will become a light yellow-brown or mustard color, as shown below and left.
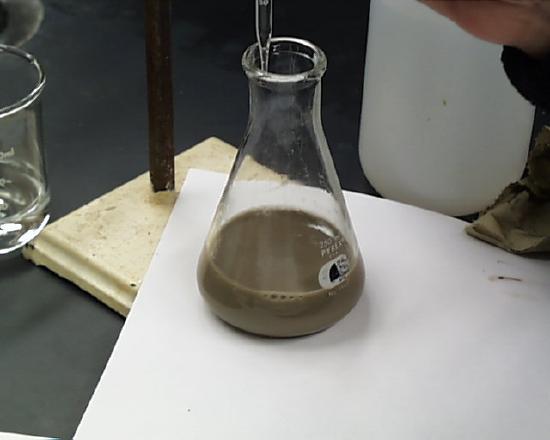
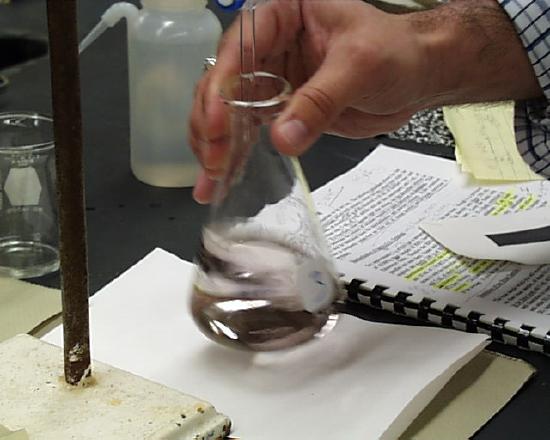
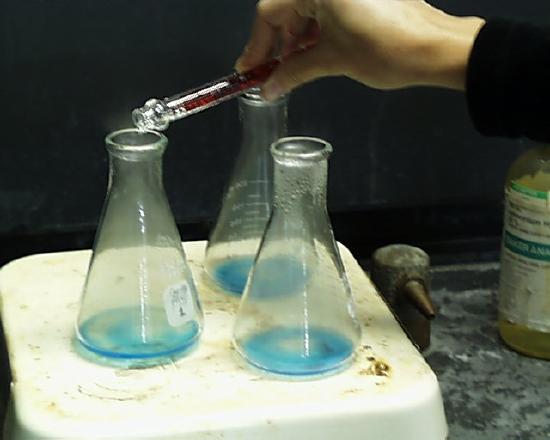
At this point, starch is added using the calibrated pipette at the left and the suspension swirled so that the dark iodine/beta-amylose complex assumes homogeneity throughout the solution, as on the right.
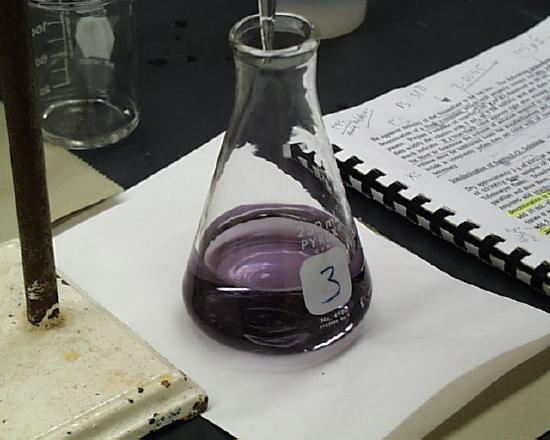
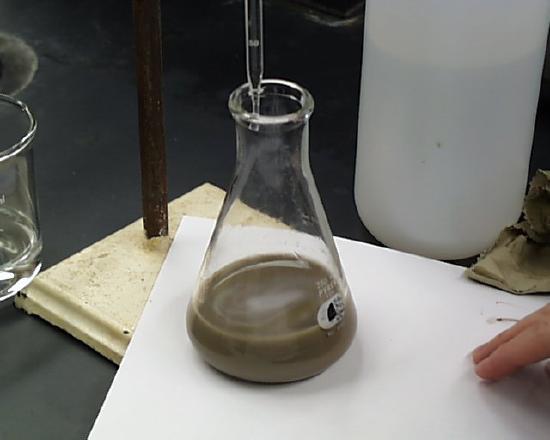
As your titration progresses you will begin to notice that as thiosulfate solution is added dropwise a spot forms in the center of the brass solution which more and more begins to resemble a lavender color. The spot forming on the left certainly doesn't look lavender to me, but to some extent that is the result of the angle and exposure of the photo.
Finally though, the lavender color becomes more pronounced and your whole suspension will more and more appear like that on the left and the right.
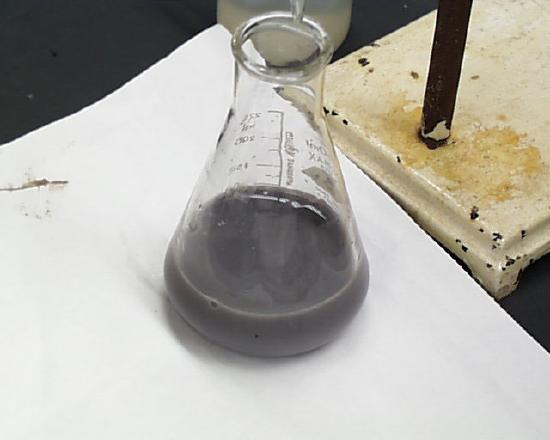
At this point you add the KSCN crystals which, when they dissolve, competitively inhibit the binding of iodine to CuI, freeing it up (and turning your suspension once again a dark grey color, as on the left) for final titration to the cream-colored end point, like the color shown in the Erlenmeyer flasks the suspensions in which have been titrated completely in the upper left corner of the image just above and left.
Contributors and Attributions
- Ulrich de la Camp and Oliver Seely (California State University, Dominguez Hills).