
3.2. Project-Based Learning (PBL) Pedagogy
- Page ID
- 132535

3.2.1 Definition of PBL
Lack of motivation and engagement could be barriers to learning if the importance of the work is not clear to the student. Incorporation of project-based laboratories is a potential solution, as these types of laboratory experiences require students to independently work through the steps necessary to answer a real-world question. According to the Buck Institute for Education (http://www.bie.org/), project-based learning (PBL) is defined as
“a systematic teaching method that engages students in learning essential knowledge and life enhancing skills through an extended, student-influenced inquiry process structured around complex, authentic questions and carefully designed products and tasks.”
Figure 3.1 shows the essential components of the PBL pedagogy. The projects are designed to teach both course content as well as 21st Century Skills such as teamwork, collaboration, professional presentations, and computer skills. These strategies are primarily used in K-12 education, but can easily be adapted to higher education to facilitate a transition from a traditional lecture or laboratory format to a student-centered environment.
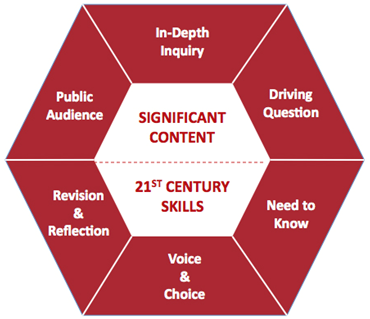
Figure 3.1: Essential Components of Project Based Learning Pedagogy as reported by the Buck Institute. (http://www.bie.org/)
3.2.2 PBL Process
Step 1: Defining Essential Skills in a Project
The first step in developing a project is to determine the set of skills that will be addressed. The goal is to teach both fundamental course content and skills needed in the workplace including collaboration, professional presentations, and computer proficiency. Many of these essential skills can also be found in the learning objectives and a representative list is shown below.
Table 3.1 Analytical Chemistry Content Skills and Professional Skills in Brewery Project
|
Analytical Chemistry Skills |
Professional Skills |
|---|---|
|
|
Step 2: Development of a Driving Question
Another key component is to develop an authentic driving question for the project. An important aspect is to arrange a community partner (i.e. local microbrewery) interested in the final product of the students’ work. Authenticity greatly increases engagement as students are not doing the work because it is simply a class assignment that is good for them. This focuses and deepens students’ learning by showing them how their work is useful in the real world. The answer to the question must be of genuine interest to a community partner, who is typically involved in evaluation of the final product. The hope is that students will take extra pride in their work and perform careful and accurate laboratory work because someone is counting on their answer. The instructor’s role changes from someone who lectures and gives grades to a facilitator or consultant in the project.
Driving Question: “What is the concentration of important flavor and aroma substances in beer from the Upland Brewery?”
Step 3: Introducing the Project (The Entry Event)
The entry event is an introduction to the project and provides students with motivation for their work along with the requirements of the final product. The event can take many forms, such as an invited speaker, field trip, letter, video conference, or Skype conversation. The head brewmaster from the Upland Brewery came to our class and gave some background about his career path, the brewery, and why he wanted the different components of beer analyzed. For example, he discussed the importance of alpha and beta acids in bitter flavor and oxalate concentration in foam properties and “beer stones.” He brought in samples of different types of hops and malts and explained the brewing process. He finished by summarizing the analyses he would like the class to perform and the final product- a scientific poster that will be displayed in the brewery laboratory. Typically a brief letter or handout that summarizes what the community partner would like is given to the student. The instructor writes the letter to ensure that it contains language specifying the course content that should be included and then the community partner signs it. (Refer to “Assignments and Rubrics” section for a copy of the letter used.)
Step 4: Student-Centered Learning (Know and Need to Know List)
The next step is critical in creating a student-centered learning environment. Using the content-specific language in the entry letter as a basis, students will create a “Know and Need-to-Know” list which sets the direction for future instruction in the course. For example, in the Upland Brewing letter, it is indicated that “the most suitable calibration method (external standards, standard addition, or internal standards) should be utilized.” The instructor can anticipate that students will have the question “How do I choose which calibration method is best?” and plan how to address this question in future classes. First, students work in small groups and then a comprehensive list is generated during a class discussion. It is important for the instructor to serve simply as a scribe during this discussion so that students know all their contributions are valid and important.
Once the list has been generated, some simple questions can be answered immediately, whereas other questions can be addressed in more detail later through various methods, including class instruction, group discussions, and readings. The table below includes some items on the original “Know and Need to Know” list. Topics are covered as students need them, and the list is dynamic, with items being removed as they are addressed or added as needed. Students are much more engaged and receptive to learning when an instructor presents information that they know is essential for finishing their work.
This format is the reverse of traditional instruction in which all the essential information is given up front and then students use it to complete a project. In this case, it is the vision of the final product that drives student learning.
Table 3.2. Representative Know and Need to Know List
|
Know |
Need to Know |
|---|---|
|
To answer immediately:
Addressed through future lecture, reading, or small group discussion.
|
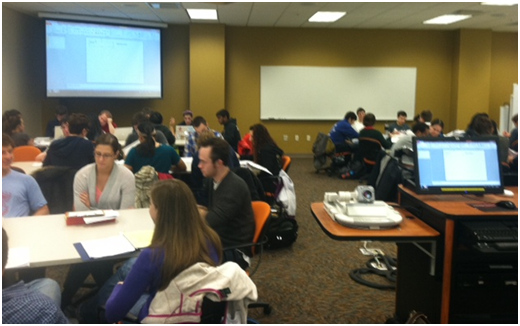
Students working in groups to develop a “Know and Need to Know” list
Step 5: Project Implementation
Two key components of the PBL pedagogy must be utilized during implementation of the project. Voice and choice ensures that students are empowered to make their own decisions and learn from their mistakes. There must also be time for revision and reflection so that they can think deeply about how to improve their laboratory work and final product. A brief description of how these critical components were incorporated is provided.
Voice and choice: Students become much more vested in their work when they have made their own decisions about how they will solve the problem. Student teams independently decide which method they will use for analysis of their assigned compound. Once they have decided a certain technique is the best choice, they work hard to achieve success. As we all know experimental difficulties are frequently encountered and students are required to solve them on their own. Of course they can consult with the instructor or the TA, but ultimately the decision on how to proceed is their own. This led to different investigations such as the effect of incubation time on signal or the effect of signal averaging on precision. Students indicated they greatly enjoyed the freedom to do real science in an end-of-project survey. As an instructor, I observed big improvements in motivation and creative problem solving as a result of students making their own choices.
Revision and Reflection: There must also be time dedicated to reviewing and revising the final product since it will be given to the community partner. The goal is to provide accurate and precise results that are presented in a clear and professional manner. This was accomplished through a peer review session (during lab lecture) of the final poster. In addition, there must be reflection about the success of the project and how it could be improved in the future. The end of project evaluation was used for this purpose and is available in the “Assignments and Rubrics” section.
Step 6: Presentation to Public Audience
Ideally, the community partner should attend a poster session at the end of the semester to hear the students’ presentations and assist in the evaluation of their work. However, this was not possible in my case. Poster sessions were held during regularly scheduled lab times and lasted for about 2.5 hours. Since there were five lab sections in my course, it would have been too much to ask for the brewery staff to come over to campus every afternoon. Instead a smaller group of students volunteered to go over to the brewery one evening to present their results. However, the poster sessions were attended by the instructor and several present and past TA’s from the class. The graduate students and other faculty frequently enjoy the opportunity to discuss science with undergraduates.
